A hydrometer is a device that measures the density of liquids. Car owners can use it in two cases. The first is to check the density of the electrolyte to find out the condition of the battery. The second is to find out the density of antifreeze. The freezing temperature of the coolant depends on this parameter.
Hydrometers for electrolyte and antifreeze can be either universal or separate devices. When servicing a car with your own hands, you must know how to properly use each of them in one case or another.
Application of hydrometers
The density value can indicate some properties of liquids. Hydrometers are used to measure:
- salt content in solution - salter
- sugar concentration in solution - sugar meter
- milk fat content - lactometer
- alcohol content in the drink - alcohol meter
- electrolyte density in the battery - car hydrometer
- densities of unknown liquids
Every car owner wants the battery to last as long as possible. When the resources of maintenance-free batteries are limited by manufacturers, then maintained energy sources with competent and high-quality service can last longer than the car itself. The most important indicator that must be constantly monitored is the density of the electrolyte. To keep it under control, you should know how to use a battery hydrometer - a device that makes it possible to measure the degree of acidity of the liquids inside the battery.
Density is the weight of sulfuric acid mixed with water relative to the complete solution, in other words, the level of acidity of the mixture. According to the laws of hydrostatics, it turns out that when a body is immersed in a liquid medium, its weight is equal to the mass of the displaced volume. This principle underlies the operating principle of this simple device.
, allowing you to accurately determine the acidity of the mixture.
A hydrometer for electrolyte is structurally similar to a glass float, inside of which there is a measurement scale. In many modifications it is placed in a transparent flask (pipette) made of glass or plastic. This simplifies the process of collecting liquid as much as possible. Some types of instruments allow you to measure not only acidity
, but also the temperature of the antifreeze. The entire structure is made up of:
- Hydrometer;
- Pears;
- A glass pipette in which the device itself is placed;
- Tight cork;
- Fence.
Popular models
Car owners who are faced with measuring acidity for the first time often ask the question of what an electrolyte hydrometer can be and how much it costs. Modern manufacturers have offered several varieties, which not only have different costs and appearances
, but also functionality.
The most famous of them:
Budget devices cost no more than 600 rubles, digital devices - from 800 rubles and above. For correct operation, optimal operating conditions must be adhered to. Recommended temperature of measured liquids is 20±2 degrees
.
The best alcohol models
ASP-T
Rating 5 out of 5.
Determines the percentage of alcohol in a liquid as a percentage. Has a thermometer. Used in factories and industries. It is famous for the high accuracy of the results obtained. To ensure accurate results, you must observe the temperature and chemical content of the solution (water and alcohol only). Made of glass.
| Reviews: |
| Users note ease of use, affordability of about 500 rubles. No deficiencies were identified. |
ASP-1, ASP-2, ASP-3
Rating 4.8 out of 5.
Determines the percentage of alcohol content as a percentage, does not have a thermometer. Differs into types according to the scale range.
| Reviews: |
| Inexpensive cost, scale range to choose from. |
Refractometer (optical alcohol meter)
Rating 4.5 out of 5.
Capable of measuring the percentage of alcohol and sugar in different solutions. Widely used in winemaking and brewing at a professional level. A few drops of liquid will be enough to determine the results. The package includes a storage case, a pipette, and napkins.
| Reviews: |
| Buyers note ease of use, good packaging, and temperature compensation. Disadvantages: high cost. If you need high accuracy in measuring alcohol, laboratory models will be the best option. If you need to measure the level of sugar or alcohol in wine or beer drinks, an optical alcohol meter is suitable. |
Density measurement
How to store a batteryHow to store a battery.
Let's say in winter, charged or discharged. Correct instructions Measuring electrolyte with a hydrometer is carried out in the following sequence.
- Unscrew the caps of all cans on the battery.
- Take the hydrometer with your right hand by the rubber bulb.
- Place the tip of the densimeter into a controlled “jar”.
- A sufficient amount of liquid must enter the flask so that the float floats freely in it.
- If it doesn't work the first time, you need to repeat the operation. In this case, you should try to hold the device vertically.
- When you manage to collect a sufficient amount of electrolyte, it is necessary, without making sudden movements, to achieve complete equilibrium of the hydrometer. However, it should not touch the walls of the flask.
- Read the readings on the densimeter scale. The surface of the electrolyte should coincide with one of its marks. There is one subtlety here. Between the float and the walls of the flask, spherical depressions, the so-called menisci, are formed: the readings must be taken along their lower cut.
- The density should be approximately the same in all “cans” and be in the range of 1.26 - 1.28 g/cm3.
It may happen that some battery cells are dry. This very often happens to owners who neglect battery maintenance. The jar, naturally, is not dry in the usual sense of the word, the water has simply boiled out of it, and the electrolyte has dropped below the lead grids. This usually happens with extreme elements. In this case, before measuring the electrolyte with a hydrometer, it is necessary to bring its level to normal. To do this, add distilled water to the jar. The electrolyte level should be approximately 1 cm above the surface of the jars.
Features and accuracy of measurements
When reading readings from a hydrometer, a small feature should be taken into account. A more accurate indicator is shown not at the point of contact between the water and the float, but from the meniscus. This is the name given to the lower part of the curvature of the liquid surface. Indicators should be written off precisely from this lower part, so the information will be more reliable.
Disadvantages of the device:
- Somewhat large amount of liquid that is being measured
- The scale is nonlinear
- A small range of values that are measured is limited by the initial portion of the scale.
- The outer surface of the cylindrical float is subject to contamination
- The capillary characteristics of liquids are different, which adversely affects the test result.
If the readings for the desired temperature by measuring the electrolyte density are not met, it is necessary to make calculations referring to the following data:
| Calculation in case of deviation from the norm | |||||||
| Temperature of the measured substance, °C | -20°С | -10°С | 0°C | 10°C | 20°C | 30°С | 40°C |
| Correction value for electrolyte, g/cm3 | -0,035 | -0,025 | -0,014 | -0,007 | 0,007 | 0,014 | |
How does a hydrometer work?
Start of operation
As you know, density is the ratio of the mass of a substance to the occupied volume
. The density of an unknown can be determined using a hydrometer.
Constant mass hydrometer
This device is a sealed tube filled with a liquid (for example, mercury) or a granular substance. The mass of a substance can be found using a scale. We will put a scale on the tube, which can be used to determine how much of the tube is immersed in liquid. Let's consider a system of forces acting on a hydrometer immersed in a liquid; the force of gravity is balanced by the Archimedes force.
Let's create an equation for the balancing forces:
Mg = ρgV
- where m is the mass of the hydrometer
- g—gravitational acceleration
- V is the volume of the hydrometer immersed in water
- ρ—liquid density
Transforming the equation we get:
ρ = m/V
The mass of the device is known, the volume can be determined from the applied scale.
Having carried out, you can apply a scale to the hydrometer, from which you can immediately determine the density of the liquid, without additional calculations.
Hydrometer design
The device can be made in the form of a pipette with a bulb, with which you can draw the liquid to be measured into the cavity of the device. The anemometer itself is installed in the cavity - a sealed tube with a printed scale.
The shape of the hydrometer and the design requirements are defined in GOST 18481-81 “Glass hydrometers and cylinders. General technical conditions".
Hydrometer scale
There are hydrometers designed to measure the density of several typical liquids, for example, a car hydrometer
allows you to measure density:
- antifreeze
- washer
- electrolyte
There is a separate scale for each type of liquid.
Constant volume hydrometer
In the previous example, the mass of the device was constant, but the volume varied. In a constant-volume hydrometer, the immersed mass is constant, the device must be completely submerged, or a mark is applied to it, to which the hydrometer must be immersed. The mass of the device can change; for example, shot can be added to it.
The diagram of forces acting on a constant-volume hydrometer will be the same as in the previous example. Only in this case, the variable value will be the mass of the device, by which one can judge the density of the liquid.
What is an alcohol meter
Alcohol meters are easy-to-use devices that must be in the arsenal of any person who produces various alcoholic beverages.
Everything is elementary - you immerse a measuring device containing a load of a certain mass into the liquid. The device pushes out part of the liquid, floating above the surface to the division that corresponds to its “degree” - Archimedes’ law.
During the manufacturing process, alcohol meters are calibrated in a water-alcohol mixture and are able to accurately determine the strength of alcohol ONLY if the latter consists exclusively of alcohol and water.
Not from sugar, fruit juices extracted from berries, fermented wort (there are separate wine meters for wines, we will talk about them below), but only and exclusively from alcohol and water. Any additive, even a minor one - for example, essential oils in distilled sambuca or absinthe - has an unpredictable effect on measurements, since the density of the substance increases - the device shows fewer degrees than it actually is.
Electrolyte level and density are two important factors for good battery performance.
How to spell batteries
A car battery works without interruptions and problems if the density of the electrolyte at +25 degrees Celsius is 1.28 g/cm3. This value applies to all new batteries that have not been used in vehicles and are factory certified. If the density in one of the cans is lower, it can be assumed that a short circuit occurred in this part of the battery, the lead plates touched each other, which caused the battery to break down. If the liquid density is below normal throughout the battery, this indicates the following possible problems:
- the battery is deeply discharged, it can no longer perform its functions in full mode;
- the battery went through the sulfitation stage and received certain problems in the chemical reaction;
- the battery has gone through excessive wear when the generator fails and the engine runs on battery power only;
- The battery is simply outdated and needs to be replaced due to too much age and wear;
- the car battery was produced by a manufacturer who does not check the quality of the product;
- This is not a factory battery, but a fake that does not provide much reliability.
Any problems can be solved, and the most popular solution to the problem of too low electrolyte density is to charge the battery. If you can increase the density by charging, then the battery will still be able to serve for some time. After charging, the electrolyte level in the jars decreases slightly, so you may need to top up with distilled water after completing several charging stages. Low electrolyte levels cause contact with lead cells and significantly increase the risk of failure of the entire battery. Therefore, monitor the liquid level in the jars if your battery allows for maintenance.
Antifreeze and electrolyte hydrometer with funnel IZMERIT AET-1
Good day.
What is a hydrometer, everyone knows that it is used to measure the density of a liquid, but I want to talk about the AET-1 hydrometer, which can be used to measure the density of electrolyte and antifreeze.
The first thing that catches your eye when examining a product in the AUTOALL online store, where the selection is quite rich in contrast to auto stores, is that this hydrometer has a price of 160 rubles, and if there is a discount, even less. Even taking into account delivery, it's mere pennies.
A hydrometer is an integral device for a car enthusiast who maintains his car himself, there are still such people, I myself am one, and that’s why I have a hydrometer, but I had to buy another one because... nothing is eternal. I chose this model "AET-1".
Our manufacturer, Russian St. Petersburg “TOP AUTO” is a plus, I’m pleased that they produce it here in Russia. It consists of a glass float, which is calibrated for electrolyte and antifreeze.
The antifreeze measurement scale is highlighted with a red oval.
The scale located inside has a graduation (measuring range of electrolyte density, kg/m3 from 1100 to 1300). At 1270 kg/m3 there is a mark (hint) indicating the normal density of the electrolyte - a fully charged battery. If the readings are less than normal (in all banks), the conclusion is to charge the battery; if during measurement the density is low (in one of the jars), then the bank is “dead”, the conclusion is to replace the battery. The graduation for measuring antifreeze is in Celsius (C) from -5 to -40. Comfortable.
The float is located in the body, or as the manufacturer calls the pipette, this model is made of plastic.
Transparent plastic, no dullness, high-quality casting, I managed to use it, it hasn’t become cloudy yet, I just personally rinse it in distilled water after use, dry it and only then put it in a tube, it’s cast with high quality, I didn’t have to farm it, all the rubber elements are seated tightly and not flow. Also on the pipette (body) there is a graduation in ml. up to 50ml. This is convenient if you need to know the volume of liquid collected.
A bulb and a stopper with a tube for collecting liquid.
Made of rubber (resistant to aggressive liquids) - elastic, soft, the bulb wrinkles well, fits tightly to the body (pipette), no leaks were noticed during operation and collecting liquid does not cause difficulties. The plug and tube are made in one unit and are installed tightly, and no leaks were detected during operation.
The tube itself is made of plastic, the lid of which can serve as a watering can, convenient for pouring liquid into the battery (if necessary). The casting is of high quality - smooth, the body itself is dense, and storage is reliable.
Before use, we assemble the device, it is not difficult.
Don’t forget about safety precautions, you still have to work with acid, these are rubber gloves and goggles (which can also be bought at the AUTOALL store) - the price tag is nothing, the eyes are a delicate organ, and it’s expensive to treat if something goes wrong.
We draw into the pipette (body) using a bulb; the line of contact of the liquid with the rod of the hydrometer (float) corresponds to the density of the electrolyte in kg/m3, and if antifreeze, then in Celsius. Measurements are made at a temperature of 20C +/-2C.
If measurements are carried out at a temperature different from 20C, then the following amendments must be added or subtracted to the measurement results from the table that is given in the device passport (not all devices have a passport or instructions) - this one does.
The density of the infected battery is 1270 kg/m3.
Result: The device is needed in the garage, the price is not expensive, if delivery to another region - it arrives within 2-3 business days, but if something sad happens - it breaks, the price is just a fairy tale. Don't hesitate to buy. The friendly managers of the AUTOALL store will send your order to the moon.
Source: www.avtoall.ru
Proper battery maintenance on all VAZ cars
How should the battery be properly maintained? 1) Initial preparation for battery maintenance: 2) Pouring distilled water into the battery: 3) Measuring the density of the electrolyte in the battery: 4) Charging the battery:
Initial preparation for battery maintenance:
1) Wear gloves on your hands first, as the battery contains acid, which can cause injury if it comes into contact with the skin. 2) Next, with a clean or slightly dirty small rag, clean the entire surface of the battery from dirt, so that when you turn out the plugs, various types of dirt do not get into the battery compartments.
Note! If dirt gets into the battery compartments, the battery may be damaged!
3) Next, check how well the battery sits in its place; if the battery is loose, then take all measures to eliminate this problem.
Note! If the battery does not sit securely in its place, that is, it dangles, then when driving a car, unpleasant vibration occurs, which can lead to damage to the battery!
4) Then check whether the terminals on the battery are seated well; poorly tightened terminals can also lead to electrical failures in the car.
Pouring distilled water into the battery:
1) First, using a five-ruble coin or a thick screwdriver, remove absolutely all the plugs that cover the battery compartments.
2) And then check the level of distilled water in each battery compartment, but if the level in any battery compartment is too low, then add distilled water to this compartment to the required level.
Measuring the electrolyte density in the battery:
1) In order to make such a measurement, use a hydrometer, for this: 1. First press with your hands on the upper rubber tank of the hydrometer, and then insert the tip of the hydrometer into the battery compartment, and then immediately release the rubber tank, and as a result, the electrolyte from battery will go into the flask.
2. After the electrolyte is in the flask, carefully remove the flask from the battery compartment, and use the hydrometer in this flask to check the density of the electrolyte.
Note! The electrolyte density is considered good when the mark on the hydrometer is in the green part!
Accumulator charging:
1) In order to charge the battery, first remove both terminals from the battery terminals. (see Removing terminals from battery terminals)
Note! After removing the terminals, check the terminal blocks for oxidation, if possible, use a brush with metal bristles, or sandpaper, and carefully remove oxidation from the battery terminals!
2) And then connect both clamps from the charger to the battery terminals.
Note! The clamps must be connected strictly plus to plus, and minus to minus!
Important! 1) Never pour electrolyte into the battery compartments; only distilled water should be poured into them! 2) When you remove acid from the battery terminals, it is recommended to moisten the brush or sandpaper in water, and soda should be diluted in this water!
Vaz-Russia.ru
Tips and tricks for working with a hydrometer
To use a battery hydrometer correctly and maintain the reliability of the results, you should consider some important nuances:
- Compliance with safety precautions should not be neglected. Contact with acid on the skin will cause a burn, and if it gets on clothing, it will render it unusable for further use.
- It is important to measure the density of the electrolyte in a battery with a hydrometer correctly - so as to prevent the float from coming into contact with the edges of the container (case). Otherwise, it may “stick” and the readings will be unreliable.
- Be careful when interacting with antifreeze. Some manufacturers use a dangerous component in their composition - ethylene glycol, which (unlike propylene glycol) is very toxic and can cause serious damage to the skin if exposed to it for a long time.
Knowing how to use an electrolyte density meter correctly will allow you to independently check the acidity level in the battery. Which, together with its proper adjustment, will extend the life of your square friend for many years.
Source: akkumulyatoravto.ru
Adding fluid
Many “bright minds” strongly advise that if the battery is severely discharged, add sulfuric acid to it, which is unacceptable. The acid will not immediately mix with the remaining liquid, and for this you need to charge the battery. Meanwhile, the aggressive liquid will intensively corrode the plates, “eating” at the same time the active mass - the powder applied to them.
If you add electrolyte, the consequences will not be so dire, but such liquid will also have a bad effect on the condition of the battery.
If the density is too high, you need to pump out the liquid with a hydrometer and then add distilled water. Next, charge with a low current, not forgetting to periodically monitor the electrolyte density.
If the electrolyte needs to be replaced, you need to prepare a new one. For proper preparation, distilled water is first poured into a glass or acid-resistant plastic container, and then acid is poured in a thin stream.
When adding acid in small portions, you need to frequently check the density of the electrolyte, bringing it to the desired value, depending on the region of residence and the season.
How to determine the strength of alcoholic drinks?
An alcohol meter, despite its ease of use and rather simple design, is actually a rather complex device.
When using it, you need to observe some subtleties that will help you get a reliable result:
you can’t just throw the hydrometer into a container with liquid, you need to slowly dip it into it; before taking final readings, you must wait until the alcohol meter freezes; during measurements, the device should under no circumstances touch the walls or bottom of the vessel; it is important to select an alcohol meter that is designed to determine the strength of a suitable liquid; Do not immerse the alcohol meter in very hot or cold liquid. This will lead to incorrect measurement results. Most often, these devices are used to find out exactly how many degrees of alcohol are contained in drinks such as wine, moonshine or beer
Most often, these devices are used to find out exactly how many degrees of alcohol are contained in drinks such as wine, moonshine or beer.
In each specific case, the procedure will be slightly different from each other.
Moonshine
Instructions for measuring distillate strength:
- The device must be wiped with a dry cloth to remove moisture, dust and any other contaminants.
- You should make sure that the moonshine has a room temperature of no lower than 18 and no higher than 25 degrees.
- Pour an alcoholic drink into a glass.
- Carefully place the alcohol meter into it and wait until it locks in one position.
- Evaluate the result obtained.
Watch a video that describes the step-by-step process of measuring alcohol strength:
For different devices, readings must be taken from the top or bottom, so be sure to read the manufacturer’s instructions before taking measurements.
Table of alcohol content and its dependence on temperature:
You might be interested in reading about the famous Lager beer!
Beer
It’s worth saying right away. That a regular alcohol meter, which is designed to determine the strength of alcohol, moonshine or vodka, is not suitable for beer.
You can measure the strength of this alcoholic drink using an optical hydrometer, which is suitable for any alcoholic liquids that contain alcohol, water and other additives.
Procedure:
- Place the device in a vessel with liquid heated to 15 degrees.
- Wait until all gas bubbles disappear.
- Take the obtained measurements.
This procedure must be performed twice. The first time before the start of fermentation, and the second time after its completion.
From the results obtained in the first measurement, the data obtained in the second study are subtracted and the strength of the beer is obtained.
Each manufacturer must indicate on the label or packaging itself the strength of each unit of its alcohol.
Design
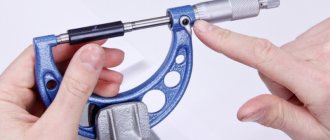
A densimeter is a glass float of a certain volume and mass. When immersed in a liquid, it sinks to a certain depth: the lower the density, the lower. The hydrometer has a scale for reading readings. It is calibrated in accordance with the density of the liquid being measured. This is how the densimeter works in the general case. This method is not suitable for a battery. The float can be lowered into the battery can, but the lead plates will prevent it from sinking. Therefore, the electrolyte density hydrometer is designed somewhat differently. It is located inside a glass flask, on one side of which there is a thin plastic tip, on the other - a rubber “bulb”. With their help, the vessel is filled with electrolyte. Its volume is relatively small, but given that the diameter of the flask is small, this allows the densimeter to be immersed to a depth sufficient to measure density.
DIY alcohol meter
However, if there is no opportunity or desire to buy such a device, then you can make it yourself. And we can say with confidence that homemade alcohol meters are not much inferior to factory instruments.
From a ballpoint pen
To make such a device you will need:
- a ballpoint pen case (the simplest one) no more than 14 centimeters in length;
- a plastic container for nasal drops and small shot (you can also use finely chopped steel wire or finely chopped lead for weight).
The following is done:
- The lower part of the handle is cut off by half a centimeter.
- To make it easier for the pen case to fit into the neck of the drop bottle, you need to hold it in hot water.
- The pen case is carefully screwed into the neck of the bottle.
- The workpiece is lowered into a container with warm water and a weighting agent is loaded through the upper hole until it is immersed in water one and a half to two centimeters from the neck. A mark is made on the case (it will be 0).
- Carefully bury the glue inside to fix the weighting material and screw the cap tightly.
- The alcohol meter is immersed in a container with 40-degree vodka. Mark 40.
- Use a ruler to measure the distance from 0 to 40 and divide by 40. This reading will correspond to one degree.
- Using the data obtained, a scale is formed. The alcohol meter is ready.
Alcohol meter from a fishing float
To make an alcohol meter from a fishing float you need:
- Take a float with a long pole. If necessary, attach a weight to the lower part to lower the float to the desired level.
- Place it in water at room temperature, put a mark that will be equal to zero.
- Pour 40 degrees vodka into a deep container, lower the float there and also put a mark. And, using the principle of an alcohol meter, form a scale from a ballpoint pen.
Test tube alcohol meter
To make such a device you will need:
- test tube;
- weighting agent;
- test tube stopper and wooden rod 12–15 centimeters.
The next steps are:
- It is necessary to load the weighting agent into the test tube so that it is completely immersed in the liquid, but does not sink to the bottom, but floats near the surface.
- Secure the weighting agent with glue.
- Close the test tube with a stopper and insert a wooden rod into the stopper.
- According to the manufacturing principle of the above instruments, apply a scale to the rod.
In conclusion, we can say that homemade alcohol meters are practically in no way inferior to domestically produced factory instruments. Moreover, they work properly, unlike their Chinese counterparts, which are consistently inaccurate in their readings. It’s up to you to decide which device to use.
How to use a wine meter instructions for the buyer
When purchasing a hydrometer, you need to pay attention to the following:
- The scale range (maximum and minimum) must correspond to the specific situation. The standard measurement range for home winemakers is between 0.990 and 1.120. For example, to achieve a wine alcohol content of 12%, fermentation should begin at a specific gravity of 1.090.
- What liquids is the wine meter designed for? How to use the device is indicated in the attached instructions.
- Some hydrometers can only measure specific gravity, but most also measure potential alcohol percentage and sugar content.
- The temperature at which the vinometer is calibrated should be stated, and how to use specific gravity conversion formulas based on sample temperature (the most common calibration temperature is +15°C).
- Does the size of the device correspond to the dimensions of the graduated cylinder?
- Is there a protective case (hydrometers are very fragile).
What to look for when choosing
What kind of hydrometer do you need?
AlcoholAutomotive
Main selection criteria: density range and scale graduation.
Devices can be made of glass or plastic. In some models, the float is located in the body and is located together with the bulb. This makes it possible to take the solution from a closed container, which can be useful if it is not possible to place a float.
Other features worth noting:
- It is better to purchase a glass hydrometer. Glass is considered a durable material, resistant to various compounds and aggressive environments.
- Plastic flasks lose transparency over time. This may affect the accuracy of the result.
- When choosing a device with a pear, pay attention to the quality of the rubber. It must remain elastic at different temperatures.
All hydrometers have a scale. It can be digital or color. Digital is the choice of professionals. It is considered highly accurate. Used where you need to know the accuracy without errors. The color scale is suitable for approximate measurements. It is divided into several colors. Used to evaluate technical fluid.
Hydrometer - type
Hydrometer type AG-ZPP (Fig. 5.1) consists of a measuring cup 5, a float 4 with a rod 3 and a removable weight 6; The glass is attached to the float using pins. There are two scales on the rod: the main scale /, which determines the density of the solution, and the correction scale, which is used when using mineralized water. The device is supplied complete with water bucket 2, into which it is immersed; the lid 7 of the bucket serves as a sampler for the solution.
ANT type hydrometers also have an alcohol thermometer that allows you to measure the temperature of the liquid with an accuracy of 1 C. However, these thermometers are usually inaccurate, and it is not recommended to use them when making accurate density measurements.
The thermometric scale of the BST type hydrometer is manufactured with measurement limits from -25 to 35 C and a scale division of 1 C.
Readings for hydrometers of types AM and AMT are taken to half the value of the smallest scale division.
Designed to eliminate errors when measuring the specific gravity of clay and cement mortars with hydrometers of the AG-2 type, caused by different specific gravity of the water into which the hydrometer is immersed.
Currently, the density of the solution prepared by each cement-mixing machine is determined with an AG-2 type hydrometer, according to which adjustments are made to the operating mode of the machine. It should be noted that this method of density control requires improvement.
Usually it is necessary to determine the density of the prepared solution for each cement mixing machine (mixing unit) using a special hydrometer of the ABR type (AG-2), according to which adjustments are made to the operating mode for preparing the solution. During the initial period of preparing the solution, the density is measured every 30 - 50 s. This allows you to reduce the time it takes to reach a given solution density. The latest mixing plants US6 - 30 are equipped with tachometers, which allows, based on the experience of previous cementations, to quickly obtain a standard solution. In mixing plants with pneumatic supply of dry material to the mixing device, the feed speed is controlled by a valve.
The density of the cement slurry is one of its most important characteristics, on which the hydrostatic pressure in the well, the conditions for displacement of the drilling mud and the pressure in the pumps at the end of cementing depend. Density depends on the water-cement ratio and is the only parameter controlled during the cementing process. Fluctuations in density indicate a change in W/C, which in turn causes an undesirable change in its other properties. In laboratory practice, to determine density, an ABR-2 type hydrometer is used, consisting of a glass, a float, a removable weight and a water vessel, and at the drilling site - in parallel with continuous radioactive density meters. Before measuring the density, the ABR-2 error in water is determined, and if it exists, it is added or subtracted from the density of the cement slurry. Then, after determining the spreadability, the grouting solution is poured into the glass without overlapping the two threads, the float is twisted, the device is washed with water to remove the displaced excess solution (a mandatory condition) and a measurement is taken. In this case, with a weight on the glass, you can measure density up to 1.8 g / cm3, and with a higher density, the weight must be removed.
Selling brands of hydrometers in Russia
The choice of brands of hydrometers on the market in our country is quite large, but in fact they represent almost identical devices. The only differences are in the quality of the material used to make the devices.
Hydrometer IP1
What stands out from the general monotony is the IP1 hydrometer, which is made not with a standard glass hydrometer, but with a set of plastic sticks, opposite which the density value is written on the body. After filling the cavity of the device with electrolyte, the sticks float up and the density value is read on the scale from the one that floated last.
The measurement limit of this device is from 1.19 g/cm3 to 1.31 g/cm.
The scale division value is 0.02 g/cm.
Hydrometer IP1 - “Density indicator - 1” is not an entirely accurate device, but it is quite common among motorists, probably due to its low cost (approximate cost in stores is 100 rubles) and compactness.
How to find out the registration history of a car in the traffic police
Good afternoon, dear reader.
In this article we will talk about the traffic police service, which allows you to obtain information about a car by its VIN number.
The old version of this service, which allows you to check a car for restrictions, has already been reviewed on pddmaster.ru.
Recently, the functionality of the service has been significantly expanded. The updated version allows:
- Find out the registration history of the car in the traffic police.
- Check the car for involvement in an accident.
- Check the car to see if it is wanted.
Let's take a closer look at the updated service.
To check the car you will need the VIN number of the car. It is indicated in the vehicle passport (PTS), in the vehicle registration certificate, as well as on the car body. If you want to check the car for restrictions before purchasing, I recommend copying the VIN number from the body. This is due to the fact that some “cunning” sellers show buyers documents from another (problem-free) car before purchasing.
You can check the car on the next page.
The VIN number only needs to be entered once at the top of the page:
In the future, you just need to click on the buttons corresponding to different checks and enter the verification codes. At the same time, various checks are carried out on independent servers. Those. If one of the checks is not currently working, you can still run the others.
Checking the vehicle registration history with the traffic police
Click on the “request verification” link, enter the verification code and wait for the result.
After some time, information about the number of car owners, as well as when the car was registered, will appear on the screen.
In addition, the system will display the characteristics of the vehicle: make and model, year of manufacture, color, engine size and power. I note that in practice, complete information about the car is not always provided.
The most important thing to pay attention to when checking the registration history of a car with the traffic police is how often the owners of the car have changed recently. If the car has not been in the same hands for a long time, then it is quite possible that it has some hidden defects that do not allow it to be used normally
Checking a car for involvement in an accident
Please note that this check displays information only about those accidents that were registered by traffic police officers. The database does not contain information about road accidents that were reported by drivers independently, as well as about road accidents that were not reported at all
Therefore, if you receive the message “As a result of processing a request to the AIUS traffic police, no records of traffic accidents were found.”, this does not mean that the car was not involved in accidents.
On the other hand, if the database contains a record of participation in an accident, then this is a serious reason to think about buying another car. The fact is that the database is guaranteed to include accidents in which cars were seriously damaged. So think again before buying such a car.
Wanted check
This check allows you to obtain information about the search for the vehicle. Those. if the car was stolen from the owner and he wrote a corresponding statement to the police, then this service will allow the potential buyer to find out about this and refuse the transaction.
Good luck on the roads!
pddmaster.ru
The nuances of using alcohol meters
One of the main criteria that plays an important role in the production of alcohol is its strength. People have long tried to measure strength using a variety of methods and techniques.
If you are the happy owner of a high-quality alcohol meter, you won’t encounter any particular difficulties in using it. Included with the device itself, you will also need a small transparent cylinder - 100 ml will be enough to avoid plopping the hydrometer into a jar of moonshine. A thermometer will also come in handy - those with a remote probe are especially good, but any other will do - to correct for temperature.
We pour a water-alcohol solution or moonshine into the cylinder, lower the alcohol meter into it - you can give it a slight rotation with your fingers to get rid of bubbles.
We wait until the device levels out and see at what point it stops. If the “float” sank, it means it’s biting! That is, the alcohol is too strong, you need to take an alcohol meter designed for a higher degree. If, on the contrary, it floats on the surface, like a dry log, the alcohol contains too few revolutions and we need a less high-degree device.
Some tasted the drinks, trying to determine how many degrees they had using the receptors on their tongue. Others lit a small amount of alcohol, watched the flames, and decided how high quality the alcoholic drink was.
A hydrometer is a device for checking the density of an electrolyte.
From the instructions for the hydrometer:
A hydrometer is a device that is designed to determine the density of a substance. With the increase in demand for serviceable batteries, the demand for this device has increased again among motorists. Maintained batteries are cheaper than unmaintained ones, so demand for hydrometers will continue to be high.
Typically, a hydrometer is used together with a set of measures aimed at diagnosing the car’s power system. Therefore, we recommend that you familiarize yourself with how to properly charge a car battery, how to check the voltage on the battery, and why it is more efficient to charge a car battery with a charger.
Usually, the hydrometer already has a scale of information and readings; the only thing you need to know is the correct density ratio specifically for your region of residence.
Operating principle of a hydrometer
By its principle of operation, a hydrometer resembles a float, on the body of which a graduated scale is applied. Using a balloon, which in its principle of operation resembles an enema, you need to suck electrolyte into the flask through the plug on the car battery. To do this, you need to insert the lower edge through the plug, use the rubber pad on top of the hydrometer to suck in the required dose of electrolyte, and then compare the density using the float.
For measurement accuracy, it is necessary that the hydrometer floats freely inside the flask. The level of contact between the liquid and the hydrometer must correspond to the density of the electrolyte of your battery. Also, using a hydrometer, you can check the density of Antifreeze (the freezing point of Antifreeze liquid at zero temperature).
For accurate measurements, the ambient temperature must be within 20 degrees. If the temperature measurement mode is violated, then the accuracy of determining the density with the electrolyte will not be high. In this case, you will have to take the battery home or to a warm box.
Safety when measuring with a hydrometer
Since the electrolyte is an acid, it would be useful to remind you of precautions. Acid is an aggressive environment that corrodes and spoils clothing, and if it comes into contact with the human body, it can easily cause a chemical burn.
It is also unacceptable to get electrolyte into the eyes. Therefore, when working with a hydrometer, it is necessary to take precautions, such as wearing gloves and special safety glasses.
If electrolyte gets on your skin, you must immediately rinse the affected area with water. Under no circumstances should you use soda to neutralize the electrolyte. This will only increase the severity of the burn. If the pain does not stop, you should immediately consult a doctor!
The best devices for battery electrolyte
Jonnesway AR030001
Rating 4.7 out of 5.
Suitable for determining the state of charge of acid batteries. Color scale for determining results, simple design, light weight 118 g.
| Reviews: |
| They praise the tightness of the assembly, resistance to aggressive environments, and protection against burns. Disadvantages: high cost. |
Heyner PREMIUM 925 010
Rating 4.7 out of 5.
This model will require a small amount of electrolyte to determine results. The hydrometer has a plastic body. This device can take measurements in batteries. It has a float operating principle and accurately determines the results.
| Reviews: |
| Among the advantages, owners note light weight, affordability and a small volume of electrolyte for research. Disadvantages: thin spout, unreliable fixation system. |
AUTOPROFI BATTERY BAT/TST-118
Rating 4.5 out of 5.
Measures density in lead-acid batteries. Has a color scale and is easy to use. The device is equipped with a bulb and a hose. Quickly measures battery charge level.
| Reviews: |
| Users note ease of use, clear scale and affordability. Disadvantages: inaccurate measurement results, narrow scope of use. |