The process of metal etching has been known to people since the 16th century. The most famous masters lived in Italy and Germany. Today, anyone in the world can do knife etching at home. The availability of reagents and many methods allows you to do this without special experience. But it’s definitely worth studying the topic of knife etching.
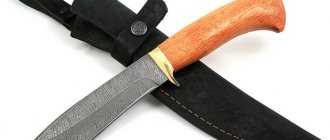
Etching a design on a knife at home.
The essence of the method
The key factor is the effect of acidic environments on the metal. Due to the interaction of the aggressive environment and the product, a chemical process called etching occurs. To apply a pattern to the blade, areas of the surface not intended for etching are covered with a protective layer.
It must be resistant to the etching substance. The depth of metal dissolution depends on the time of exposure to it. Since the 16th century, several effective methods for etching knives have been identified. They will be discussed below.
Damascus pattern development
How does the concentration of chlorine fluid affect the manifestation of the damask pattern? Is it recommended to apply the body thinner, or vice versa, thicker? Is it better to work quickly in a hot solution, or vice versa, slowly in a cold solution?
It probably depends on what’s in the package.
What is mixed is, unfortunately, unknown, Damascus without a name. I see that without exoticism, it’s ordinary. Are there any general recommendations?
The most important recommendation is to etch and grind. But in general, it’s better to buy yourself nitrogen, it’s better to poison Damascus with it.
serge-vv
the most important recommendation is to etch and sand
Alexey, just choose a time and come to me, I will clearly show you everything and tell you on the spot. From Pervomaika to Semenovskaya it’s not that far.
“Come to me, I’ll clearly show you everything and tell you on the spot. From Pervomaika to Semenovskaya it’s not that far.” Well, no, gentlemen! You sniffed around here, it’s not far from you, sit, chat, drink a beer here, or drink something else, and the rest of the comrades who are interested will be left WITHOUT BEER, WITHOUT COGNAC AND WITHOUT INFORMATION. ))) Write everything here! Best regards, RAZZI
Metal etching methods
Acids in the etching technique are used depending on the type of metal. A certain alloy requires its own aggressive substances. The speed and quality of the process depends on this. There are several ways:
- a process using an electrolyte with current passing through it. They call it electrochemical. Its features are: precise drawing, saving time and working fluid solution. No harmful fumes;
- a process that does not require complex equipment and is incredibly simple - chemical . But the use of liquid acidic solutions is characterized by emissions of fumes harmful to human health into the air;
- production method requiring expensive equipment - ion plasma method. Used in dry environments in the field of microelectronics.
The first two methods are widely used for etching knives at home. The components are commercially available and do not require complex manipulations.
Preparing metal for drawing
It is necessary to prepare the blade for drawing and for the etching process itself. If the knife is collapsible, be sure to disassemble it. Freeing the blade will make it easier to work. In a one-piece product, the handle must be insulated.
It doesn’t matter what material it is made of, an acidic environment will harm anyone. Electrical tape as an insulator will work perfectly. The surface of the blade to be treated must be thoroughly wiped with acetone. The intended design will fit well on a degreased surface. We try not to touch the workpiece with our fingers.
Drawing methods
A pattern made from various materials serves as a protective layer; the metal not covered with it will be etched. There is a similarity to a film negative when a photograph is developed. There are plenty of options for protection: electrical tape, stickers, nail polish, vinyl, metal marker and many other polymers.
Nail polish
A popular material among amateurs. But professionals don’t disdain them either. Good resistance to aggressive environments makes it a leader in use. After applying it to the product and letting it dry, it is possible to correct the design with sharp cutting objects. Achieving a clear pattern and smooth lines.
Primer or bitumen varnish
The product is completely covered, then the contours of the design are transferred over the layer with a marker or brush. Having sharpened a thin wire, you need to scratch the sketch down to the metal. The primer is used GF 021 or XB 062. When scratching a sketch, there is a risk of chipping off the dried primer or bitumen varnish. This is a disadvantage of this method.
Glossy paper
It is a good method that is gaining momentum among masters and has many positive aspects. The required sketch is printed in real size on glossy paper using a laser printer. Applying the side with the pattern to the surface of the blade, you need to iron the paper.
After the product has cooled, it is placed in water. Having brought the paper to a soft state, it peels off, and the toner from the printer remains on the product. You just need to treat the surface around the design with nail polish. The method allows you to transfer the smallest details of the image.
The principle of etching using electrolysis
For metal products, two methods are used: acid (liquid) and electrochemical. They are used to remove scale and oxide films. Compliance with the etching rules: holding time and solution concentration are the key to a successful process.
Electrolysis process.
It is important to thoroughly degrease the part. A small greasy stain will render all the work of the master unusable. When working with varnishes, you must be careful; they are highly flammable. This also applies to the process itself. In any form, it is unsafe. It must be treated with caution and care.
Perfect Damascus technology.
Perfect Damascus technology.
1. Introduction.
The purpose of this work is to answer some questions: what steel is a knife made from, which knife is better, Shx-15 or R6M5 and how much, how to quantify the cutting ability, how quickly the cutting edge (RC) shrinks when using knives made of different materials and some other questions.
Arkhangelsky (https://www.arhangelskie.com/stat_1.html) divides knife steels into 5 groups and sets qualitative priorities between them, based on empirical experiences, but without quantitative estimates.
Kuznetsov has quantitative estimates (https://kuznec.com/stal.htm), presented in the form of tables during tests on felt. In his opinion (and the tables confirm this), cutting properties depend mainly on the carbon content: the more it is, the slower the knife shrinks, provided there is sufficient viscosity. From this point of view, the best cutting properties should be possessed by high-carbon cast damask steel, in the structure of which there is a large amount of excess cementite against the background of a ferrite matrix, which ensures sufficient viscosity due to the absence of pearlite and ledeburite structures in this very matrix.
Further.
There are many negative reviews about the performance properties of Damascus. In particular, Kuznetsov believes that, at best, the quality of Damascus with some average carbon content corresponds to the quality of monosteel with the same carbon. Plus, he believes that the number of layers should be about 3000, so as not to depend on which layer, soft or hard, comes out on the RK.
2. Tests. Let's check all this using a specially developed technique. A package of 32 layers of newspaper with a width of 25 mm is assembled, pressed to the table using a clamping bar and a clamp, as shown in photo 1. A freshly sharpened blade (the length of the sharpened blade is selected 70 mm, the adjacent areas of the RK must be dulled with a diamond needle file) should cut these 32 layers under a force of 5 kg. This force is created by a load placed on the butt, as shown in photo 2.
The second cut is a 0.2 mm cut on tin (paint can). The length of this cut is about 60 mm. The third cut is again on a packet of newsprint. Then the cut layers are counted, their number is the cutting capacity at the moment. Then the alternation of cuts on tin and paper is repeated many times (the total length of the cut on tin reached 5 meters), the results are recorded and graphs are plotted: X axis (abscissa) is the total length of the cut on tin. Y-axis (ordinate) – number of cut layers of paper – cutting ability – sharpness of the RK. (if the layer is cut off by more than half, it is considered cut; if less than half, it is considered not cut). The test results are presented in the graph. (see attachment at the very end of the topic, there are two graphs)
Sample 40Х13 – kitchen knife from the set, HRC 60. Sample “Damascus classic” – 50% ШХ-15, 50% low-carbon iron, approximately 5000 layers, photo 3 Sample ШХ-15 is forged from a roller from a bearing. Sample ShKh-15 Damascus 1200 layers - monosteel of this brand is forge welded in 1200 layers. Cast iron sample - synthetic 6% cast iron based on ShKh-15, forged in a pipe into a strip, then the edge is sharpened (very gently and carefully) Sample R6M5 - from a mechanical saw (factory) Sample ideal Damascus - prepared using the technology presented below. All standard grades are tested on a steeloscope, hardness is about 60-65 HRC. When analyzing the graphs, interesting patterns catch your eye. It can be seen that at the beginning of the process of cutting tin, the RK quickly shrinks to a certain value, for each brand of steel, then it stops getting dull, no matter how much tin you cut. So, cutting capacity for different steels (number of cut layers of paper): 40Х13 – 6 layers Classic Damascus (0.7% carbon on average) – 13 layers ШХ15 – 18 layers ШХ15 Damascus 1200 layers – 23 layers Р6М5 – 25-30 layers Perfect damask - more than 32 layers. Regarding the ShKh-15, it should be noted that the RK did not begin to sit immediately (unlike other samples), but after half a meter of cut tin. Let’s also compare separately ShKh-15 and ShKh-15 Damascus 1200 layers. At the initial stages of cutting tin, both edges shrink approximately equally, but then, in the stabilized sections of the curves, it is clear that the ShKh-15 Damascus 1200 layers still remained sharper. Thus, with the same carbon content, Damascus is still more resistant than monosteel. A small digression. Let us mentally imagine the process of destruction of the RC during the cutting process. If the contact surface is too sharp for sheet metal, the contact surface is small, the pressure per unit area of the contact surface is too high for its actual strength, the contact surface wears out to a certain increase in the contact surface area, the pressure decreases, the material of the contact surface begins to withstand the loads from the sheet metal, and then the cutting process occurs without dulling. RK, and this stabilized sharpness is different for different steels, although they have approximately the same hardness. The mechanism of destruction of the RC is most likely some kind of dislocation, and if we are testing Damascus made of monosteel (in our case it is ShKh-15 Damascus 1200 layers), then the boundaries of the layers probably make it difficult for dislocations to pass through them, which increases the durability of Damascus in front of the monosteel. Also, from the graphs it is clear that for samples ShKh-15, R6M5 and “ideal Damascus” the initial size of the paper bag (32 layers) turned out to be small, so they were repeated tests on 128 layers of paper, the results are in Fig. 2. https://foto.mail.ru/mail/bulbul20000/2/16.html
It can be seen that for “Ideal Damascus” the cutting ability is about 50 layers; if we take this result as 100% (for convenience), then the results can be briefly written as follows:
Relative cutting ability of steels of different grades. “Ideal Damascus” 100% 40Х13 12% Classic Damascus (0.7% carbon) 26% ШХ-15 36% ШХ-15 Damascus 1200 layers 46% Cast iron 40% (approximately) Р6М5 60%
Of the standard steels, R6M5 should apparently be recognized as the best for a knife, provided (!) it is properly heat treated: hardening 1200 degrees, tempering 550 degrees 2-3 times. There is no point in hardening it from lower temperatures, it will only spoil the material; when properly hardened P6M5 is tempered at 550 degrees, the dispersion hardening mechanism is triggered, during which dispersed alloyed carbides are released from the matrix, which provide high cutting properties, despite the lower carbon (0.8 %) than that of ShKh-15.
3. Technology Now more details about the “ideal Damascus”. During development and manufacturing, I sought to ensure the following properties. High average carbon content (about 3%) Sufficient number of layers 2000-3000. Minimize pearlite and ledeburite components in the structure.
The “soft” component of Damascus is a piece of carbon-free iron (I found one), it produces almost no spark on sandpaper, and when analyzed with a steeloscope, there is an almost complete absence of alloying elements - chromium, manganese, silicon, etc. “The hard component is synthetic cast iron based on ShKh-15, the charge was weighed at the rate of 8% carbon, a roller from a bearing weighing about 400 grams was filled with graphite in a disposable crucible (clay + sand + loose asbestos against cracks), heated in an inductor (TVCh VChG-100), graphite gradually dissolved on the surface roller, the roller melted as carbon diffused, melted and was kept in liquid form until the graphite completely disappeared. The goal is to have as much carbon in the cast iron as possible; let’s assume its content is 6%. Pouring onto a corner, crushing with a hammer into small granules. Next, the well-known “under-melting method” was used, only modernized, let’s call it the “impregnation method”. In my opinion, the conventional undermelting method (when cast iron is melted, iron is introduced into it in small portions) has a significant drawback - the portions of iron introduced first have time to completely dissolve in the cast iron, and the carbon gradient in the volume of the casting decreases, which, in my opinion, undesirable. It was done as follows: granules of iron and cast iron were mixed with each other in equal parts and poured into a disposable crucible with the addition of boric acid. Then this mixture was heated in an inductor until the cast iron melted, the cast iron spread over the surface of the iron granules (the process is more reminiscent of soldering with cast iron solder), then the heating stopped immediately to minimize the diffusion of carbon into the iron. Forging was carried out on a 40-ton hydraulic press into strips using flat and cut-out dies, the strip was then welded and forged several times to refine the structure. Welding took place at low temperatures, because it is not even welding, but soldering with cast iron. The layers were sprinkled with boric acid and glass powder (you can even do it without boric acid). Forging itself is very specific; material with such carbon is not forged in the usual sense; rather, it is a kind of semi-liquid stamping. Again, to minimize diffusion, it is desirable to use as few passes as possible so that the material is at high temperatures for as little time as possible. Quenching after sanding with oil (I don’t think the quenching temperature matters much), tempering at about 250 degrees. Etching in table salt under current after polishing, polishing after etching, then you can chemically oxidize to give it an appearance (I also oxidized under current, I didn’t bother too much, but I think that by carefully selecting the temperature, current and process time you can get any primer, even black, even red, even blue, even gold. I received gold and black, I’m guessing about the rest).
4. Microstructures. Microsections were made on samples with a reduced number of layers, for better visibility of the structures that make up the sample under a microscope (about 64 layers). The photos are not of very high quality: the digital camera was attached to the lens of a metallographic microscope (MMP-4), what happened was what happened. I will give several microphotographs (for contrast, the samples were hardened).
Photo 4. Cementite.
Photo 5. All structures in one bottle: Ferrite (white), martensite (dark), cementite (smoky at the bottom of the section, layer “edge”) https://foto.mail.ru/mail/bulbul20000/2/5.html
Photo 6. Cementite transforming into hypereutectoid steel (martensite + carbides, darker spots), the layer boundary in a section at an acute angle.
Photo 7 Ferrite. Photo 8. Ferrite at higher magnification.
Photo 9. All structures are visible, the cementite layer is edge-on, the lightest.
All microphotographs are from one microsection! (Photo numbers correspond to the order they appear below the text)
The next three photographs are photos of the same product with different zooms (macro photography, without a microscope).
Photo 10 photo 11 photo 12.
It can be seen that the etching was quite deep. Raised areas are probably cementite, the cutting phase.
Conclusions.
So, let's summarize. 1. Cutting tin is a rather difficult test for the Republic of Kazakhstan. The main result is stabilization of the sharpness of the cutting edge after a certain length of cutting on sheet metal; further cuts occur without blunting of the cutting edge (possible reasons for this effect are discussed above in the text). I didn’t really expect this, I was rather preparing to measure the angle of inclination of the curves. I would be careful when comparing these tests with cutting on felt - after all, if there are abrasive particles in the felt, then the mechanism of wear of the RC will be somewhat different, abrasive, and if you replace the tin with felt and leave the rest as is, be patient and run the test until some end, then, probably, a uniform blunting of the RK will be revealed throughout the entire test, then the assessment of the results will have to be done by the angle of inclination of the curves, and not by the stabilization sharpness of the RK (this is my assumption). During normal use of a knife (cucumbers, tomatoes, sausage), the wear of the RC is still non-abrasive, and the test method for tin is more justified. 2. All other things being equal, Damascus cuts better. Probably, after all, carbide particles located on the Republic of Kazakhstan need some kind of support from nearby, more viscous areas. Let's look again at the test schedule for a cast iron knife - there is not even a smell of stabilization of the rotating agent, the rotating agent dulls evenly. It would seem that solid cementite should stand and stand, but white cast iron, one might say, is an absolutely brittle material, although quite durable - it is very difficult to crush with a hammer (as evidenced by the rather high percentage of relatively “ideal Damascus”, see above). There is no support for carbide particles, so they chip evenly. I’ll try to run a ceramic knife using this method, I wonder what will happen. I think it’s the same as in cast iron: good average resistance of the paint in the absence of stabilization of its sharpness. 3. ShKh – 15 monosteel does not dull immediately, unlike all other samples. I haven’t come up with an acceptable explanation yet; there may be some kind of experimental error. 4. R6M5 has good results, despite the lower carbon content compared to, say, ShKh-15. Apparently, due to the presence of a large number of alloyed carbides of different types, which are much stronger and harder than cementite and due to the mechanism of dispersion hardening, they are better connected to the matrix by atomic bonds, and therefore are better retained by it (the matrix). It felt like it immediately began to slide across the paper, but it cut well and for a long time - very mysterious.
Charts .doc
Solutions used for pickling steel
The process for different alloys requires different etchants. Based on the atomic structure of the metal lattice, a specific solution is selected:
- alkaline solutions etch aluminum and its alloys well;
- nitric, sulfuric, hydrochloric and phosphoric acids are used in the etching of copper and its alloys. To increase the reaction rate, chromium and nitrogen are added;
- For durable titanium, a double etching method is used. Initially processed in alkaline solutions, then in high concentration acidic solutions;
- an aqueous solution of hydrogen peroxide and formic acid is ideal for nickel and tungsten;
- for other solid metal compounds, mixtures of nitric and acetic acids are used;
- A mild sulfuric acid solution works well on cast iron.
A favorite for etching a knife at home is nitric acid. Sometimes salt is added. They are highly active and must be handled with care.
Etching a knife in Coca Cola
The method is unusual in its solution. According to some experts, the following drinking solutions are suitable: Coca Cola, Sprite and Pepsi. The listed drinks contain phosphoric acid. A reasonable question is why not find it in its pure form?
Expected effect of long-term etching in Coca Cola.
If you are engaged in etching blades, the question will not arise. They sell it in canisters of 16 kilograms. Phosphoric acid is an excellent rust inhibitor. Treated metal surfaces are protected from damage for a long time.
The process of etching a knife in Coca-Cola sounds a little incorrect, but bluing a knife in Coca-Cola sounds more accurate. During the process, a layer of iron oxides is formed on the surface of the blade, which gives the product a dark tint and protects it from corrosion.
The acid concentration in Coca-Cola is low. It is easier to buy the drink in small quantities. Controlling the process will be easier than with a strong concentrate. The process of bluing a knife in Coca-Cola looks like this:
- It is necessary to degrease the knife blade well. Otherwise, uneven etching will occur.
- Pour Coca-Cola into a container of a size suitable for immersing the blade.
- The drink should be heated and all carbon dioxide should be thoroughly expelled. Bubbles stuck to the blade will leave an unetched mark.
- Immersion of the blade is recommended every 2-3 hours. When removing it from the solution, the product should be washed with running water, washing off the oxide that forms. The procedure is necessary for uniform coverage.
The whole process takes about a day. If a light gray shade of the blade is enough, 3-4 hours of soaking in the drink will be enough. The reader should be warned that the resulting layer of bluing is not strong enough, as with other methods. But still, there are advantages: the blade is less afraid of water, high humidity, and there are other pleasant little things.
How to develop a Damascus steel pattern at home
On New Year's holidays I received a gift from my father in the form of a semi-finished knife made of Damascus.
All I have to do is do the RK and develop the drawing. What is the optimal acid to use and tell me recipes with other acids. Which of them can be found in urban environments? I can’t tell you about the composition of Damascus. the author of the blade blank no longer remembers what he welded it from. perhaps one of them, according to him ShKh15
Max sit down for chemistry class
How is it that weak nitrogen does not eat iron? Nitrogen is everything, before and after H2, according to a number of electrochemical potentials of metals, but slowly after H2, because it itself is unstable and volatile. Classic reagent for etching 5% nitrogen, you can even use it less - it will take longer. Concentrated - maybe yes, it is iron right away Passivates, although it is all there, only for a corrosion center to appear. Pendos drinks contain mainly citric acid with flavoring, sugar, coloring and caffeine. Well, lemon is a classic bleach and is good because it is not volatile, it is especially poisonous and you can drink it. TS let him buy himself a bottle of nitrogen for flux in stores for DIP. It will loosen the nitrogen for peephole, degreases the wedge and bathes it to the desired condition and rubs it with sandpaper 000 to visualize the pattern of your damask
-Comrade Cadets! This device measures ambient temperature from -500 to +500 degrees Celsius. - Comrade Colonel! Physicists have proven that there is no temperature less than -273 degrees!
-Comrade Cadets! The device is military, Physicists (Chemists) might not even know!
Seryoga. Something is making a noise. Yes, a waterfall is a waterfall. , Asya?
Read attentively. what ya wrote. poisoned diluted.
Open the chemistry textbook for grade 1. Concentrated nitrogen is transported in iron containers.
And then everything is as you wrote. concentrated instantly forms a strong film on the iron and the reaction does not proceed further. poison with nitrogen 5%
Well, lemon. it is especially poisonous and can be drunk
Well, here you are just BURNING.
Source
Instructions for liquid etching of a knife
The chemical method is simpler and does not require batteries. A strong aggressive environment is required. It has already been stated that the method is dangerous due to its gaseous emissions. Opening a window or getting a good hood is a must. Safety equipment:
- latex gloves;
- respirator;
- protective glasses;
- smock.
Avoid contact with mucous membranes of the body. Washing with water will not do. A chemical burn is a terrible thing. We've sorted out the equipment, now it's a matter of materials:
- insulating tape;
- nail polish, marker;
- grinding machine;
- distilled water in a container;
- Plastic container;
- solvent, acetone;
- ferric chloride supply;
- cotton swabs and disks, toothpick;
- sandpaper of various grains.
The knife must be prepared in advance. On a solid product, protect the handle with electrical tape; on a collapsible product, disassemble it and work with the blade separately.
Creating a protective layer
The pattern that needs to be transferred to the product must be outlined with a protective layer. Considering that in the coated area, the reaction will not take place, and the metal will remain light. Initially, make a sketch with a marker and then cover it with nail polish. This is the best option. The varnish can then be adjusted to ensure evenness of the lines and the pattern itself.
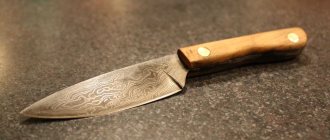
Patterns for etching on a knife.
Don’t be shy about fantasizing; the uniqueness of the work performed also depends on the personal qualities of the master. Use varnishes of various shades; they are clearly visible on the surface of the product. Drawings and sketches for etching on knives are freely available on thematic Internet resources, or use the pattern from the picture above.
Preparation of the solution
We make sure to use personal protective equipment. When working with acid, you need to have a solution of soda on hand; it will come in handy if an aggressive substance gets on your skin. The rule of all chemists is to pour acid into water, never in the reverse order:
- The ratio of ferric chloride and water should be 50/50. This is the best option, but to speed up the reaction, other proportions can be used.
- The plastic container should not be filled entirely; be careful when placing the product there. After pouring a little distilled water, pour in the same amount of ferric chloride.
- Label the container with the words "Acid" and be careful with it. A metal container is not suitable; there is a possibility of it reacting with the solution.
Please note that the diluted liquid will serve more than once; you can actually process a dozen blades in it. Once dilution of the solution is complete, proceed to the next step.
Etching process
To obtain a high-quality result, it is recommended to make movements in the liquid when immersing the blade. The process will look like gently rinsing the product in a solution. Touching the blade is strictly prohibited. Leaving it in it for a long time is also not recommended.
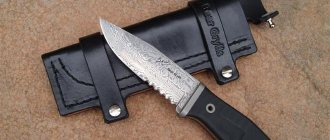
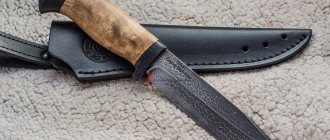
The process of etching a knife.
Etching professionals argue that repeated, short-term immersion of the product in an aggressive environment is necessary. It looks like this:
- you should immerse the blade for 20 seconds;
- take it out into the air for the same time as the immersion;
- quick rinsing under water from a tap;
- hold in air for 20 seconds;
- and then again immerse in the solution for the same period of time.
This achieves constant control of the etching; the circular process must be performed several times. The total time of holding the blade in acid should not exceed 10 minutes. It should not be forgotten that all time intervals depend on the steel and the composition of the solution.
At the end of the process, it is necessary to rinse the product well with running water and remove the protective layer with acetone or solvent. Walk the blade with sandpaper starting from coarse grain 400 grit. and ending with 2000 or 2500. A felt wheel on a sanding machine will help bring it to a shine.
Etching the drawing
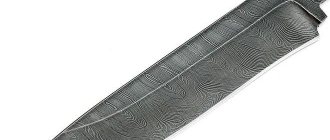
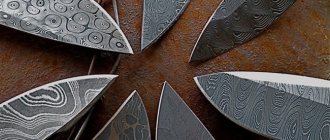
The skillfully polished surface of damask steel is no different from the surface of ordinary steel, and only in the halo of light glare can one hardly discern some semblance of a pattern. This is what they do in Japan, spending hours admiring the family blade, but less refined natures prefer a clear and distinct picture. Therefore, traditionally, damask and damask blades were and are subjected to chemical treatment, revealing the pattern forcibly.
The essence of the process is that fragments with different carbon contents have different resistance to caustic solutions, acquiring different shades and textures in them. Since damask steel consists of a mixture of cementite and soft perlite, after etching it becomes dark and dull. Strictly speaking, this is the background color against which the high-carbon fragments appear as a clear white lace. Damascus reacts differently - the pattern on it is obtained from the fact that the material of the layers and welding planes interact differently with the reagent.
Traditionally, a solution of ferrous sulfate was used as a “developer,” but in modern times it has been replaced by combinations of various acids, many of which were completely unknown before. This castling is due to the fact that the blade must be kept in vitriol for a long time, sometimes even boiled, while acid works instantly, just move. But in the first case, the background color turns out to be dark, almost black, and the long-awaited pattern burns like fire on it, and, as you know, the ancestors had no problems with patience. Alas, “before there were times, but now there are moments.”
The process diagram looks much more primitive, but the specific etching technology was a top secret, protected from the watchful eyes of neighbors and competitors. Simply revealing the pattern is a simple matter; to do this, just moisten the blade with any acid and observe the mystery of birth until the result satisfies you more or less. But giving metal a truly noble appearance is a real art, based on considerable experience, both our own and that of our predecessors. Here, for example, is the method used by the already mentioned Kahraman Eliazarov:
“When the blade is hardened in this way, then it should be cleaned with fine sandpaper (emery... first grind it into powder). For this, you should have in readiness a copper beetroot or a tube, deliberately made 1 and 1/4 arshins long, filled with spring water, into which put 1/2 pound of alum and. put on fire and boil. After this, put the blade in it, and after a quarter of an hour, take it out and clean it in one place with dust, if the stream on it turns out to be good or if desired, then clean it from the dust with the same powder and use it.”
It is not difficult to etch welding damascus, but to treat the surface of genuine damask steel is very, very tricky, although both paths are quite tricky and full of unexpected tricky traps. Especially for those who decide to carry out the experiment with their own hands, I offer several good options (according to V.I. Basov):
1. The easiest way to etch the surface of Damascus is with sulfuric acid, for which you need to prepare a 15-17% solution. It is better to do this with distilled water, since the result directly depends on the quality of the components. The product is pre-ground, polished and degreased with alkali, after which it is filled with “boiled” acid for 2-2.5 minutes. That is: the said solution should be heated in an aluminum container to a boil - and poured. After the expiration date, the blade is removed to white light, washed and neutralized. The surface turns out black and ugly. The pattern appears after processing with the finest sandpaper (“zero”) and light polishing (so as not to smooth out the texture) with felt. After all, the metal should definitely be oiled and wiped dry.