Electrochemical engraving on metal
Step 1. Cut out a rectangular piece from a metal plate, on which the inscription will be etched in the future.
You can get a metal plate 1-2 mm thick at any hardware store; I bought the cheapest steel eye. A piece cut from it:
Step 2. Carefully sand the surfaces of the workpiece, first with coarse sandpaper, then with fine sandpaper. The surface should become shiny, covered with many small scratches. You also need to sand the edges and edges of the plate with sandpaper. After sanding, the metal must be degreased with alcohol, solvent, or simply washed thoroughly with hot water and soap. After this, you should not touch surfaces with oily hands.
Step 3. Using a laser printer, print out the design that will be immortalized on the metal and transfer it to the metal using laser-iron technology, which has been described more than once on the Internet. You need to print it in a mirror image. If you don't have a laser printer at hand, you can just as easily draw a design with nail polish or a permanent marker. The painted area will remain untouched, and the bare metal will undergo electrolysis, i.e. it will simply get poisoned.
Step 4. Now that the workpiece is completely ready for etching, you need to take a non-metallic container, pour water into it and add salt. The speed of etching greatly depends on the concentration of salt; the more salt, the faster the process. If the etching speed is too high, there is a risk of damage to the protective layer of varnish or toner from the printer, and the drawing will not be of high quality. The optimal ratio is a tablespoon of salt per glass of water. The anode must be secured in the container, i.e. the metal workpiece itself and the cathode - a simple piece of metal. The larger its area, the higher the etching rate will be. The etching installation is clearly shown in the picture below:
The plus from the power source (anode) is connected to the workpiece, and the minus (cathode) is connected to the solution. In this case, it is advisable to install several negative contacts on all sides of the workpiece, then the etching will take place evenly on all sides.
A few words about the power source. I use a computer power supply, or rather its 12-volt line. The higher the voltage, the higher the etching speed. You can also use a regular cell phone charger; its output is 5 volts, this voltage will be quite enough. You should not increase the voltage above 12 volts, otherwise the process will be too active, the protective layer of varnish will fall off, and the solution will overheat. Having correctly connected all the wires, turn on the power supply. Bubbles will immediately start coming from the negative contact (cathode), this means that the process is in progress. If bubbles begin to come from the workpiece, then you need to change the polarity of the power supply.
After several minutes of etching, a nasty yellow-green foam forms on the surface of the solution.
After 30-40 minutes, the workpiece can be removed from the solution, having first turned off the power. It will be completely covered with a black coating, this is normal.
Step 5. Now all that remains is to clean the metal from plaque, wipe off the toner or varnish, and, if desired, sand the surface again. Black deposits can be easily removed under running plain water; the varnish or toner is washed off with acetone or nail polish remover. Now it is clearly visible that the letters on the metal have become embossed, and the metal surface itself has become matte after etching.
This is interesting: Tompak - alloy composition and characteristics - composition, characteristics, production, types
Burnishing in citric acid
Comrades, tell me the recipe for bluing in acid. I searched about ten pages in a search engine, found only a topic on the Hansa, but there are no specifics there at all. Knowledgeable people, tell me?
dima3795 08/19/2013 12:42
in citric acid - bad. if you just need to darken the carbon, then it’s better to just use lemon juice. Degrease the blade. Squeeze a little lemon juice onto a clean cotton cloth (bandage) and rub it into the blade. the longer you rub, the darker it gets; when you reach the desired shade, wipe dry, rinse under the tap and cut the lard. The coating is not very resistant, but it protects against rust and can always be renewed. In principle, you can do this with citric acid, but lemon is better.
How to make at home
Engraving the blade or handle of a knife can be done at home. The master must have a sharp eye and steady hands. It will take a long time to acquire these skills. Therefore, it is better for beginners to try the chemical method of etching metal in an aqueous solution.
Required materials and tools
For chemical etching of metal you will need:
- glass bath;
- car battery;
- wires for connection and clamps;
- spoon;
- saline solution;
- tsaponlak.
Application technology
All work must be carried out with rubber gloves. Step by step execution:
- Prepare the electrolyte: pour water into the bath, add salt depending on the volume (2 teaspoons per glass of water).
- Cover the material with varnish and wait until it hardens. Draw the outline of the future image with a sharp needle. Exposing the metal is necessary for contact with the electrolyte.
- Place the electrodes in the saline solution. The downside is a pre-prepared spoon; the upside is a knife blade.
- Apply electricity. After 5 minutes, turn off the current, remove the product, wash off the remaining varnish, rinse under running water and wipe dry.
There are many methods for engraving knives. The above is one of the most common and simplest. It is ideal for inexperienced or novice craftsmen.
Engraving on metal always attracts the eye. This trade has fed artisans since ancient times. And today it has not lost its relevance. Craftsmen can turn everyday objects into real works of high art by decorating them with fancy miniatures. Sometimes you can see entire paintings of considerable size, made by engraving artists. And few people know that absolutely anyone can do this business.
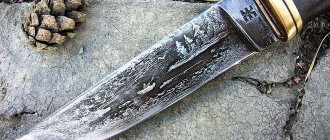
Photo 1. Souvenir engraved hunting knife, an ideal gift that can be given to hunters.
You can decorate small metal objects using engraving yourself at home. This activity will arouse the respect and envy of friends and acquaintances. In Zlatoust, thousands of craftsmen practice this craft at home. Engraved items are expensive. A saber costs approximately 300 thousand rubles, a hunting knife costs up to 100 thousand (photo No. 1). Agree, this is good money. How to make engraving on metal at home with your own hands? For this lesson you need to prepare the simplest equipment that can be found in any house, in any apartment.
Steel blueing
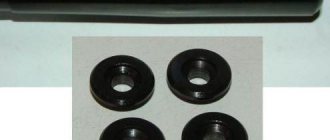
Hot bluing most often helps achieve a blue color. This happens when heated for a longer time. Initially, the surface acquires white, yellow, purple shades, and the result is a beautiful blue color.
Recipe 1
Burnishing steel at home using this method requires the presence of a forge, ideally with automatic blowing. Birch charcoal should be placed in a metal box, leaving room for the metal that needs to be processed.
This structure is placed in a preheated forge. The metal is smeared with vinegar, wiped and placed in a box when the coal begins to smolder. If a bluish color appears, the part must be pulled out, cooled a little and returned to its place. Such manipulations should be done 3-4 times until the correct shade is obtained.
Recipe 2
This method of obtaining blue color is carried out without heat treatment. You will need 3 grams of hexacyanoferrate (“red salt” popularly) and iron sesquichloride. For safety reasons, chemical components must be added to water, but not vice versa.
These substances are highly soluble and are strong oxidizing agents. Add them separately to 0.5 liters of water, stir and mix into one substance. We dip the steel into the resulting solution until it acquires the desired color.
How to etch boards in hydrogen peroxide and citric acid
Although I have always been an adherent of the conservative path, despite all the advantages of the FeCl3 solution, its disadvantages are gradually pushing me to search for alternative etching mixtures. And so I decided to test the method of etching boards in hydrogen peroxide and citric acid.
On the way home, I went to the grocery store and, in addition to the ingredients for a delicious dinner, grabbed 4 10g packets of citric acid. every. Each bag cost me less than 6 rubles.
I went to the pharmacy and bought a bottle of hydrogen peroxide, it cost me 10 rubles.
I don’t have any project at the moment, so I decided to purely test the method, to understand what the big deal is. I found a scrap of foil PCB in my stash and made a few strokes with a permanent marker. This is a kind of imitation of tracks and copper polygons; it will work quite well for experimental work.
The solution is not difficult to prepare, but it is important to maintain the proportions. Therefore, pour 100 ml of peroxide into a plastic tray and pour in 30 g of citric acid. Since I had 10 g bags, I poured out 3 bags
All that remains is to salt the whole thing, add 5 g of table salt, this is about 1 teaspoon without a slide.
I noticed that you can add even more salt than required, this speeds up the process. Mix thoroughly
It is very important that you do not need to add water to the solution, so for preparation we select a container so that the solution covers the board, or we increase the amount of solution, observing the proportions
We put our “printed circuit board” into the resulting solution and observe the process. I would like to note that the solution turned out to be completely transparent.
During the etching process, bubbles begin to appear and the temperature of the solution increases slightly. Gradually, the solution begins to turn greenish - a sure sign that etching is in full swing. In general, the entire etching process took me less than 15 minutes, which made me very happy.
But when I decided to etch another board in the same solution, a little larger in size than this one, everything turned out to be not so positive. The board was etched exactly halfway and the process slowed down very much, slowed down so much that we had to complete the process in ferric chloride.
Apparently the power of the solution is enough for the duration of the chemical reaction between hydrogen peroxide and citric acid. The process can be extended by adding and adding the required components.
Alkaline steel bluing
The simplest way to apply an oxide film to products is alkaline bluing. The operating principle is based on the use of caustic soda and sodium nitrate (used as a fertilizer). Both components have a pronounced alkaline reaction.
To process a part weighing about 900...1000 g you need to have:
- 100 g caustic soda (NaOH);
- 30 g of sodium nitrate (sodium nitrate NaNO₃).
Process:
- Dissolve the components in 100 ml of water. If this amount of working solution is not enough, then increase the amount of liquid, as well as caustic soda and nitrate in proportion.
- The solution is heated to 135...145 ⁰С (salt solutions boil at a temperature higher than pure water boils).
- The part is washed with soap or weak alkali to remove possible greasy stains.
- Place in the working solution for 30…35 minutes and maintain a high temperature. In a hot state, the rate of film formation on the surface of a steel object will be high.
- After completing the procedure, it is necessary to wash off the remaining working solution.
- Wipe the product with vegetable or technical oil.
- Then thoroughly wipe the item with a rag; only a thin layer of oil film will remain, which will further protect the finished product.
As a result, the metal surface will receive a black coating with a bluish tint. It is quite durable and can withstand minor mechanical stress.
Other alkaline treatments are possible in NaOH and KOH solutions. Prepare a solution in which 300...400 g of each component is dissolved. The minimum concentration of alkalis is 700 g per 1 liter of solution.
The processing procedure takes place according to the technology described above. In this case, the result is a film with slightly more blue.
Attention! During alkaline processing, the liquid level should be maintained so that the part is always completely in the solution. Then the entire coating will be uniform.
Bluening methods
There are three ways to blue steel:
- Cold - when the product undergoing bluing does not experience thermal effects.
- Hot - during the bluing process, the product is subjected to some kind of heat treatment.
- Treatment with an oxidizer is the most difficult method for home use, since it requires not only the use of chemicals, but also heating to high temperatures.
Now let's take a closer look at what techniques for bluing a knife can be used at home. Before using any of the methods, it is necessary to degrease the steel with alcohol and wipe dry with flannel.
Etching process for other materials
In addition to metals, other materials are also subjected to etching. The most common etching of glass is for decorative purposes. Etching is carried out in hydrofluoric acid vapor, the only one capable of dissolving glass. At the preparation stages, preliminary acid polishing of the surface of the product is carried out, then the outline of the future image is transferred to it. Protective coatings for glass are made from a mixture of wax, rosin and paraffins. After applying the protective coating, the workpiece is dipped into an etching tank.
The use of hydrofluoric acid creates a beautiful matte structure on the surface. To obtain a smooth, transparent surface, concentrated sulfuric acid is added to the etching mixture. To obtain a relief, deep pattern, the operation is repeated.
In metal etching, extremely chemically active substances are used - strong acids, alkalis and their solutions. If handled incorrectly, they can cause serious injury and damage to property.
Using rubber gloves
Therefore, when working with them, you need to take special precautions and strictly follow the safety rules when carrying out work:
- Work is carried out only in the presence of good ventilation, preferably a fume hood.
- It is mandatory to use personal protective equipment: rubber gloves and an apron, thick work clothing, a respirator, and a protective face shield.
- Do not place jars containing acids and alkalis on high shelves and cabinets.
- When diluting acids, ACID is POURED into WATER, and never water into acid.
- When working with acid, have a soda solution on hand, and when working with alkali, have a weak vinegar solution to wash areas of the skin where drops of the solution accidentally fall.
- When working using the galvanic method, before starting work, carefully inspect all electrical equipment used for the absence of mechanical damage and integrity of the insulation.
- Have a working fire extinguisher on hand.
If the etching solution comes into contact with the skin, immediately wash the affected area with an appropriate neutralizing solution. If acid or alkali splashes onto clothing, it should be removed immediately.
Rinse the affected area with water
If the etching solution gets on the mucous membranes, you should immediately seek medical help. Delay in such cases can cost health or even life.
If you find an error, please select a piece of text and press Ctrl+Enter.
One of the methods of producing a convex or depressed pattern on metal products, which appeared relatively recently, is called etching. The operating principle of this method is based on the use of electrochemical processes in a liquid electrolyte. If you have artistic abilities, even at home you can get a high-quality pattern with a minimum of required materials and equipment.
When doing etching yourself at home, you will need the following consumables and equipment:
- a product intended for decoration - various cutlery, hunting or camping knives, or simple soap dishes on which simple patterns can be made;
- a container of sufficient volume and convenient shape made of non-metallic materials, suitable for placing the entire product being processed or its part to be decorated. It is most convenient to use glass containers for this purpose, which allow visual control of the processing process.
- a sufficient amount of ordinary table salt;
- nail polish of any color;
- nail polish remover intended for cleaning the treated product;
- source of direct electric current of low voltage. In this capacity, a charger can be used to charge car or telephone batteries.
What other ways are there to combat corrosion?
There are various ways to combat corrosion.
Chemical
In this case, solvents on a natural or chemical basis are used, especially with a high concentration of alkali. The substance is applied in a thin layer to the area affected by corrosion. Next, wait for 30 minutes until the reaction passes. At the end, the treated surface is wiped dry.
Thermal
An oxy-acetylene torch will remove rust thermally.
This method requires the use of an oxy-acytene torch. It allows you to burn out the affected areas, but along with the paint.
Mechanical
Various devices are used to help remove plaque: brushes, scrapers, emery, and a grinder. These should be items with abrasive properties.
In more complex cases, when the corrosion layer is too thick, the following are used:
- orbital sander with abrasive wheels;
- sandblasting machine;
- electric drill with attachments;
- Bulgarian.
The latter tools require special skills and mandatory safety precautions.
The listed methods should only be used in well-ventilated areas.
Not all metal surfaces can be cleaned mechanically or thermally. To avoid mistakes and damage to the product, pay attention to the inscriptions or labels. If there are special symbols that prohibit machining, use a different method.
Types of blade surface coating:
In this case, unlike mechanical processing, a layer of one or another material is applied to the surface of the blade. Depending on the type of coating, it can not only give the surface a matte tint, but also provide additional protection against corrosion and make the surface extremely resistant to wear.
The cost of coverage can vary widely. While powder or varnish coatings are relatively inexpensive, titanium aluminum nitride hard coatings will add significant value to the product. It should be noted that not every coating method is suitable for blades.
If the temperature of the material during the coating procedure is higher than the tempering temperature of the blade, then the blade loses its hardness, so care should be taken that the temperature does not rise too high.
Blueing is unlikely to protect the blade from rust or wear, so this coating method is usually used for those grades of steel from which bayonets and inexpensive combat knives are mainly made.
Powder and varnish coatings
Taking into account the different properties of coatings, it is always necessary to choose them depending on the quality of the blade steel and the profile of its tactical use. Powder and varnish coatings are primarily used on steel alloys that are susceptible to corrosion. A layer of such coatings completely protects the steel surface from external influences.
The blade, of course, remains a weak point, since during subsequent sharpening the coating is removed, after which the blade is easily susceptible to corrosion. Powder and varnish coatings are therefore not as wear-resistant as hard-material coatings, but in terms of cost they are inexpensive methods to blue rusting blades while protecting them from corrosion.
The most common types of powder coating are epoxy powder or Teflon-S. Due to the electrostatic charge, powder particles are applied to the surface of the blade, after which they are sintered under high temperature.
Unfortunately, the coating layer is quite thick in most cases, causing the corners and edges of the blade to look awkward. Calgard is a type of varnish that is applied to the surface of the blade using a spray bottle, and the thickness of the layer can be changed as desired. After applying the varnish, the blade is placed in an oven for one hour at a temperature of 160 ° C, where the varnish particles are sintered into a hard layer.
Rusty varnish
Burnishing a knife with rusty varnish has both its advantages and disadvantages. The main advantage of this method is that it is possible to burnish knives that have tin solder on them, since all previous methods are not suitable for these purposes - the tin will either dissolve or will not change its color. In addition, using rusty varnish, you can carry out spot bluing of a knife, that is, blue only certain areas of the blade or handle. The coating layer is quite thick, compared to previous methods, and the steel itself is matte after such bluing.
The disadvantages of blueing a knife in this way are that knives, especially industrial ones, are most often made from various alloys, and rusty varnish is very sensitive to impurities, that is, each metal in the alloy will be painted in its own color and red-brown and brown spots. If you notice such an effect when applying varnish, it is necessary to remove the varnish as quickly as possible, even before oiling the surface, otherwise these stains will not be removed later and the knife will be damaged.
Other significant disadvantages include the fact that this method of bluing a knife is sensitive to various nuances of the process: the quality of degreasing, drying temperature, and bluing time. In addition, the bluing process is quite lengthy and requires your direct presence, since the varnish must be applied several times and each time after drying, steam it, and then rinse under running water. All these procedures must be repeated until you are satisfied with the final result. After that, you need to place the knife in boiling oil for about 5 minutes, and then wait for it to cool completely and only then begin the grinding process with a soft flannel cloth.
Acetic acid
Do-it-yourself metal galvanizing and galvanizing technologies
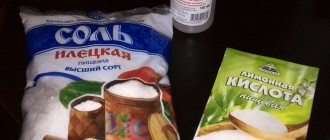
This bluing will protect the metal from corrosion and give it a beautiful black color. The method of bluing steel using citric acid has been used for a long time, but is only suitable for high-carbon metals. In addition, you should know that bluing a knife in citric acid is best done when the knife performs purely decorative functions, since this method of blackening metal is not durable and the entire coating will come off very quickly when sharpened.
In order to blacken a knife using citric acid, you will need:
- citric acid – 1 sachet;
- water heated to 90 - 95 degrees;
- machine oil;
- knife.
This method of bluing, although it protects the metal from rust, is rather of a decorative nature due to the fact that with the slightest impact, the coating comes off and the procedure for bluing the knife will need to be carried out again.
Burnishing a knife in vinegar is practically no different from the two previous methods. The knife must also be placed in vinegar and periodically shaken and turned over to prevent bubbles from settling on the surface of the product.
In addition, if the knife handle is plastic or plastic, then it must be protected from the effects of vinegar, for example, by covering it with paraffin.
Blazing a knife can also be done in heated vinegar, then this method will be more similar not to blackening, but to etching of metal.
You can not completely immerse the knife in vinegar, but wrap the blade in a fleecy cloth well soaked in vinegar, but this method is more labor-intensive, since the cloth must be periodically wetted.
It should also be said that not any metal can be blackened with vinegar, but only hydrocarbon metal. Therefore, during the first hours, carefully monitor how the steel behaves. If you notice that white inclusions appear on the surface, then this method of bluing, unfortunately, is not suitable for this metal; subsequently the inclusions will not disappear, but will only become more contrasting.
Features of home technology
It is quite natural that using industrial methods of knife bluing at home is unprofitable from either an economic or technical point of view. In production, steel blueing is achieved by changing the structure of the upper layers of metal using chemicals. Using this method at home is not advisable; there are much simpler, but quite effective ways to blue a knife at home.
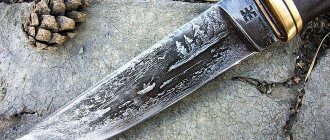
Instructions for liquid etching of a knife
The chemical method is simpler and does not require batteries. A strong aggressive environment is required. It has already been stated that the method is dangerous due to its gaseous emissions. Opening a window or getting a good hood is a must. Safety equipment:
- latex gloves;
- respirator;
- protective glasses;
- smock.
Avoid contact with mucous membranes of the body. Washing with water will not do. A chemical burn is a terrible thing. We've sorted out the equipment, now it's a matter of materials:
- insulating tape;
- nail polish, marker;
- grinding machine;
- distilled water in a container;
- Plastic container;
- solvent, acetone;
- ferric chloride supply;
- cotton swabs and disks, toothpick;
- sandpaper of various grains.
The knife must be prepared in advance. On a solid product, protect the handle with electrical tape; on a collapsible product, disassemble it and work with the blade separately.
Creating a protective layer
The pattern that needs to be transferred to the product must be outlined with a protective layer. Considering that in the coated area, the reaction will not take place, and the metal will remain light. Initially, make a sketch with a marker and then cover it with nail polish. This is the best option. The varnish can then be adjusted to ensure evenness of the lines and the pattern itself.
Patterns for etching on a knife.
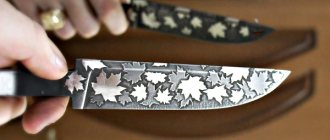
Don’t be shy about fantasizing; the uniqueness of the work performed also depends on the personal qualities of the master. Use varnishes of various shades; they are clearly visible on the surface of the product. Drawings and sketches for etching on knives are freely available on thematic Internet resources, or use the pattern from the picture above.
Preparation of the solution
We make sure to use personal protective equipment. When working with acid, you need to have a solution of soda on hand; it will come in handy if an aggressive substance gets on your skin. The rule of all chemists is to pour acid into water, never in the reverse order:
- The ratio of ferric chloride and water should be 50/50. This is the best option, but to speed up the reaction, other proportions can be used.
- The plastic container should not be filled entirely; be careful when placing the product there. After pouring a little distilled water, pour in the same amount of ferric chloride.
- Label the container with the words "Acid" and be careful with it. A metal container is not suitable; there is a possibility of it reacting with the solution.
Please note that the diluted liquid will serve more than once; you can actually process a dozen blades in it. Once dilution of the solution is complete, proceed to the next step.
Etching process
To obtain a high-quality result, it is recommended to make movements in the liquid when immersing the blade. The process will look like gently rinsing the product in a solution. Touching the blade is strictly prohibited. Leaving it in it for a long time is also not recommended.
The process of etching a knife.
Etching professionals argue that repeated, short-term immersion of the product in an aggressive environment is necessary. It looks like this:
- you should immerse the blade for 20 seconds;
- take it out into the air for the same time as the immersion;
- quick rinsing under water from a tap;
- hold in air for 20 seconds;
- and then again immerse in the solution for the same period of time.
This achieves constant control of the etching; the circular process must be performed several times. The total time of holding the blade in acid should not exceed 10 minutes. It should not be forgotten that all time intervals depend on the steel and the composition of the solution.
At the end of the process, it is necessary to rinse the product well with running water and remove the protective layer with acetone or solvent. Walk the blade with sandpaper starting from coarse grain 400 grit. and ending with 2000 or 2500. A felt wheel on a sanding machine will help bring it to a shine.
Previous Sharpening knivesSharpener for knives Victorinox Next Knives DIY knife lanyard
How does bluing occur?
First of all, you need to properly prepare for the bluing process. Preparation includes purchasing citric acid, washing dishes for metal weed, and boiling water. Most often, bluing occurs in a half-liter jar, since this vessel is most convenient for small blades. If the steel is large, then you should think about using other cookware. If the blade has a size comparable to a liter or two-liter jar, then you should think about using these containers.
Citric acid must be diluted in water in a ratio of 1 to 10. That is, 50 g of citric acid is needed for a half-liter jar. It is important to use only hot water. The optimal water temperature will be liquid in the range of 80-100 degrees. Be very careful when pouring hot water into a glass container, as the jar may burst in the process. After stirring citric acid in water, the bluing process itself begins.
Important! Before bluing, the steel must be additionally cleaned. For these purposes, you can use alcohol - it will remove dirt and grease.
The bluing process consists of several stages:
- Immersion of steel in a previously prepared container with solution. The product must be completely submerged in water. Within 1-2, a reaction will begin, which is accompanied by the formation of a large number of bubbles.
- Every 2-3 minutes it is necessary to rotate the steel product in the solution to release large bubbles of formed gas. This is necessary to evenly distribute the coating and prevent the appearance of various stains on the steel.
- Every 10 minutes you need to take out the steel product and wipe it with a paper or cloth napkin. During the wiping process, black deposits are removed from the surface, so no need to worry if the fabric or napkin has a different shade.
- Depending on the desired effect and the size of the product itself, the bluing process takes 30-60 minutes.
- If the desired result has been achieved, then it is necessary to remove the steel product from the solution, wipe it with a napkin and machine or sunflower oil. This action stops the reaction and also helps preserve the color of the coating and makes it stronger.
It is worth considering that if the water cools too much, the bluing process may be interrupted, so if it is noticeable that the solution has cooled down, then it is worth warming it up slightly in the microwave or on the stove. The working temperature of the solution is 80 degrees, so the container can additionally be wrapped in a towel to retain heat.
There are many examples of bluing with various materials on the Internet, but citric acid is the most affordable solution. Even if small stains appear after bluing, they will disappear after several cleanings of the item. If you plan to sharpen the steel product in the future, you must do this extremely carefully to prevent abrasions from appearing on the blade itself. If you plan to blue the knife, then it is better to sharpen it in advance before the weeding procedure.
How to get a faded color?
To achieve a faded color on the surface of your product, you need to know very well at what temperature it appears and what duration of heating is necessary to fix it on the metal. The main condition: firing with a flame must take place for a strictly defined time. Therefore, if you want to enhance your product with a tan color, choose a small item, because it will be almost impossible to heat a large area of metal evenly on a gas stove or blowtorch.
Once you have achieved the desired color, immediately remove the product from the heat and let it cool. Then rub it with oil to set the color.
Hot bluing method
In addition to the above, methods of bluing a knife using calcination are also used at home. Before burying a knife in this way, it must be coated with linseed oil, animal fat or wax. After which the knife must be well heated over fire. Some people do this in a regular kitchen frying pan, but keep in mind that the dishes will be damaged after this.
Before using this method, you can first immerse the knife in a solution of copper sulfate and ammonia: 100 grams of vitriol and 10 grams of ammonia are diluted in one liter of clean distilled or settled water. Dipping and heating the knife must be done several times until you get the desired color of the metal.
What will happen in the end: how high quality will the drawing be?
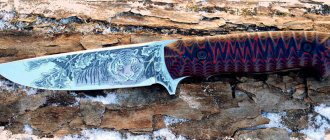
If everything was done correctly, the drawing will be no different from the one on paper. At the same time, the quality of the image does not depend on its complexity and the number of small details. If etching is not important, then you can leave the drawing as it turned out. Of course, such an image is not very resistant to aggressive cleaning agents and high temperatures, but in the absence of such factors it can last up to six months. I decided to leave this image of a tiger as a simple drawing.
The drawing turned out perfect, and I decided to leave it exactly as it was, without resorting to etching
As for etching, for your first experiments with metal it is better to choose something simpler, especially if you have no artistic education or experience in metal engraving. But the article would be incomplete if I didn’t talk about how to etch metal so that the design will never be erased. I will talk about this using the example of another kitchen knife and a simpler image - I did not have a good relationship with art education, unlike technical and exact sciences.
The result of transferring a design to metal
I'm pleased with the result, the quality is excellent. Making a gift knife now won’t be difficult, for example.
Afterword
Etching can be carried out without electricity, using a different chemical solution. Etching can also be carried out without any plasticine barriers, simply by soaking a cotton swab in saline solution and applying an electrode to it, directly affecting the metal. But I don’t like this method, since the contact is direct, which can erase small details of the ink. Watch the video of the process - If you didn't manage to do everything the first time, don't worry. Try again, it's not difficult. I am sharing my personal experience in this seemingly simple matter. Because As an amateur radio enthusiast, I often make printed circuit boards using the LUT (Laser Ironing Technology) technique. Recently I was asked a question by a fellow biker: is it possible to pickle steel to make different fuses and how exactly to do it. On a whim, I was convinced that a solution of ferric chloride in water eats up not only the copper on the PCB, but also almost any iron. What I was able to verify when it spilled on my balcony galvanized sheet and the very next day I observed decent holes there... In short, I thought, purkua wouldn’t even work... So we need: Ferric chloride 200g (70 rubles) Water 0.5 liters ( from the tap) LASER printer black and white. A sheet of paper with text and a minimum number of pictures from the magazine “Popular Mechanics” or “Iron”. For some reason, the printer chews paper from “Liza” and other magazines... Iron. A computer with Word or any graphic editor who likes it. I did it in Word, where it’s easiest to stretch the drawing as you like. Sample drawing - taken from tattoo sites. Technology. Choose a drawing and stretch it as you like. We take a knife or piece of iron and clean it with sandpaper. We print the drawing onto the area with the text of the prepared sheet. Place it on the knife and iron it with a hot iron until it sticks and the toner slightly bleeds through the paper. If necessary, do the same on the second side of the knife. We put the knife under water (in a basin or ladle) for 5-10 minutes. We begin to rub our finger across the paper. The paper rolls off and the toner remains on the metal. If the toner has peeled off, then we sand it again and make new drawings and iron it harder and longer. After this, we protect the rest of the surface of the knife where there will be no etching, either by painting it with paint, NC varnish, or bitumen varnish. In my immense laziness, I completely wrapped it in tape... So it’s like this
IMPORTANT. If you want the etching to be of high quality, you will have to go over the drawing from above or with a marker and paint
Those. “strengthen” it with something, because the toner sticks with small holes and there will be marks. The same applies to minor flaws when translating a drawing. We put the object with the pattern into a solution of 200 g of ferric chloride in 500 ml of water. (Do not dissolve everything at once, but in parts - it heats up). Periodically we take it out and pass it under running water with a paint brush. After a couple of hours we get noticeable etching of 0.3-0.5 mm. Then we sand everything down and polish or not polish... Depending on laziness
A sample of the result below. As I said, it turned out to be undergrasses, but it gave the ornament, so to speak... an old-fashioned look...
Of course, it turned out so-so, but for the first time it’s not bad PS/ Any etching and inscriptions make the knife less durable and it usually breaks along the etching line. Good luck to everyone. 73!
Coca Cola
Another way to blacken a knife at home is using Coca-Cola. By the way, this drink is very versatile and is most often used not for its intended purpose, but for all kinds of experiments, including with metals. So, to blue a knife in Coca-Cola you will need:
- glass or metal container made of stainless metal;
- Coca Cola;
- knife.
The bluing process is similar to the previous one, but does not require heating. To bluing using this method, you need to place the knife in the drink for a day or two, periodically turning it over and releasing the bubbles. After this time, you need to replace the drink with a new one and re-place the knife there. This procedure must be performed until the knife acquires a beautiful black color, usually within a week, changing the drink every two days. Make sure that the Coca-Cola completely covers the knife by 5 centimeters and do not forget to turn it over periodically, since bubbles accumulating on the surface of the knife will interfere with the blackening process.
After this, you need to rinse the knife well in clean water, possibly with some soap, and lubricate it with machine or gun oil. Without lubrication, rust appears on the metal very quickly; it becomes visible already during the drying process.
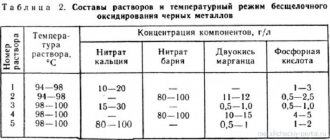
This method of bluing is best suited for narrow, flat surfaces; for example, bluing a bayonet in this way will allow you to achieve a more even coating than on any complex surface with many bulges and bends. In addition to Coca-Cola, you can also use Pepsi-Cola. Blackening occurs due to phosphoric acid, which is part of these drinks.
This method of bluing a knife is quite durable. According to reviews, even if small scratches appear during use, the coating does not come off. In addition, the product turns out absolutely smooth, as if it had not been subjected to any influence. The only disadvantage of such bluing is that it takes quite a long time and requires constant contact with the product (it is necessary to turn the knife up to 4-6 times a day), since otherwise the bubbles will result in piebald inclusions on the surface of the knife.
