In the process of drilling recesses, a situation often arises in which it is not easy to obtain perfectly straight corners. How to drill a perpendicular hole of a certain depth? To do this, you should take the advice of experienced craftsmen. They offer several options for getting out of this situation.
Tools for drilling holes.
There is practically no carpentry work that does not involve the use of a drill and fasteners. During the drilling process, it is worth knowing about the important principles of this activity:
- you only need to drill a hole at a given point;
- the hole has a set size;
- at the time of drilling, the tool should be positioned at a right angle.
Drilling techniques.
If all of the above requirements are clearly met, we can speak of success in the work:
- use of special drills;
- clear fastening of the material will help to secure the work and make it significantly easier;
- uniform pressure on the drill.
So, for these purposes, you can use a square-shaped wooden block, firmly press a drill with a drill bit to its base and perform the desired action.
Another method also involves using a homemade device, only it looks like the letter “T” with an internal angle of 90 degrees.
Drilling methods: partial holes in products in pairs (a); using an attachment plate (b); c - holes in the corner; g - in planes located at an angle; d - on a cylindrical surface; e - in hollow parts.
The drill is placed at one of these points and placed on the mark, after which drilling is performed. Taking into account the length of the drilling device, the depth of the groove is determined.
To get an accurate hole at a right angle, you can use a guide. Its strictly fixed position will allow you to avoid mistakes and deviations from the given angle. Certain varieties of such tools help to make grooves not only vertically, but also while maintaining other angles.
The nozzle has a depth-limiting device, adjustable with a stopper and a spring. The purchase of such a tool will protect against damage to workpieces and furniture.
Angle drilling accessories
Many different accessories can be used to drill holes at the required angle. These include a variety of tools that set the required inclination of the drill to the surface:
- consoles;
- overlays;
- conductors;
- templates;
- other special devices, both homemade and factory-made.
With the use of such devices, the process of creating “complex” holes is significantly easier and faster. Also, a special tool can be used for drilling in hard-to-reach places.
Some of the devices for drilling holes at an angle include guide attachments that have a tilt adjustment function. When attaching a guide frame (or two, as in most models of modern consoles), you can make holes at different angles. The most popular among professionals and home craftsmen are devices for drilling at 45°, since this is the angle most often used to connect elements in furniture production when creating complex metal parts and structures.
Most DIYers use homemade drill stands by modifying the clamp so that it can rotate. Thus, the standard device turns into a device for drilling holes in any plane, into a design with an adjustable angle of inclination.
Mechanism for moving the drill in the vertical direction
A homemade drilling machine must be equipped with a mechanism that will ensure the movement of the drill in the vertical direction. The structural elements of such a unit are:
- a handle with which the carriage with a drill attached to it is brought to the surface of the workpiece;
- a spring necessary to return the carriage with the drill to its original position.
Spring mechanism for moving the drill
You can make such a mechanism using two design schemes:
- the spring is connected directly to the handle of the machine;
- the springs are located at the bottom of the carriage - in special grooves.
According to the first option, the design is carried out according to the following scheme:
- two metal plates are fixed on the machine stand using screws, between which an axis is installed, where the installation handle will be placed;
- on the other side of the rack, plates and an axis are also installed, on which one end of the spring is fixed, and its second end is connected to the handle;
- the pin with which the handle is connected to the installation carriage is placed in a longitudinal groove made in it.
The basis was an old stand from a Crocus photo enlarger made in Poland
If the springs are located at the bottom of the return mechanism, then the handle of the device is also fixed using two plates and an axis that ensures its movement. With this design, the springs are located in the lower part of the guide grooves, which are modified using metal corners that limit their movement.
The principle of operation of a drilling machine, in which the springs are located at the bottom of the carriage, is quite simple: moving down during the drilling process, the carriage with the drill attached to it presses on the springs, compressing them; after the mechanical impact on the springs stops, they unclench, lifting the carriage and drill to their original position.
Hole depth and width
Usually a confirmat size of 6.4*50 is used. Because the thread diameter is 6.4 mm, and the diameter of the confirmation body is 4.4 mm, then for high-quality fastening of parts, the hole diameter must be in the range of 4.5-5 mm and a depth of at least 50 mm.
If the thickness of the hole is greater than the specified one, the confirmat will not hold the parts well; if it is less, its thickness can tear the chipboard.
For drilling, use a confirmat drill with a diameter of 4.5 mm, which is equipped with an additional head for drilling an enlarged hole for the neck of the confirmat, which also makes a countersink for its head.
Of course, you can use a regular drill with a diameter of 5 mm, but for high-quality fastening in the hole you will additionally need to make space for the neck of the confirmat and its head.
In order to perfectly fasten two parts, it is necessary to mark the places of their fastenings as accurately as possible.
On the part that will be applied to the end (the one on which there will be a through hole), you need to make two measurements - along the length (usually 5-10 cm) and from the edge - exactly 8 mm (this is if the thickness of the plate is 16 mm).
On a part that lies perpendicular, mark the drilling point at the end. Here you need to maintain the same distance in length (5-10 cm from the beginning), and in width - strictly in the center (8 mm from the edge).
Markings must be done as accurately as possible, especially along the length, because If the markings are incorrect, your parts may have extra gaps or protrusions when joined.
It is better to make a through hole in the first part, attach it to the second - and immediately use a drill to mark the drilling location at the end of the second part. And then, separately, calmly drill the hole.
We make a hole at a distance of 8 mm from the edge.
The drill should ALWAYS be held strictly perpendicular to the surface.
Before making a through hole, place a piece of unnecessary chipboard under the part. This will prevent chips from appearing on the reverse side.
When the through hole is made, the part can be drilled on the fly to drill holes for the neck and head of the confirmat.
The main rule is that when drilling at the end, the drill must be strictly perpendicular to the end of the part. If you don't hold the drill straight, the drill bit may go sideways and come out, ruining the part.
When drilling, you need to pull the drill out several times so that chips do not clog in the hole.
This option is considered the most accurate and, moreover, the fastest. But in order to make a hole in two parts at the same time, you will need to fix them before drilling. To do this, you may need special clamps, clamps and other devices.
Hole Drilling Tools
In order not to mark 8 mm from the edge each time both into the layer and at the end, you can use a special device, which, by the way, is easy to make yourself.
It is a kind of wooden template with a metal sleeve for a drill inside.
It looks like this, see photo:
And this is a more professional thing:
Watch a short video on how to accurately drill holes in chipboard for confirmations and assemble furniture parts:
Features of self-production
When designing a conductor for confirmation, it is necessary to correctly calculate what functions it will have to perform in the future. It should be done for the most commonly used fasteners in the house. If such a device is required by furniture makers for constant work, then it is better to buy a factory model, which is distinguished by great precision. In addition, manufacturers often include additional fasteners, stops and templates in the kit.
The price of such a device for professional use ranges from 400 to 1100 rubles. It depends on the immediate capabilities of a particular unit, the number of holes made, their length, etc. Many people are interested in how to make a furniture jig with their own hands. Drawings with dimensions are a must for novice craftsmen, as they allow you to make a high-quality design on the first try. Similar diagrams can be found on the Internet.
Basically, the conductor has the following elements:
- The basis of the product. It is directly applied to the plane of the furniture, on which the holes will be drilled.
- Guide bushings. A drill goes through them.
- Surface clamping parts. As a rule, they are located at the end of the conductor.
Next you need to take care of the correct direction of the sleeve. It can be made from stainless pipe. The length of the sleeve should be at least twice as long as the hole in which it will be located on the angle. The bushing should fit tightly in the hole. The simplest and most common option is a shaft-type landing. A corresponding hole is drilled in the corner to fit the already known diameter of the bushing, and then the fit is made. It is recommended to use a low interference fit.
There are cases when the jig needs to be made for drilling deep holes. Then the bushing is made with a collar. The number of possible holes, their length and the distance between them is selected to suit the specific needs of each master.
Several options can be used to attach the device:
- Spring support. The conductor will adhere to the material being processed using spring force. For these purposes, you can use any flat spring with the required force.
- Fastening to wood using self-tapping screws. Using this method, the jig is pressed and held on the working surface due to friction. This fastening method allows you to use the resulting marks for subsequent centering of the part. When working with chipboard, you need to use this method with great care.
- Clamps with rubber gaskets. This method is dangerous due to possible displacement of the bushing axis. This happens because the weight of the jig increases and the bushings become bent. Therefore, you must first attach the jig to the surface, mark the future hole, and then start drilling.
How to drill concrete evenly with a drill
First you need to know for sure that the right nozzle has been selected. Drilling must always be done at low speeds. Typically, the tool is in use for 10 or 12 minutes. During this time, it is guaranteed that it will not overheat and accidentally break. If the tool drill accidentally remains in the thickness of the wall, you must carefully remove it. You cannot use force. Perhaps the drill will break and its fragments will remain in the thickness of the wall. If necessary, the drill can be easily detached from the attachment.
The drill must be held strictly perpendicular to the surface. If this is not observed, there is a risk of damaging the drill and sometimes leaving a dent
It is also important to ensure that drilling dust does not get into your eyes. To do this, purchase safety glasses.
You can also use gloves to prevent your hands from slipping during the process. Only a person with sufficiently strong hands can drill a surface efficiently. Because the process requires significant effort.
General tips for drilling wood
Wood is a relatively soft material that can be easily processed. Of course, there are hard varieties, and there are also exotic ones, which in their properties are not inferior to every metal, but still in Russia most often you have to work with fairly soft varieties. On the one hand, working with soft wood is easy, but on the other hand, you need to follow some rules.
- Before starting work, it is worth applying markings, especially if several holes are needed. The center of the hole is marked with a regular pencil, after which many make a recess there with an awl or a nail. This is necessary so that the drill does not move to the side at the very beginning of work. If the drill has a centering sharp tip, then you can do without it.
- If you have to work with a separate piece of wood, then it must be securely fastened. The ideal option is to use a vice; if you don’t have one, you can simply press it firmly against the wall. Working without fixing it would not be the best idea, since the hole may turn out to be of poor quality, and the wooden part itself may begin to rotate.
- If you need to make a through hole, then you need to place a piece of wood under the wooden part, which will prevent damage to the surface on which the drilling takes place. Surprisingly, many people forget about this. By the way, this will also prevent the fibers from breaking on the bottom of the workpiece (where the exit hole will be).
- For each type of drill (as well as diameter) there are recommendations for the maximum permissible speed. You definitely shouldn’t exceed them, and it’s even better to drill with a small margin, at slower speeds. What are the consequences of high revs? It's simple: chips and cracks. And if you need to make a large hole, then it would be correct to first use a drill of a smaller diameter, and then a larger one.
- Always select drills that are suitable for your task, especially when large diameter holes are needed. And when using very large diameter crowns, they often use an additional blank with an already drilled through hole, which will not allow the drill to go to the side (it is placed on top and the existing and future holes are combined, like a stencil).
- When drilling blind holes, the most important problem is depth. There are types of drills that have limiters in their design, but if they are not there, you can get by with marks that are attached to the drill. You don’t need to buy anything: rubber rings, adhesive tape or electrical tape will do.
- Do not allow the accumulation of chips and especially sawdust, this reduces work productivity and is fraught with jamming of the drill. This is true even when using screw drills, which, in theory, should remove chips, but this does not always happen.
Follow these simple recommendations and you won’t have any difficulties drilling wood. This process requires only accuracy, slowness and the right approach.
Nozzles: saving effort and money
If we make a rating of power tools for which manufacturers produce additional attachments and accessories, the electric drill is the leader. The drilling tool turns into a multifunctional machine for repair work. She saws, cuts, mills, grinds and does much more. In terms of performance, it will not fully replace every tool, but it solves short-term tasks for a home craftsman.
To operate, the shank of the attachment is clamped in the drill chuck, like a simple drill, and the drilling mode is set.
Sanding and polishing
For grinding, use an attachment for wheels with Velcro, where abrasive wheels of different grain sizes are attached. Metal and wood are polished with cups or discs. In hard-to-reach places, use a fan nozzle.
A file attachment is a pin that is attached at one end to a chuck. On the other it has a solder in the form of a cone, bullet or ball. They are called rollers. The holes are bored and polished using a nozzle. For rough grinding and deburring, rasp attachments are used.
The drill becomes an electric sharpener with special attachments. The sharpening angle is adjustable, you can sharpen anything: drills, chisels, disc blades.
Polishing attachments: soft felt, special for cars, polishing leather ends and others. To work with rotation in any direction, select a speed of 1000 revolutions.
Scissor attachment for drill “Cricket”
With this attachment, the drill becomes a nibbler for thin sheet metal, corrugated sheets and plastic. The shank is attached to the drill chuck. It has two cutting heads that are set at the desired degree. At a rotation speed of 3000 rpm it produces a burr-free cut. You can sharply change the direction of the cut to make shaped parts.
Attachments that make it easier
Corner. Works in hard-to-reach places as a drill and a screwdriver.
Drywall cutters. Used when installing sockets and distribution boxes.
Flexible shaft. One side is attached to the drill chuck, and the drill chuck is on the other end. Drills where a drill cannot cope without such an attachment.
Original nozzles
Sometimes it is necessary to drill holes in a very hard-to-reach place, where a standard product does not fit due to its dimensions, then use original nozzles for drilling at different angles. The angle drive is ideal for use with any model of electric or cordless tool because it has its own chuck where the drill bits are clamped, and the torque is transmitted through the gearbox and shank, which is fixed in the main drill.
This device can be used not only for drilling, but also for tightening fasteners (screws, self-tapping screws and screws), cleaning and polishing hard-to-reach places - we clamp the required bit or attachment and carry out the intended scope of work.
There are very unusual devices that are used for electric drills - pumps. They cannot work for a long time - with their help you can quickly pump out viscous paint residues from a barrel or groundwater that has leaked into the cellar. Their productivity is not very high, but you have nowhere to rush. The body of the nozzles is made of durable plastic, the service life is short, but the price is low.
The simplest guide attachment for a drill with your own hands
The nut is removed from the drilling tool. Next, measure its diameter on a plastic bottle and mark it with a felt-tip pen. As a result of these actions, a complete circle should be obtained.
The resulting template, which will need to be cut out later, is marked on the bottle cap so that the width is sufficient.
Next, the bottle or can is trimmed. The template that was previously applied to the bottle and its cap needs to be cut out. Then take the lid and install it into the jar from the front side, achieving maximum fit.
After the glue has dried, a drill is inserted into the nozzle and then used like a plastic nut, fixing it on the tool and starting drilling the hole.
Required Parts
Any drill stand, regardless of its dimensions and taking into account the purpose of such devices, has basic structural elements, each of which performs its own functions and must meet certain requirements.
- The bed is one of the main components of the described equipment, which is its base (stand) and ensures the stability of the entire structure. In addition, a vice is located on the bed for fixing the workpieces being processed. The weight and dimensions of this element depend on the power of the tool used and the list of tasks performed.
- A guide post, which is positioned strictly vertically in relation to the base. Even with a slight deviation, the workpiece being processed can be damaged and the drill or cutter can be broken. Depending on the design features of a particular model, this part can be made of different materials.
- Movement mechanism. There are no strict requirements for the design of this node; templates are not applied. Its main task is to ensure smooth movement, secured with brackets or clamps of the drilling tool along the tripod. There are many variations of such mechanisms.
- Holder for equipment (drill, hammer drill, screwdriver). Clamps, blocks and other mounting elements are used as effective fastening.
Drill Guide Features
The drill stand has several important characteristics:
- Vertical stroke (how far the tool can be moved vertically).
- The diameter of the fixing flange (determines what size tool can be clamped).
- Material.
- Size and weight of the device.
Drilling stands can be mobile or stationary. The stationary guides are very reminiscent of a small drill press, they look like a tripod for a drill. Mobile guides are attachments for drilling tools. Their main advantage is their very high mobility.
An important property of the rack is the method of fastening. The most reliable option is a magnetic mount. There is also a simpler option - this is a vacuum mount.
Mobile devices fit comfortably in your hands and absorb vibration when drilling. Most people choose mobile guides. All thanks to their excellent characteristics. They are very reliable, compact and have a low price.
Device for drilling at right angles
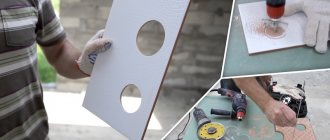
Greetings to all DIY enthusiasts, today we will look at how to make a drill guide that will allow you to drill holes at right angles. The homemade product is made of plywood, and the author made the guides from steel tubes so that the weight of the nozzle would not be too large. Thanks to this device, you can also confidently drill holes of large diameters using crowns. If the project interests you, I suggest you study it in more detail!
List of materials:
— steel rods; - plywood; — threaded rods and nuts; - wood glue; - self-tapping screws; - epoxy adhesive; - two springs.
Homemade manufacturing process:
Step one. Cutting the parts
First of all, let's cut all the necessary parts. If you look at the device, you can see 3 parts that are identical in shape, they have the shape of a horseshoe. We cut out these three parts so that they are the same, they can be glued with double-sided tape and sanded all together.
After this, we immediately mark the locations for the holes and drill them at right angles on a drilling machine. These holes will be needed so that the tubes that serve as guides can be installed. Finally, don’t forget to cut out the base; you can glue one of the “horseshoes” made earlier to it with wood glue.
Practical recommendations from experts
Drilling diagram for a concrete wall.
In order for the drill to stand exclusively vertically when drilling openings, use a square. It is placed strictly at a right angle, in parallel with the drill.
Regular carpentry work involves purchasing a special stand that will hold the power tool perpendicular. The stand allows you to control the depth of the grooves.
To firmly fix the wooden block, you should use a vice or a workbench. Holding the material in your hand is not at all safe: at the moment of processing, the dry base can crack and split, injuring the master.
To ensure a smooth entry groove, it is recommended that any remaining board be placed under the base of the groove so that it can be discarded later. The product can be drilled. This technique works well for flat surfaces.
Angle drills and other miter drilling tools
An angle drill is a type of electric tool designed for drilling holes in hard-to-reach places. There are 2 types of angle drills – compact and volumetric. Compact is intended for assembling furniture and other interior items. It has a small size and relatively low power. Volumetric – a screwdriver with a powerful motor and high torque. Mainly used in construction and repair work.
Main characteristics
The angle drill has the following characteristics that the buyer should pay attention to when choosing:
- weight;
- number of revolutions;
- power;
- availability of battery power.
The weight of an average screwdriver model should be 1.2-1.7 kg. Please note that the heavy weight of the device affects not only ease of use, but also other important characteristics.
The presence of a battery is an additional advantage, which will allow you to avoid fiddling with wires. After all, an angle cordless drill, first of all, should be convenient for working in hard-to-reach places. Typically, cordless screwdrivers are slightly more expensive than their corded counterparts.
MILWAUKEE angle drill with battery
The number of revolutions directly depends on the power of the screwdriver. Some models have an additional speed control function. Using a special lever, you can set the required number of revolutions within the limits allowed by the device. This function allows you to adjust the tool to the characteristics of the material being manipulated.
If you are not planning to purchase such a screwdriver, an angle attachment for a drill is an excellent solution that will allow you to work with a regular tool in hard-to-reach places. Angle adapters vary in color and size, so choosing the right option for yourself is not difficult.
Angle attachment for drill
Pneumatic devices
A pneumatic screwdriver is a special type of electric device that can significantly reduce the amount of time and effort spent on drilling holes of different diameters. There are both straight and angled pneumatic tools. If you own a straight pneumatic model, you can purchase an adapter for an angular drill, which allows you to work in confined spaces.
The main positive qualities of pneumatic tools include:
- smaller size;
- increased power;
- no sparking;
- easy repair;
- long service life.
Angle pneumatic drill Jonnesway JAD-6249
The absence of sparking allows the use of pneumatic devices in places with an increased likelihood of fires and explosions. With frequent use, such devices wear out much less than usual, which is a big plus for those who plan long-term repair work.
Despite all the positive qualities, such a device has one significant drawback in the form of a large initial investment for the purchase of all the necessary equipment. But, thanks to the high productivity and efficiency of such a device, all costs quickly pay for themselves.
To help the carpenter
The milling attachment turns an ordinary drill into a small home machine that is used for furniture repair. By turning on low speed and holding the device in a special mount, you can make a sample in the right place or machine a side groove.
Great precision in surface treatment is not expected, but this is not necessary, for example, when installing piano hinges - nothing is visible under them anyway.
Features of the position of the jig for drilling in different areas of workpieces
The technology of drilling holes in a pipe using a jig.
- For rounded parts, a recess without corners is used, located on the bottom of the device.
- At corner points and on cylinders it is worth using the V-shaped element included in the kit.
- To fix the middle end line of the part, you need to install 2 nails in the corresponding grooves at the corner points of this device. The jig is rotated so that the fasteners connect to the edge of the element. The central part of the sleeve, intended for drilling a hole, is placed in the middle of the end part of the part.
A core is taken to mark the center point of the groove.
- Place the named element in the middle of the hole and fix the stencil on it.
- Place the bushing on this post with the flared part up, its diameter corresponds to 4 mm, and insert it into the template. Such a part must be centered and pressed against the material using a clamp.
- Remove the core along with the bushing from the template, which should not move.
- The guide sleeve is placed in a stencil of a certain cross-section.
- Using a drill, a hole of a certain depth is made.
Read also: Tennis racket stringing machine
Stops
This type of device is the most widely represented and has many interpretations.
- Drilling limiter. On the auxiliary handle for an electric drill there is a metal rod with metric divisions - this is a limiter that rests against a wall or workpiece and prevents the drill from penetrating to a greater depth.
- Parallel exposure. This device is more advanced - it can control the depth of the future hole and the correct location of the tool, and is used for perpendicular drilling during construction. There are models where dust is simultaneously removed using a connected vacuum cleaner. The attachment can be made in conjunction with an additional handle, which is installed on impact drills intended for long-term use in construction.
Which tool and attachment to choose, practical advice
Having understood how to drill concrete, proceed to choosing a tool. The following parameters are key:
- Power.
- Speed regulator (at different stages of drilling one hole, the speed should be different).
- An auxiliary handle on the body (to obtain a straight hole, the drill should not enter the concrete at an acute angle).
- Impact mode (if it is not available, large particles will have to be broken manually with a punch).
- Adjustment of drill installation depth.
In addition, there are:
- Toothed bits of different configurations, made of high-strength alloys for impact drilling.
- KS crowns, the edges of which are covered with diamond chips. They can be used to drill into all hard materials.
- Diamond core bits for hammerless drilling of various diameters and sizes.
For different types of holes, different drills and crowns are chosen. Pobedite bits are cheaper than diamond bits and can be used in impact tools. Diamond drills need to be cooled every 10-15 minutes. Water cannot be used for this.
Areas of use and design features
As mentioned above, in order to drill a quality piece of wood, it is very important to choose the right drill bit. When making this choice, it is necessary to take into account both the characteristics of the material being processed (in particular, its hardness) and the type of hole that needs to be made. That is why it is very important for home craftsmen and specialists whose work involves processing wooden blanks to understand both the types and functionality of wood drills.
Twist (screw) drills
A twist or screw drill can be produced with two types of working tips: conical and with special scoring tips. If we compare both types according to the degree of their effectiveness, then it is almost at the same level. However, they differ in the load taken by the tool during wood processing. Thus, in the design of the working head of a drill with a scoring tool, there is a jumper, which causes significant loads to be transmitted to the entire body of the tool. Drills with a conical working head do not have this drawback, which, in addition, are much better centered on the surface of the workpiece. The conical head immediately enters the material, and the drill does not move to the side. Meanwhile, spiral drills with scoring tools, due to their design features, allow you to create holes in wood with higher precision.
Design of a twist drill for wood
Drilling wood using a spiral tool allows you to get precise and neat holes with straight edges and a smooth surface on the inner walls. Tools of this type can be used for drilling wood of any species and almost any hardness, as well as materials made on its basis (chipboard, MDF, plywood, etc.). If the drill is driven into the material being processed at a low speed, there will be no need to frequently remove the tool from the hole being created to remove accumulated chips.
Features of the position of the jig for drilling in different areas of workpieces
The technology of drilling holes in a pipe using a jig.
- For rounded parts, a recess without corners is used, located on the bottom of the device.
- At corner points and on cylinders it is worth using the V-shaped element included in the kit.
- To fix the middle end line of the part, you need to install 2 nails in the corresponding grooves at the corner points of this device. The jig is rotated so that the fasteners connect to the edge of the element. The central part of the sleeve, intended for drilling a hole, is placed in the middle of the end part of the part.
A core is taken to mark the center point of the groove.
- Place the named element in the middle of the hole and fix the stencil on it.
- Place the bushing on this post with the flared part up, its diameter corresponds to 4 mm, and insert it into the template. Such a part must be centered and pressed against the material using a clamp.
- Remove the core along with the bushing from the template, which should not move.
- The guide sleeve is placed in a stencil of a certain cross-section.
- Using a drill, a hole of a certain depth is made.
Making a homemade device
Devices for drilling wood: a – use of a stop for drilling holes in round workpieces; b – use of a stop for drilling holes in a vertical plane; c – template for drilling the end and plane of the workpiece: 1 – workpiece; 2 – template; 3 – holes in the template; 4 – clamp with which the template is attached.
In practice, drilling a groove at a right angle can be very difficult. Often, many craftsmen use special devices for this. However, these options are often designed for specific types of drilling equipment. Some are suitable for hand drills with slots for additional handles, while others are suitable for cordless ones.
There are also universal options, but they are expensive. People who make furniture cannot do without this device. For a person who makes something on rare occasions, the cost will be quite high.
You can make such an assistant yourself, from the remains of chipboard. The initial blank of such a device looks like bars stuffed on the base of this material.
Here you will later need to drill holes to help the drill find the correct point and angle. A small part of the material is installed end-to-end on the main panel.
Before assembling the device, it is worth making a mark for 3 holes with different sections.
Options for using a guide for drilling.
Take 3 screws, the diameters of which correspond to 5 mm, 6.3 mm and 7 mm. According to these dimensions, grooves are drilled at 3.5 mm, 4 mm and 4.5 mm.
Next, the device is assembled. Holes are drilled for the first holding component, which is immediately secured. Afterwards, a groove is made for another holder. At the time of drilling, a chipboard block is placed between these two parts to create more accurate results for the second element. The device, made independently, must be strong and should not move in all directions.
Such a device will allow you to make grooves only as a drilling device to create a right angle at the end of the panel. To center the drill and drill a hole on a flat base, an additional device is made from this material. To do this, 3 holes with a diameter of 3.5 mm, 4 mm and 4.5 mm are drilled in a chipboard block. Next, marks are fixed on the prepared panels, the drill must pass through the object, and a groove is outlined.
As soon as the markings are made correctly, you need to lower the device onto the panel and place the drill, maintaining a right angle. Now you can drill.
The grooves in the end part are made in the same way. The drill passes through the assistant, the hole is marked, the structure is firmly connected to the side of the manufactured object, after which the drill can be used.
Work rules: tips
When working with tools, you must follow the safety rules and general recommendations:
- 1) Protect your respiratory system when performing work, dust is harmful.
- 2) If you work outside, then you need to install 2.5 meter fences.
- 3) When working at a height of more than 1.5 meters, use a strong scaffold or sawhorse foundation.
- 4) When working with the tool, the speed must be turned on smoothly, and in no case should it be turned off when it is in the wall housing.
- 5) When drilling through plaster, you need to carefully study the communication plan so as not to damage anything.
- 6) It is strictly forbidden to drill into the decorative coating.
- 7) Select the correct drill bit for each surface.
- Wet the drill bit with water to prevent overheating.
How to fasten timber
In order to work with timber easily and without problems, the optimal solution would be to buy a twist drill. Its design is such that it fits into the wood with the effect of a self-tapping screw, without the need to put pressure on the drill. The price of such a drill is higher than a feather drill, but the quality of the hole is worth the cost. The edges are not torn, there is no axial deviation, the diameter is strictly the same throughout the entire depth. The length of the drill must exceed the thickness of the timber by at least one and a half times. This will make it possible to drill 1 beam through, and the second halfway. You must follow a simple rule: the holes for the dowels should be 2-3 cm larger than the dowels themselves. Thanks to this, when the wood dries out, there will be a headroom and the beam will not hang.
The drill for drilling holes for dowels must be powerful enough. Experience shows that when using a 25 mm twist drill, holes in pine beams can be easily handled by a drill with a power of 800 W. True, we mean a low-speed drill. The fact is that power is proportional to the number of revolutions and torque, which means that the more one, the less the other. When drilling large holes, torque is much more important than speed. Therefore, a low-speed drill is more suitable for such work. In this regard, when choosing a drill, you should pay attention to its reduction gearbox. It is advisable to use a tool that has several speeds. At first speed the torque will be maximum.
How to drill a hole? There are several technologies. You can do them when trying on timber, after all plumb lines, levels, and dimensions have been checked. After this, the beam is removed. Batting, jute or other similar material is laid. The spaces above the holes are cleared in advance. The beam is laid in place and dowels are inserted into it. They can be knocked out, but the impact force should be small. Otherwise, the dowel will either break or it will not match the diameter of the hole made. A dowel driven too tightly will prevent the timber from shrinking when it dries.
Some use a different sequence. The timber is laid directly on the batting, leveled, and then drilled. This allows you not to remove it from the wall again. But this method also has its drawbacks. The quality of batting, linen and jute sold in stores varies. They often contain long fibers that, once under the drill, begin to collect the batting and wrap it around the drill. This entails a number of problems. The drill gets hot and loses its technological properties, so turning it out even using reverse is not so easy. The drill for drilling timber for dowels is overloaded and may fail. Not to mention the fact that in this case you will still have to remove the timber in order to restore the batting layer.
Technologies are different, often they have to be changed due to the characteristics of the materials used. But it is necessary to follow 2 rules in any case: the diameter of the dowel and the holes for it must correspond to each other, and the drill must be low-speed and powerful.
What to do if, when drilling a hole in concrete, the drill gets completely stuck in the wall
Basically, the drill jams as a result of getting between a piece of crushed stone and reinforcement, especially when drilling deep. If, when starting the tool, only a characteristic buzz is heard and nothing else, then this is a clear sign of a stuck tool.
When starting work, it is important not only to know how to make a hole in the wall, but also how to remove a stuck nozzle
If the drill is equipped with a reverse function, you can try turning it on. The reverse rotation will release the drill. This method is suitable if the jam was noticed immediately, and the situation did not have time to worsen.
Otherwise, the first thing to do in such a situation is to stop the process and turn off the tool. It is useless to immediately try to remove the attachment by hand or with a drill, as the drill may break off. In this case, it will be more difficult to remove it.
The stuck bit is removed from the drill, and another drill of a smaller diameter is inserted into the tool. Carefully, without touching the nozzle, clear the space around the jammed part from the concrete. When enough space is available, the drill can be removed from the wall with your hands or long-nose pliers.
There are more unusual ways to get a stuck drill out. When a significant part of it sticks out from the wall, you can put a gas wrench on it and try to unscrew it in the opposite direction. If you cannot turn the key by hand, you can try to do it with a hammer.
Another way: drill out the fragment with a larger diameter nozzle. The hole that has already been made expands to a piece of the stuck drill. Then there are two options: use a thin drill to expand the space around the fragment or try to immediately remove the fragment with long-nose pliers.
If the place for the hole in which the nozzle is stuck is rigidly fixed by the floor plan and it is impossible to move it a few centimeters, then the nozzle or fragment must be removed, and a wooden plug (dowel) must be inserted in place of the expanded hole. Otherwise, it’s easier to leave the fragment in the wall and cut down the piece sticking out (if any). The hole formed during the removal process is sealed with a solution.
Making a machine tripod
The machine will consist of the following parts:
- Bottom part;
- metal vertical guides;
- upper part with cartridge.
Bottom part
It is a board or thick plywood in which we drill two holes for the guides. These holes should be slightly larger in diameter than the guides so that in the future they can be set exactly at 90 degrees.
Metal vertical guides
They are two rods of the same size. They are attached to the bottom of the product using cold welding or epoxy resin.
In order to set them straight at an angle of 90 degrees, you can use a regular wooden block, in which the cuts on both sides should also be straight.
After the glue has completely dried, we make the upper part.
Upper part with chuck
It is made from a bar as follows. We accurately measure three holes on the block, two at the edges, they will be through and one in the center. In the central hole, the depth on both sides will be equal to the width of the bearings, which will be glued with the same glue to the axis of the chuck and the central hole of the upper part of the machine.
We install bushings in the side holes that will move freely along the metal guides, but there should be no play. The bushings must be selected exactly according to the diameter of the guides.
We also glue these bushings so that they are tightly secured and do not fly out.
We take the cartridge and glue the guide to its axis.
We put the guide on the cartridge axis and remove excess glue. The guide should also fit tightly onto the chuck axis. We get the following.
We install a bearing of a pre-selected size on the cartridge tube.
We coat it with glue and install it in the central hole of the upper part of the machine.
On the other side we do the same thing, install the second bearing.
As you can see, the tube is clamped in the cartridge. Instead, you can clamp a drill. It is needed in order to subsequently install the cartridge at an angle of 90 degrees relative to the bottom of the product.
After installing the cartridge and the glue has dried, remove the upper part of the product from the guides and place springs and washers on the metal rods.
Springs can be purchased at any hardware store. Then we put on the top.
You can install plugs on the vertical rods. We cut a hole in the bottom of the product for ease of drilling.
It turns out like this.
Checking the product for accuracy and quality of work
Installs a drill, drills a hole
insert a metal rod or drill of a suitable diameter into it.
We measure with a corner to make a right angle after drilling.
Our expectations and efforts were justified. The machine works accurately. Can be used when performing work.
Result of work
If you liked my article, give it a thumbs up. I hope you find it useful.
Good luck.
Safety precautions
If handled incorrectly, the tool can cause serious injury to a worker, so it is important to know the basic safety rules:
- Before each use, the instrument must be inspected for defects.
- If you are going to make a hole in the wall, you need to make sure that there are no communications in the selected location.
- It is highly not recommended to use a drill in a room with a high level of humidity.
- Do not use a tool that has been exposed to water.
- While working, you should not put too much pressure on the drill, and before pulling out the drill, you need to release the pressure.
- To replace the drill, you should turn on the drill and wait until it stops completely.
- If the drill body gets hot and the motor starts to hum, you need to postpone work and let the tool cool.
Following safety precautions reduces the risk of injury
Racks
To accurately drill the necessary holes in various materials, special stands or guide attachments are used, which can be purchased in stores - they ensure vertical movement of the drill clamped in a special basket. Their compactness, smooth operation and accurate metric scale make them attractive for equipping a small workshop, where a home craftsman can accurately drill any holes, even in round objects.
A small vice with a clamped workpiece can be installed anywhere on the bed and secured tightly, thanks to the grooves cut into the base.