We assemble a CO2 installation with our own hands.
Specialized stores sell ready-made CO2 installation kits.
Most often, they consist of a cylinder, a reducer, a needle valve, a solenoid valve and a reactor/diffuser. It’s convenient, you came, bought the installation, came home, adjustments and the plants already receive the necessary CO2. But is it worth paying so much for this convenience? After all, such ready-made sets are quite expensive. If you take a closer look at these installations, some even recognize components from well-known equipment manufacturers, but with a tag from some aquarium company and for this tag, as it turns out, people overpay a lot of money. Is it so difficult to assemble everything yourself? It seemed to me that yes. The first thing that came to mind then was: - what if I assemble something wrong and it crashes?... I asked people on the forum, they explained that everything was quite safe. Then the thought that there are too many details and there is no way to figure it out without preparation. But still I decided to act.
First, I bought a 5-liter CO2 cylinder (painted black) at a welding equipment store; I didn’t need a larger cylinder, since just a 100-liter aquarium, according to the owners of CO2 cylinders, should have lasted at least a year. Price
1600 rub. I bought a half-inch to three-quarters adapter with the cylinder; it is needed to move from the cylinder valve to the reducer. Price
100 rub. Next, the gearbox. The question arose, which one to choose. People recommended taking beer reducers (those used in bars for dispensing beer), they are imported (Italy, Germany, etc.), but the price is no less than 3,500 rubles. I chose our UR 6-6 gearbox (Petersburg), it has a more affordable price
700 rubles, I didn’t find any particular complaints about it, but its output pressure should not be too low for it to be stable (about 0.4 MPa), and therefore, a needle valve is also needed. Here we go to the website of the camozzi representative office in your city and place an order. Why camozzi? Relatively inexpensive, I have not encountered any complaints about the operation of the equipment. It may well be that there are cheaper brands that work no worse, but I decided to take it, following the herd instinct, because it has already been tested. In general, you really need a needle valve and a solenoid valve - it is needed to turn off the CO2 supply at night. After all, CO2 is not needed at night. And without turning off the fish you can bait. But my water allows me not to turn off the supply at night. Therefore, it was decided not to take the solenoid valve. I placed an order at camozzi: an adapter from a gearbox to a needle valve 3\8 -1\8, the valve itself RFO 382-1\8, and a union nut 1\8 -5\3. Order price
600 rub. I didn’t take the tube from the needle valve to the reactor from camozzi, it is quite rigid and inconvenient, you can get it at an aquarium store, but I took it at Leroy in the garden department (the smallest in diameter, transparent). As a diffuser, I have a small sprig of rowan inserted into this tube. It sprays perfectly - small bubbles, if you spray through a stone that is sold in an aquarium store, the bubbles turn out to be large and do not have time to dissolve. Be sure to wrap all connections with fum tape. Otherwise, if the tightness is insufficient, the gas will escape in a week or two.
Adapter from cylinder to reducer (from half an inch to three quarters) - 100 rubles.
Adapter from gearbox to needle valve 3\8 -1\8
Union nut 1\8 -5\3. about 600 rub.
Hose from the valve to the aquarium - 100 rubles.
A diffuser in the form of a small rowan branch is in the neighboring yard.
Refilling a cylinder with carbon dioxide costs 100 rubles.
This is what my setup looks like
If you are going to install a solenoid valve, then the order from camozzi should look like this:
camozzi throttle RFO 382-1\8 mini-distributor electric pneumatic A321-1s2 2\2-1\8 solenoid A7E AC 200W connector 122-800 solenoid A70 I G 70 fitting S2520 1\8-3\8 straight fitting S2500 1\8 straight collet fitting S6510 5-1\8
You will overpay another 700-800 rubles for the solenoid valve, but if you have soft water, it is definitely worth it.
In the photo above, after the solenoid valve, they also installed a bubble counter, which looks like a useless thing. The photo was taken from some forum.
The total will be 4000 rubles. In a store, such an installation costs twice as much, or even three times! Believe me, everything is assembled in an elementary way, the main thing, as I said, is to wrap the connections with foam to seal the connections. “So if you can’t see the difference, why pay more? :)”
Structure and principle of operation
A siphon for aquariums, acting like a dropper, is a long transparent hose, to which a wider tube is attached at one end, and at the other - a traction device (similar to a vacuum cleaner) with the ability to drain contaminated liquid. The first part is a glass, a cylindrical funnel (with a diameter of at least 5 cm) or any other suction or receiving device. The second is a special pump, a bulb, or simply the open end of a tube, through which you can independently provoke the outflow of air from the system by inhaling.
Photo of a budget CO2 solenoid valve
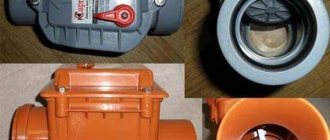
I have been looking for a budget option for a CO2 solenoid valve for a long time and decided on the following kit:
The gas electromagnetic valve is used on cars with gas equipment, the cost is 300 rubles. and an old power supply from an inkjet printer costing about 150 rubles. we put it together, connect it to the same timer as the lighting. When 12V power is supplied, it is open, CO2 enters, the timer is off. There is no CO2. On the issue of saving, a CO2 cylinder from a used OU-5 fire extinguisher can be purchased from us for 300 rubles. It costs 200 rubles to fill it up.
OK then. For CO2 I would choose Burkert 6011. About 1,700 rubles, but guaranteed reliability for many, many years and use in accordance with the declared performance characteristics. I understand that my solution is several times more expensive. but from the “set it and forget it” category.
A month and a half later, no problems!
Friends. Believe me, this option is much better than any “special” (intended for aquarists)! This valve, as already noted, has really strict requirements and multi-stage quality control has been carried out, while there are simply no requirements for the stupid “special” valves (requirements from private individuals are not considered). This valve will work reliably for a hundred years if there is no manufacturing defect. I'm working (debugging) with a serious (Chinese)
) robotics and in six years I don’t remember a single case of failure of such valves. It happened, of course, but as a result of mechanical damage: someone accidentally dropped a sledgehammer or hit it with the tooth of an electric forklift. But you know, I NEVER swing a sledgehammer in front of my aquariums, and I also avoid riding around my apartment.
PS I hope the author of the topic will not be angry that we are clogging up his blog.
You don’t make me too angry with your reasoning; it’s very interesting where the topic will ultimately lead. I can only say the following: in my system, this valve shuts off the CO2 supply to 4 aquariums. To date, no overheating or malfunctions have been detected.
Can you tell me more about the last valve? I wonder what kind of unit it is. but according to the documentation there is no question, although Dy is not mine a little, but it’s not scary, everyone has the same principle (or rather two
)
I slightly edited my previous message. Re-read.
They are sold by AquaMedic as their own (https://www.aqua-medic.de/seawater/ru/2/M-ven.), but the original markings have not been erased. Tomorrow I'll get to work, take a photo and put it here. I have a small stock of emergency recalls of them.
I can even take it apart and take a photo. There is a round rubber gasket inside with a small hole.
PS I hope the author of the topic will not be angry that we are clogging up his blog.
Can you tell me more about the last valve? I wonder what kind of unit it is. but according to the documentation there is no question, although Dy is not mine a little, but it’s not scary, everyone has the same principle (or rather two
)
Sleepy, no offense. I have a little experience in this matter. I'm prof. I work on fittings (and valves in particular), a pressure difference is needed for the so-called pilot valves, a magnet, for the most part, is needed to hold it in the open position, everything else is due to the medium, but this is all lyrics, if you are interested, I can supply those. documentation. The valve being discussed here, as well as the one you proposed, is a direct-acting valve, so if it fails, nothing bad will happen to the fish as it will simply close (well, unless, of course, some kind of rubbish gets under the piston (sand, debris), which is unlikely with CO2)
Burkert 6013 works 0-20 bar. No failures were recorded.
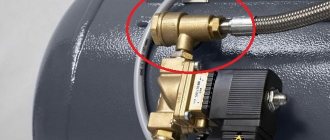
And here, for example, is a valve that repeatedly did not close after turning off the power supply to it:
It is also direct action. But it didn't close. The ingress of anything (garbage, sand) is excluded, because stood after the OO systems. Working pressure - 0.1-25 bar. If the required pressure is not there, the gasket does not move to the closed position.
If there is any technical documentation on types, devices, areas of application of valves, etc. - I will gladly accept.
I emphasize once again that I did not write that the valve given by the author cannot be used. I only insisted on the need to find out its performance characteristics before use. If, due to your specialization, you can accurately determine its type and device based on some signs and guarantee that it will always close, great. I will only once that a good and budget solution has been found for all CO2 lovers. I got burned by these things and now I try to be extremely selective about what and where to put it and figure it out first, and then do it.
Siphon for an aquarium: why and which one to choose
When starting to clean an aquarium of any type, size and quality, you need to pay attention not only to replacing water and cleaning surfaces, but also to the soil. The accumulation of garbage, waste and the remains of uneaten food if not disposed of in a timely manner, decomposing, will certainly have a negative impact on the nursery ecosystem. A special device - an aquarium siphon - will perfectly help eliminate this problem.
Mr. Tail recommends: types of siphons for an aquarium
All siphons for aquariums can be divided into mechanical and electrical according to their structure.
The main difference between them is that the former require active human participation to create traction, while the latter are focused on simplifying the process as much as possible. They are equipped with small motors, powered by batteries or mains power, which will independently power the pump at the user’s request by pressing a button. Another distinctive feature of electronic siphons is that some of them do not contain a hose in their structure, which, in turn, makes them more convenient to use. Moreover, the presence of a filter eliminates the need to change the water: dirt accumulates in a special compartment, without requiring simultaneous pumping of liquid from the reservoir.
How to clean the soil
Before using, there are several important nuances to consider:
- Incorrectly selected purifier power (too high) can result in fish getting inside. Therefore, manufacturers often make device elements from transparent plastic so that the process can be controlled.
- The more the siphon glass is immersed in the ground, the higher the quality of cleaning. But at the same time you need to ensure that the roots of the plants are not damaged. Excessive removal of sludge from the bottom is also not recommended, since it can provide a breeding ground for some benevolent inhabitants of the ecosystem.
- If it is not possible to replace the fluid, it is better to use electric models for “dry” cleaning, which were mentioned above.
- It is important to select a siphon not only by power (for light fractions - weaker pressure), type of soil (the diameter of the hose should not be much larger than the size of pebbles), but also by the dimensions of the device, including taking into account the maximum permissible depth at which cleaning can be carried out .
It is worth treating the soil at least once every 30 days, covering not only open surfaces, but also hard-to-reach places.
Having plunged the funnel vertically to the bottom, activate the device. Lower the hose below the bottom so as not to interfere with the process of draining liquid into the external vessel. At the same time, by adjusting the height of the end of the tube, you can control the outgoing water pressure. Rotate the cylinder, thereby loosening the layer, including for better aeration of the soil. Make sure that soil particles do not fall from the bowl into the hose, but only reach half the height of the funnel. Purification can be completed when the water becomes half as contaminated as it was initially. Having stopped the outflow, you should move the device to a new location, repeating the previous algorithm of actions.
You can use nozzles of different diameters for more convenient and high-quality cleaning: small - for hard-to-reach places (sinks, buildings, etc.), corners; large - for areas with minimal planting and a clutter of decor.
Mechanical siphons should remove no more than a third of the liquid.
You should not forget to replenish the water supply in the aquarium, restoring it to its previous level.
Structure and principle of operation
A siphon for aquariums, acting like a dropper, is a long transparent hose, to which a wider tube is attached at one end, and at the other - a traction device (similar to a vacuum cleaner) with the ability to drain contaminated liquid. The first part is a glass, a cylindrical funnel (with a diameter of at least 5 cm) or any other suction or receiving device. The second is a special pump, a bulb, or simply the open end of a tube, through which you can independently provoke the outflow of air from the system by inhaling.
How to clean the soil
Before using, there are several important nuances to consider:
- Incorrectly selected purifier power (too high) can result in fish getting inside. Therefore, manufacturers often make device elements from transparent plastic so that the process can be controlled.
- The more the siphon glass is immersed in the ground, the higher the quality of cleaning. But at the same time you need to ensure that the roots of the plants are not damaged. Excessive removal of sludge from the bottom is also not recommended, since it can provide a breeding ground for some benevolent inhabitants of the ecosystem.
- If it is not possible to replace the fluid, it is better to use electric models for “dry” cleaning, which were mentioned above.
- It is important to select a siphon not only by power (for light fractions - weaker pressure), type of soil (the diameter of the hose should not be much larger than the size of pebbles), but also by the dimensions of the device, including taking into account the maximum permissible depth at which cleaning can be carried out .
It is worth treating the soil at least once every 30 days, covering not only open surfaces, but also hard-to-reach places.
Having plunged the funnel vertically to the bottom, activate the device. Lower the hose below the bottom so as not to interfere with the process of draining liquid into the external vessel. At the same time, by adjusting the height of the end of the tube, you can control the outgoing water pressure. Rotate the cylinder, thereby loosening the layer, including for better aeration of the soil. Make sure that soil particles do not fall from the bowl into the hose, but only reach half the height of the funnel. Purification can be completed when the water becomes half as contaminated as it was initially. Having stopped the outflow, you should move the device to a new location, repeating the previous algorithm of actions.
You can use nozzles of different diameters for more convenient and high-quality cleaning: small - for hard-to-reach places (sinks, buildings, etc.), corners; large - for areas with minimal planting and a clutter of decor.
Mechanical siphons should remove no more than a third of the liquid.
Siphon for an aquarium: why and which one to choose
When starting to clean an aquarium of any type, size and quality, you need to pay attention not only to replacing water and cleaning surfaces, but also to the soil. The accumulation of garbage, waste and the remains of uneaten food if not disposed of in a timely manner, decomposing, will certainly have a negative impact on the nursery ecosystem. A special device - an aquarium siphon - will perfectly help eliminate this problem.
Mr. Tail recommends: types of siphons for an aquarium
All siphons for aquariums can be divided into mechanical and electrical according to their structure.
The main difference between them is that the former require active human participation to create traction, while the latter are focused on simplifying the process as much as possible. They are equipped with small motors, powered by batteries or mains power, which will independently power the pump at the user’s request by pressing a button. Another distinctive feature of electronic siphons is that some of them do not contain a hose in their structure, which, in turn, makes them more convenient to use. Moreover, the presence of a filter eliminates the need to change the water: dirt accumulates in a special compartment, without requiring simultaneous pumping of liquid from the reservoir.
However, these models also have disadvantages: carelessness in handling water and current or other violations of operating rules (for example, exceeding the permissible depth threshold of 0.5 m) can easily lead to complete malfunction of the device.