Why doesn't tin stick to the soldering iron?
If the tin does not stick to the soldering iron tip, then for some reason many begin to think that they have come across a low-quality or defective tool.
In fact, the problem lies in other reasons. Often this is either unsuitable solder, which is intended for high-temperature soldering, or the lack of tinning of the tip. The reason may also be the mistakes of the shareholder himself when performing the work.
For example, when a soldering iron is left unattended and overheats. As a result, the flux burns out and the copper begins to quickly oxidize. Soot forms on the tip of the soldering iron, to which the solder will never stick.
Tips for working with a soldering iron
Thanks to these tips, the main problems in soldering will disappear:
Thus, by adhering to all the above tips, you can save yourself from many problems when working with an electric soldering iron. Well, if the tip has already been burned in the air and covered with an oxide film, then there is nothing else left but to re-tinning the soldering iron.
Fluxing or tinning
When soldering, the main thing is to ensure good contact between the parts being soldered. To do this, before starting soldering, the parts to be joined must be tinned or treated with flux. These two processes are interchangeable. Their main purpose is to improve the quality of the connection and facilitate the process itself.
When working with radio components, fluxes that do not contain acid are used. For example, rosin. Bow rosin for lubricating musical instruments is also sold in stores. It can also be used for soldering. But metal utensils are soldered using solder without rosin. To repair it you will need “soldering acid”. This is zinc dissolved in hydrochloric acid. It is also impossible to solder radio components with such solder, since over time it will destroy the soldering.
If you need to solder in hard-to-reach places, you need to have liquid flux. You can make it yourself. Rosin is crushed into powder and poured into acetone or ethyl alcohol. After mixing the solution, you need to add more rosin until you obtain a thick, mushy mass. Such liquid rosin should be applied to soldering areas with a brush or stick.
When working with various fluxes, it is necessary to take into account that those that contain acetone are very toxic. Therefore, when working with them, it is necessary to avoid getting vapors into the respiratory tract. It is better to solder near a window if it is summer, and in winter it is better to ventilate the room in which the work is being carried out. After finishing work, be sure to wash your hands with soap and warm water.
Correct tinning of a soldering iron tip
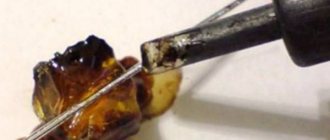
So, tinning a soldering iron is coating the copper tip with the thinnest layer of tin. It is necessary to tin not only the soldering iron tip, but also the parts themselves before soldering. This process is simple and can be done in just a few steps.
First of all, you need to mechanically remove carbon deposits from the soldering iron tip in order to get to the copper surface. To do this, you can use fine-grained sandpaper or a thin file. When cleaning the tip, it is important to leave a flat and smooth surface, without too deep grooves or scratches.
After mechanical cleaning, it is necessary to apply rosin to the surface of the tip. If you use solid pine rosin, then the tip needs to be heated in it, and not wait until the soldering iron warms up. If liquid flux is used to tin the soldering iron tip, it should be applied using a small brush.
Having immersed the soldering iron tip in the rosin and waited until it melts, you need to touch the solder. As a rule, if the surface of the tip is well cleaned and generously lubricated with rosin, the tin will immediately melt, spread and adhere well to the surface. You can lightly rub the solder on a board or metal surface.
If the soldering iron is tinned correctly, the solder does not flow down and does not stick to the surface of the tip in drops. When the tip is brought to the workpiece, the tin separates well and does not splash down.
Source
Never cool the tip in water
If the tip is too hot and you need to reduce its temperature, you should not put it in cold water. Ideally, let it cool naturally. To speed up the process, you can turn off the soldering iron and wipe it with a rough cloth. It will take on some of the heat.
Do not attempt to solder parts if there is an oxide film on their surface. It will simply prevent the tin from sticking. It must first be wiped off with an abrasive.
Not only a noticeable green oxide film, but also a recently appeared dark one can interfere with soldering. Ideally, always first wipe the surface with an abrasive, and only then solder, especially if it is a board.
Expert opinion
It-Technology, Electrical power and electronics specialist
Ask questions to the “Specialist for modernization of energy generation systems”
Why the soldering iron does not take solder If the manufacturer decided to save money and deliberately increased the percentage of lead, we have a more refractory solder with low fluidity, and perhaps not suitable for soldering. Ask, I'm in touch!
Does solder not stick to the soldering iron? It's time to fool around!
The situation when molten solder does not want to stick to the soldering iron tip is familiar, perhaps, to every novice radio amateur. Time after time, an unruly piece of solder rolls off the hot tip immediately after gripping. And there can be no question of bringing it to the soldering point on the workpiece.
Without understanding the reasons for another failure, it is simply impossible to carry out the planned operation. Attempts to replace the tool also do not always lead to the desired result. What to do? It turns out that for trouble-free soldering it is enough to properly handle the soldering iron.
You can learn how to tin a soldering iron tip in this article “Welding and Soldering” svarkapajka.ru
Why doesn't tin stick to the soldering iron?
There are few reasons why solder rolls off a soldering iron, or rather, there are only two. The first is a dirty tip, the second is an oxide film. Eliminating both problems makes full soldering possible.
The most common solder for home soldering is tin-lead solder (POS) with a melting point of 190 to 300°C. As a rule, this is enough for soldering work. If you allow the soldering iron to heat up more strongly, the solder and flux will simply burn out, and the combustion products will stick to the tip.
Most often, the soldering iron tip is made of copper, which oxidizes at elevated temperatures. It is because of the copper oxide film covering the surface of the tip that solder does not stick to it.
Incorrect soldering with a soldering iron - 10 stupid mistakes and bad advice.
When connecting an LED strip, repairing LED light bulbs, microcontrollers and radio components, you cannot do without such a useful skill as soldering.
It is high-quality soldering that ensures a reliable and durable contact connection.
However, in this simple matter there are a lot of nuances that can ruin once and for all not only the part being repaired, but also the soldering iron itself. And sometimes even lead to serious injury.
Even experienced craftsmen, who have absorbed what is called rosin vapor with mother's milk, no, no, and forget the basic rules of soldering. How to properly solder an LED strip can be found in a separate article.
Let’s take a closer look at the question of how you can’t solder, and what such errors lead to.
Soldering can be compared to some extent to the process of gluing. Only here molten metal is used to connect parts. Solder acts as such.
It has a fairly low melting point. Moreover, it is lower than the melting temperature of the part itself.
For example, for copper this figure reaches 1050C. While for tin-lead solder POS-61 it is only 190C.
That is, by heating or dripping such metal onto a part, it is problematic to damage it.
So, what stupid mistakes should you not make when soldering?
No matter how expensive the floor covering is to you, the reflexive movement to catch a fallen tool will not lead to anything good.
At the same time, never forget the main rule of a repairman - a hot soldering iron looks the same as a cold one.
Don’t even think about tapping a modern soldering iron on the table. If the impact is strong enough, the ceramic element inside can crack and shatter.
Also, do not shake off the melted solder from the soldering iron. Not only can it get into your eyes, but your children can also be harmed.
A beautiful drop will imperceptibly fall somewhere on the floor, and a young child will subsequently find it and eat it.
When soldering, remember that you are dealing with molten metal. And if a drop of tin falling on the hand can scare few people, then a spring-loaded hot leg from a radio component that accidentally gets into the eye leads to sad consequences.
Soldering overhead or near the ceiling is especially dangerous. In this case, the wires may jump out of their place and the tin will “bullet” into your eye.
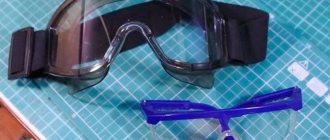
Therefore, try to always wear and use safety glasses in such cases. And don’t forget about the respiratory system.
At least basic ventilation of the room or a small USB Carlson fan on the desktop will never be superfluous.
Remember, the soldering iron is designed for soldering electrical wiring cores, LED strips, radio components or electronic boards. They cannot melt or remove insulation from PVC wires.
This is not only not aesthetically pleasing, but also spoils the veins themselves. The melted plastic gets between the wires and gets stuck there.
It is no longer possible to tin such veins normally. Although some have a completely different opinion on this matter.
Also, a soldering iron for amateur radio operators should not be used to solder holes in plastic pipes and thus try to eliminate leaks in them.
Use each device for its intended purpose and you will not have any troubles. Although, as the popular saying goes, “If you are tied up, your mouth is sealed with tape and you see a man with a soldering iron in front of you, then this is most likely a sign of trouble.”
It would seem, what kind of fool would solder a part under voltage? However, many people actually do this kind of work. They turn off the built-in microswitch on the body of the device being repaired, while forgetting to turn off the power from the outlet.
This is done intentionally in order to quickly check the functionality of the element immediately after the repair. However, with such buttons you often get confused in what state they are, disabled or enabled.
If there is accidentally voltage on your board and you touch the current-carrying part with the tip, a short circuit will occur and you will go into “spot welding” mode.
By the way, this point applies not only to the 220V network, but also to all elements powered by batteries and built-in batteries. For example, cell phones.
The same applies to power supplies with capacitors.
First make sure that they are discharged and only then climb inside. You can discharge it with a load - a high-resistance resistor, or a light bulb (more clearly).
If you forget to do this or disconnect the battery, then your device may die completely and irrevocably during this repair.
Why can't you solder without flux? The fact is that on any parts or wires there is a so-called oxide film containing microscopic particles of fat, sweat, dirt, etc.
It does not allow the solder to stick normally to the surface.
When treated with flux, the picture changes radically.
Flux not only helps to dissolve this film, it prevents it from forming again during the soldering process. Due to this, tin independently envelops, impregnates and penetrates into all the pores between the veins.
Previously, our grandfathers used aspirin instead of gumboil. It would seem, why not? Rosin is abietic acid, and aspirin is acetylsalicylic acid. What if not acid to clean off oxides?
However, be very careful in this matter.
Some people advise using only soldering acid as a flux. Supposedly the effect is better.
In fact, acid is the same flux, but not simple, but active. This means that along with the film, it perfectly dissolves the components themselves.
This, of course, does not happen immediately, but after a few months the soldering area may turn into jelly. This happens if at least a few microdroplets of acid remain and linger on the surface.
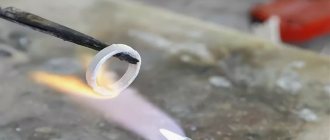
How to tin a soldering iron with a copper tip
First of all, the tip of the tool should be tinned, because it is untinned metal covered with an oxide film that cannot hold solder. Everyone who has done soldering at least once knows what tinning is. This is the application of a thin layer of tin to the surface of the metal.
First, the tip of a cold soldering iron is thoroughly cleaned of copper oxide using a file or sandpaper. In this case, even the smallest scratches and grooves should be removed. Then its surface is coated with flux. The liquid composition is quickly applied using a brush or flat spatula.
If rosin is used as a flux, the soldering iron is plugged in and slowly immersed in solid rosin. To prevent oxidation from occurring again in air, there is no need to wait for the instrument to heat up.
After heating the soldering iron to the required temperature, you need to rub its tip on the solder. At the same time, the instrument must not be allowed to overheat. A high-quality tinned tip perfectly holds the solder, which evenly covers the copper tip and moves freely onto the workpiece during operation.
How to solder stainless steel: technology for brazing stainless steel
Soldering stainless steel is a rather labor-intensive process, but at the same time there are no great difficulties here. Alloys containing up to 25% nickel and chromium are alloyed together quite simply. Moreover, these alloys can create strong bonds with other metals, with the only exceptions being magnesium and aluminum alloys.
But you need to pay attention to the fact that some nickel-plated alloys when heated to a temperature of 500-700 degrees. Carbides can form; their level of release depends on the duration of soldering, so the procedure time must be reduced.
The resulting carbides significantly reduce the corrosion resistance of stainless steel. In order to minimize the precipitation of carbides, titanium is added or additional heat treatment is carried out upon completion of soldering. Under the influence of hot solder (tinol), the cold-hardened stainless material can crack, so soldering occurs after annealing, without using loads during soldering.
The choice of solder for stainless steel depends entirely on the following characteristics: steel composition, soldering conditions. It should be noted that products that are made in corrosive conditions must be soldered using silver tinols, which contain a small amount of nickel in the composition. Copper, silver-manganese, and chromium-nickel solders are used during oven soldering in dry conditions.
is most often used as a flux for processing stainless steel . It is applied to the joint in powder or paste form. When the borax melts, the rest of the metal gradually heats up to a bright red heat (850 degrees). When this temperature is reached, solder is injected into the joint.
Removal of material adhering to the stainless surface upon completion of soldering is done by rinsing the soldered product in water or by sand blowing. Hydrochloric or nitric acid, which can be used in cleaning, are very undesirable at this stage of working with stainless steel, since they, along with the solder, will corrode the base metal.
When a soldering iron with an “eternal tip”
This is the name for a tool with a tip that is plated with nickel. Oddly enough, over time the nickel coating begins to hold solder poorly and will also have to be tinned. Of course, in this case there is no need to clean off dirt with a file. Carbon deposits are removed from a heated soldering iron with a damp cloth folded in several layers.
Then immediately lower the tip into the container with rosin, where the solder was previously placed. Rosin is melted around a piece of solder, and when it sinks in the liquid molten composition, it is touched with the tip of a soldering iron. Solder instantly coats its surface.
To avoid unnecessary tinning work, experts advise strictly monitoring the heating temperature.
Source
Main reasons
Tin-lead (the most common) solder melts at a temperature of 250-300 ℃, and this temperature is quite sufficient for work.
If at some point the tip gets hotter, then the solder and flux on it can simply burn out, leaving unsightly traces of their presence.
In addition, the copper from which the tip is made will begin to oxidize due to overheating and a thin film of copper oxide will appear on the surface. Because of it, the solder does not stick, and the “slag” remaining on the tip does not add “stickiness” at all.
So, there are two main reasons why solder does not stick or hold. The first is contamination of the tip, the second is oxidation. If you eliminate them, the work will go like clockwork.
Proper preparation for work
Direct preparation of the tool for soldering involves tinning.
After all, it is to untinned metal that the soldering material does not stick. Tinning is the process of covering a surface with a thin layer of tin.
By the way, parts are prepared for soldering in the same way. How to tin the soldering iron? Yes, very simple. Only it is not the entire instrument that needs to be tinned, but only its tip.
First you need to clean it mechanically. A file or sandpaper is suitable for this. You need to clean thoroughly, without leaving grooves or scratches in which an oxide film could remain. Of course, the soldering iron must be cold.
After thorough cleaning, you need to cover the working surface with a layer of flux. If a liquid composition is used, then immediately after cleaning it is applied with a brush; if solid rosin is used, then the soldering iron must be immersed in it as the tip heats up.
There is no need to wait for the soldering iron to heat up, because an oxide film will inevitably form in the air, which will again prevent the solder from sticking. Overheating is the reason that the copper tip does not tin.
After the soldering iron has warmed up to the desired temperature, touch the solder with the tip and rub it. You can grind the solder using a sliver of hard wood - birch or oak. In this case, do not allow the soldering iron to overheat.
The solder sticks perfectly to a properly tinned soldering iron and does not lie on it in lumps or drops. It evenly coats the copper tip and leaves it quietly when needed.
How to solder stainless steel and brazing technology
Soldering stainless steel is a rather labor-intensive process, but at the same time there are no great difficulties here. Alloys containing up to 25% nickel and chromium are alloyed together quite simply. Moreover, these alloys can create strong bonds with other metals, with the only exceptions being magnesium and aluminum alloys.
But you need to pay attention to the fact that some nickel-plated alloys when heated to a temperature of 500-700 degrees. Carbides can form; their level of release depends on the duration of soldering, so the procedure time must be reduced.
The resulting carbides significantly reduce the corrosion resistance of stainless steel. In order to minimize the precipitation of carbides, titanium is added or additional heat treatment is carried out upon completion of soldering. Under the influence of hot solder (tinol), the cold-hardened stainless material can crack, so soldering occurs after annealing, without using loads during soldering.
The choice of solder for stainless steel depends entirely on the following characteristics: steel composition, soldering conditions. It should be noted that products that are made in corrosive conditions must be soldered using silver tinols, which contain a small amount of nickel in the composition. Copper, silver-manganese, and chromium-nickel solders are used during oven soldering in dry conditions.
is most often used as a flux for processing stainless steel . It is applied to the joint in powder or paste form. When the borax melts, the rest of the metal gradually heats up to a bright red heat (850 degrees). When this temperature is reached, solder is injected into the joint.
Removal of material adhering to the stainless surface upon completion of soldering is done by rinsing the soldered product in water or by sand blowing. Hydrochloric or nitric acid, which can be used in cleaning, are very undesirable at this stage of working with stainless steel, since they, along with the solder, will corrode the base metal.
Soldering stainless steel at home
Perhaps everyone knows that a home handyman is constantly faced with everyday difficulties that he needs to eliminate on his own. But it often happens that you need to do the work associated with processing stainless steel yourself. Therefore, this will require certain skills, abilities and knowledge. You will also need to acquire some materials and tools. Here is a list of everything you need:
- Soldering acid;
- Electric soldering iron 100 Watt;
- Tin solder for joining metals;
- File or sandpaper;
- A tube;
- Metal cable.
Now that you have decided on the soldering tool, you need to know the steps to perform the actions:
- To process stainless steel, you must initially ensure that you have flux and a 100-watt electric soldering iron. You need to know that there is no point in choosing a more powerful soldering iron for processing stainless steel. The flux is ordinary soldering acid. Also, do not forget to always have tin-lead solder on hand.
- When all the necessary tools and materials are ready for soldering, you can begin work. First you need to clean the stainless steel joint: this can be done using sandpaper or a file. Upon completion of cleaning the work areas, it is necessary to apply soldering acid followed by further treatment. If the treatment does not work (the solder does not stick to the surface of the stainless steel), then you need to re-manipulate the soldering acid on a thoroughly heated surface, then perform the treatment again.
- In the case when you made a second attempt, and it was not successful, and the solder lags behind again, then the working surface of the stainless steel needs to be cleaned with a special brush, which you can make your own: you will need a piece of pipe with a cross-section of 5 mm, where you place thin wires pulled from a metal cable . Now, apply acid to the soldering area, and then bring the brush and soldering iron here at the same time. Then start working with two tools. It should be noted that this process is very helpful in removing the oxide film from the surface of stainless steel.
- When the parts have been tinned, begin soldering stainless steel using a soldering iron and flux.
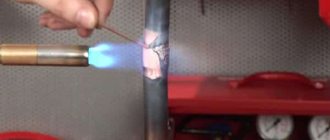
Soldering with a gas torch
The parts are heated using a gas torch or a tin-plated soldering iron tip. When working with the burner, you must ensure that there is not too much oxygen in the flame, because this causes the stainless steel to oxidize. This can be determined by the color of the fire (it should be blue); if the color is pale and the fire is weak, then this indicates an excess of oxygen. To warm up the connection, the burner must be moved smoothly.
By periodically touching the metal with solder, the quality of the temperature achieved is determined. Heating is sufficient when the solder melts not from the flame of the torch, but from touching the metal.
Then solder is immediately applied to the part where the joint needs to be made, while the parts continue to be heated so that the solder, melting, slowly fills the joint completely . If there is not enough liquid solder in some area, it is heated more strongly than other places, and the solder itself flows into it. A clear sign of high-quality soldering is the leakage of excess solder from the joint.
Working with hard solders
Stainless steel soldering works well using flowable, liquid, fluxed solder with a low melting point and high capillary characteristics. This solder is quite elastic and has excellent deoxidation properties, which are very useful when working with stainless steel.
It can also handle brass, copper and some other materials. Soldering with such hard solders is very suitable for stainless steel. Stainless steel does not contain cadmium, and the percentage of silver here is 30%. Processing the material with hard solders gives good results, making it possible to obtain durable and high-quality metal fastening.
HTS528 solder can cope with copper, brass, nickel, bronze, stainless steel, and other metals. Along with other hard solders today, this tinol is the most in demand. The solder looks like a rod treated with red flux. The rod size is about 45 cm , and the weight is 20 g. The melting point is 760 degrees.
How to choose a flux for soldering
Small elements are soldered with adjustable gas-air burners (this method is more suitable for jewelry). Larger parts are best soldered with acetylene. The same applies when choosing a flux for stainless steel, since this metal is very demanding on flux. Flux for stainless steel consists of 10% calcium fluoride, 20% boric acid, 70% borax .
For small stainless steel parts, you can prepare a flux composition that includes 50/50% boric acid and borax. This flux must be diluted in water, then applied to the part; when it dries, the solder will adhere perfectly to the metal surface.
That is, the soldering area is not etched, but only cleaned using sandpaper. Copper does not spread well over the surface of steel, so it is better to use L 63 brass. For better soldering, you can also use silver and brass to make solder from them.
Recommendations from professionals
There are many people who, so to speak, “ate the dog” when working with soldering. And they share personal experience gained in practice, giving useful recommendations:
- It is best to choose a soldering iron with a non-burnable tip.
- An electric soldering iron needs a power of 60-100 watts. The most optimal soldering iron is 100 Watt. A less powerful soldering iron will not be able to heat the metal.
- Phosphoric acid works best as a flux.
- It is advisable to use tin-lead rods as solder. You can also use tin in its pure form. It must be said that it is better to solder utensils with tin, since pure tin does not contain lead.
- When working with soldering, it is necessary to use personal protective equipment.
- Soldering must take place in a well-ventilated and open area.
In case of nickel plating
Soldering irons with a so-called “eternal tip” coated with a thin layer of nickel are often used for soldering. For some reason it is believed that it does not tin. In fact, who would think of sanding off a nickel coating?
However, the time comes and it becomes noticeable that the solder does not hold! At best, it sticks in small drops. So what should we do? The answer is the same - cheat!
The reason is often that the sting is dirty. First, you should still make sure that the nickel plating is not damaged.
After this you need to remove the deposits. This can be done on a slightly heated soldering iron with a damp cloth folded in several layers.
Next steps are:
The best way to avoid solder not sticking is to avoid overheating the tip.
Prevention has always been the most effective remedy. If it is not possible to purchase a tool with temperature control, you can purchase a dimmable voltage regulator or make one yourself. If you monitor the heating temperature, you will have to tin the soldering iron much less often.
Source
What to do if the solder does not stick to the soldering iron
When soldering with a soldering iron, various difficulties arise. Here, as with welding, the soldering iron overheats greatly and the tip burns out, but the solder does not stick, which makes soldering impossible.
Surely you have noticed more than once how, after a few minutes of working with a soldering iron, its tip turns black. This problem occurs due to overheating of the soldering iron. The carbon deposits that form on the surface of the copper interfere with the normal spreading of solder.
The problem can be solved by using a dimmer or installing a diode that would reduce the power of the soldering iron. However, even after this, the tin may still not stick to the soldering iron, for which there are certain reasons.
What do you need to solder tin?
Soldering tin most often includes lead, but nickel, cadmium, silver, zinc, copper and antimony are also used. Additives are selected depending on the metal of the parts that must maintain integrity. Therefore, the substance is combined with elements that give a certain melting point.
Interesting materials:
How to cancel a resume sent to HH? How do I cancel my Movavi Clips subscription? How to unsubscribe from Gmail? How to undo the last save in Word? How to cancel a bet on Winline? How to uninstall updates on Windows 7? How to undo all selections in Photoshop? How to cancel an application for a driver's license through government services? How to measure 120 g of flour? How to measure 150 grams of Bulgur?
If the solder does not stick to the soldering iron, what should you do?
I’ll make a reservation right away and say that for normal tinning of a soldering iron, it is better to pull out the tip. Many people do not attach any importance to this, but there is one nuance here - it will be much more convenient to clean the tip this way. In addition, it will be possible to increase its thermal conductivity by removing the layer of film from the surface that interferes with this.
Next, you will need to remove all the carbon deposits from the soldering iron tip, that is, all that black soot, cleaning the tip until it shines. It is for this reason that tin does not stick to the soldering iron. The tip needs to be cleaned with fine sandpaper.
Then you need to tin the soldering iron tip. This is done using tin and rosin. First, the soldering iron is lowered into rosin and then into tin. However, here, as it turns out, there is a small nuance. You need to lower the soldering iron tip into the rosin at the moment when the soldering iron is heating up.
The thing is that if you keep the soldering iron plugged in and do not dip it in rosin, the tip will immediately oxidize. Accordingly, it will have to be cleaned again from copper oxides.
How to Record a Song in Adobe Audition
How to learn to solder. I decided to prepare just such a small special lesson, not directly related to the main topic, for those who not only have to solder cords, sockets, plugs, but anything else in general. So, let's begin…
What do we need for soldering?
Of course, a soldering iron (ideally a soldering station), tin solder, rosin, ideally solder wire, which is a long, thin tin tube wound on a reel, similar to a wire, in the cavity of which there is rosin. Those. when soldering, in this case, we do not need, as in the old fashioned way, to lower the tip of the soldering iron, now into the rosin, now into the solder, but all this happens simultaneously at one point. More on this below...
You can purchase all the necessary components at your nearest radio store.
If you do not have a soldering station, which is initially ready for soldering immediately after switching on, but a regular soldering iron, then before work (especially if it is new) you need to prepare it in a special way - tin it, otherwise it will not solder. Now let’s look at what “tinning” means.
How to tin a soldering iron?
Take a file and apply it flat to the cut of the soldering iron tip. Now we sharpen in the same plane, periodically looking at the tip, until it becomes flat, smooth and shiny.
After this, we lower the heated tip into rosin and immediately into solder (into tin). There will be almost no solder sticking to the tip, so immediately after this procedure we apply the tip to a small board, preferably of natural origin (not chipboard), preferably spruce or cedar (resinous), but in principle, any will do, you’ll just have to mess around longer.
So, we repeat this procedure (rosin → solder → board) until the cut of the tip, prepared in advance with a file, made of yellow-gray heated copper, becomes silvery and shiny from the solder evenly covering it. This is what is called “tinning”, in this case a soldering iron.
This is what a tinned soldering iron tip should look like.
Now we will learn to solder wires (after tinning it) to a brass tin, also tinning it from the beginning.
We dip the soldering iron tip into rosin, then into solder, and immediately, with the plane of the tip parallel to the plane, we bring it close to our brass test subject, without allowing the rosin to evaporate, we press it, then we rub it in, we grind, in general, we tin. If the rosin has evaporated or spread, we repeat the process, and gradually, gradually our tin is covered with high-quality solder adhering to it. If the material is clean or without strong oxides, then such tinning occurs quickly.
If solder wire is used, then we lean the tip of the soldering iron against the tin, and bring the tip of the solder wire to the point of their contact, trying to touch more of the tinned part of the soldering iron, and rub it against this part so that the tin and rosin enrich the contact point.
How to tin a wire?
Now let's tinker with the wiring. We carefully remove the insulation just enough so that we have enough space for soldering, and for the location of the heat-shrinkable tube (or other insulator) so that later no short circuits (short circuits) arise...
It is easier to tin the wire, because Usually, the metal under the insulation is clean, not oxidized. We dip it in rosin, placing the tip of a heated soldering iron on top of it and slowly pull the wire out from under the soldering iron after the rosin melts and starts smoking. This is done, as you probably understood, so that the molten rosin envelops the contact part of the wire. Now we enrich the soldering iron tip with solder, touching the tin, and bring the tip to the rosin adhering to the wiring.
If the wire is copper and clean, tinning will occur immediately.
If not, you may have to repeat the operation or use solder paste instead of rosin - a special chemical (like soldering acid, if anyone is familiar) that allows you to tin, for example, even iron.
This is what solder paste looks like.
How to solder a wire?
We have a tinned experimental brass tin and a tinned wire, which we now have to connect, seal with heated solder and then cool in order to forever maintain their electrical connection, which we do by bringing the tinned part of the wire to the tinned part of the tin.
We bring the soldering iron tip enriched with solder to the place of their contact so that the solder covers the tinned parts of the soldered parts well. This will be facilitated by the rosin involved in the process. If something doesn’t go well, dip into it. Once the parts are in the molten solder, try not to move them anymore. You can lightly blow on the solder area until the shine of the solder darkens slightly, indicating that the solder has hardened.
That's it, congratulations! You did it.
How to unsolder the wire?
You can unsolder wires and various soldered joints using the reverse method - by heating the soldering area (tinned and dipped in rosin, heated) with a soldering iron tip until the solder melts.
...And probably the final touch - you can also dip a small paint brush into the solvent and rinse off the remaining rosin in the soldering areas.
Why you can't solder properly
In addition to the fact that the soldering iron tip burns and you have to tin it from time to time, other types of problems arise when soldering. Can't solder properly. This is the common problem faced by many who have picked up a soldering iron at least once in their lives.
Let's look at the main problems that make it impossible to solder normally:
To solder properly, you need to take into account many nuances. Therefore, in addition to the timely tinning of the soldering iron tip, it is very important to understand what kind of solder to use in certain cases, especially when it comes to equipment repair.
Source
Main reasons
The most common type of solder is tin-lead. The melting point of such an alloy is about 270 degrees Celsius. If the soldering iron heats up to 300 degrees, this should be enough for work, but if the tip overheats and its temperature significantly exceeds the melting point of the solder, then soot from consumables remains on the surface. It not only spoils the appearance of the tool, but also interferes with further work.
Contamination and oxidation prevent solder from sticking to the soldering iron tip.
Soldering iron tips are most often made of copper. When severely overheated, this metal is more susceptible to oxidation, which leads to the appearance of a film of oxides on its surface. A thin layer of copper oxide may be invisible to the eye, but it is precisely because of its presence that solder does not stick to the soldering iron tip. If we consider the immediate reasons that lead to the fact that the molten solder does not remain on the tip, but simply flows off it, then there are only three of them:
How to properly prepare tools for work
If the tin does not stick to the soldering iron tip, it is quite possible that the preparatory operations were carried out incorrectly, or they were not carried out at all. First of all, when preparing the instrument, you need to tin it. Without this procedure, even in the absence of oxide and contamination, solder will still not stick to the metal during soldering. Tinning involves coating the surface of the tip with tin. The same procedure should be carried out with the parts being soldered, this will improve the quality of the connection. The process is extremely simple: you need to dip a hot tip into tin, which will cover its surface.
If there is carbon deposits or an oxidizing film on the tip, they must be removed before tinning. The same procedure is recommended for new instruments. The surface is cleaned mechanically, for which sandpaper or a fine-grained file is suitable. The surface must be cleaned thoroughly, without leaving deep scratches and grooves on the metal surface. If there are depressions and scratches, it is in them that an oxidizing film will form and dirt will accumulate, which will then be difficult to clean.
Important! The soldering iron should be cleaned only after it has cooled down. This process is best done before soldering rather than after it.
Cleaning the soldering iron tip from contamination
When the surface is cleared of all deposits, flux must be applied to it. If there is liquid rosin, it is also applied to a cold surface using a brush or other auxiliary objects. If there is flux in a solid state, the tip is immersed in it at the moment when it warms up and reaches the desired temperature.
Important! It is better to immediately lower the tip into the rosin so that as it warms up it sinks into its surface. This will reduce the chance of oxidation
Situations may arise when the tip does not tin. This is very similar to the problem when solder does not stick to the soldering iron tip. If the temperature of the tip becomes significantly higher than the melting point of the solder, it simply does not stick to the surface of the metal, but flows off it, since it is in a liquid state. Nothing else except lowering the temperature will help here. The cleanliness of the surface and the absence of an oxidizing film will not play a role if, under the influence of the high temperature of the tip, the material melts and drains. If the temperature continues to rise, it will simply begin to evaporate.
The best option is when the temperature of the tip is slightly higher than the melting point or equal to it. This makes it possible to maintain the transition state between solid and liquid, which is required for soldering. After overheating, the tip must be cleaned mechanically again.
If everything is done correctly, the solder will stick to the surface without any problems. The optimal temperature allows it to be in the desired state, avoiding lumps and liquid drops.
After cleaning the soldering iron tip, it is recommended to tin
In case of nickel plating
Owners of nickel-plated tools also wonder why the solder does not stick to the soldering iron tip. It is believed that there is no need to tin it, much less clean off the coating with a file or sandpaper. But over time, after a certain period of use, it becomes noticeable that the material stops sticking to it. Cleaning of the coating occurs in a slightly heated state. You should try to wipe off all the carbon deposits with a damp cloth. After this, the procedure is as follows:
Preheating and temperature selection
If you want to know how to solder correctly with a soldering iron, you need to learn how to determine whether the soldering area is hot enough. If you use a regular soldering iron, you can navigate by the behavior of rosin or flux. At a sufficient level of heating, they actively boil, release steam, but do not burn. If you lift the tip, drops of boiling rosin remain on the tip of the tip.
When using a soldering station, proceed from the following rules:
- The heating temperature of the parts should be 40-80°C higher than the melting temperature of the solder (indicated on the packaging).
- The temperature of the soldering iron tip should be 20-40°C higher than the heating temperature of the parts.
That is, at the station we set it 60-120°C higher than the melting temperature of the solder. As you can see, the temperature gap is large. How to choose? Depends on the thermal conductivity of the metals being soldered. The better it removes heat, the higher the temperature should be.