I need to attach a sign to my artificial stone monument. What is the best way to drill into stone to avoid jambs, cracks and chips?
Artificial stone must be drilled with the same drill bits as concrete.
Namely, either Pobedit drills (with a Pobedit tip) or diamond-coated drills
You don’t need crowns with soldering, the holes for the plate are not large in diameter, drills are enough.
It is better to drill the monument without impact; a slab that is not very thick may burst.
It is better to drill with a hammer drill, it is heavier, but do not use a blow.
Turn on the blow if it is very difficult to drill into artificial stone, because they (stones) are made of different materials, concrete, porcelain stoneware, and so on).
The drilling process itself is not complicated; prepare water, make markings and mark the area for the hole.
If it is possible to lay the monument horizontally, then pour a small puddle of water onto the drilling site; the drill will not heat up when entering.
If the monument has already been installed, then frequently dip the drill into the prepared water.
If you do not cool the drill constantly, it will quickly “shrink”.
It is also important to remove the drill from the hole and clean the hole.
And of course, you need to drill from a smaller drill diameter to a larger one.
Source: www.remotvet.ru
Making a hole in an artificial stone sink: instructions
When purchasing a sink made of artificial stone, the client is often faced with a problem such as the lack of a hole for the faucet. Naturally, you should turn to experts, but this issue can be resolved without the help of others.
In order to understand how to drill a sink made of artificial stone, you must first understand what it is made of. There is no exact definition of “artificial stone”, which is why different manufacturers use this term to refer to different materials that differ in density and properties.
The most common are:
- porcelain stoneware;
- agglomerate (fragranite, silgranite and their analogues);
- acrylic stone.
Working with any of these materials has its own characteristics. In order to decide which drill to use to drill a stone sink, you must first understand what exactly was purchased.
The photo shows a porcelain stoneware countertop
Porcelain stoneware is the strongest and most durable of the materials listed above. It is not afraid of temperature and chemical influences, and is resistant to mechanical damage. It stands out due to its booming “glass” sound.
Other types of artificial stone produce a duller sound due to the addition of plastic and polymer materials. Despite the fact that making a hole in other materials is easier than drilling a porcelain stoneware sink, very often the choice of clients falls specifically on it. Taking into account the extraordinary density of the material, ordinary drills will be powerless here.
Only a crown or a carbide-tipped drill, ideally diamond, can handle porcelain stoneware. Sintered ring drills will also be able to work with it, but their price is even higher, so they are chosen occasionally, only if there is a need for a larger volume of work. Due to its high strength, when working with this material, you need to cool the drill and working surface with water. It is necessary to work with porcelain stoneware at low speeds (300-400 less).
Where to cut the hole?
Another important question that will arise regardless of what material the sink was purchased from: should I cut a hole in it from the front after installation? Or should I do this before installation and from the back?
Each method has a number of pros and cons:
- In the first case, the edges on the front side will be even smoother, but there is a possibility of damaging the front side of the sink with a drill, and if it has a narrow side, then splitting the edge.
- In the 2nd option, the risk of destroying the bowl is even lower, but with all this there is the possibility of getting a sloppy edge of the hole on the front side. Almost always this is not critical, because the edges of the hole are blocked by the mixer. When turning over, there is a possibility of unintentionally making a hole on the wrong side, so it is better to mark the side on which you want to install the faucet.
In any of the methods, it is better to place the hole away from the edge of the product, but at the same time without touching the bowl. To do this, before work, you need to attach the lower nut of the mixer to the sink and mark its center.
Answers from experts
Bulbasaur:
Manufacturers of sinks made of artificial stone are a little disingenuous when they claim that such material has properties similar to natural stone. In terms of properties it may come close, but not in terms of strength. An artificial stone sink is essentially plastic, or more precisely, a polymer mass mixed with stone chips. The proportions vary, from 20 percent crumbs and 80 percent resins, and up to 80 percent crumbs and 20 percent resins. In any case, drilling such material is much easier than natural stone. \
See here: How to drill a hole for a faucet in a sink made of artificial stone easylife.16mb m/drill-sink-from-stone/
Valery:
It is necessary to mark with a marker the circumference of the hole of the required size and drill with a drill along the marker with a 5mm drill bit,
Daria Kalashnikova:
drilled
NOT OLD YET:
Don’t spoil the beauty, mount a wall-mounted faucet. Drill and you’ll be in trouble—a place where there’s a constant leak.
Andrey Kozmin:
Stainless steel is easy to drill. There are special stepped drills, you can simply drill according to the markings - then, no matter what, the trim closes. The main thing is whatever the mixer is.
Yuri!!!:
I don’t know the thickness of the metal, but the principle is such a small drill in a circle, then a needle file, etc. if the metal is thin, then drill into the center and use metal scissors to enlarge it. Stainless steel, by the way, doesn’t drill well (there are diamond bits, but I’m afraid they will cost more than washing)
Drifter of the Seas:
Mark the circle under the mixer with a marker, carefully drill out with a thin drill (3-4mm) along the inside of the marker, pluck it out with pliers
And I am Fsya Taka Zagadoshna:
A 32 mm cutter for metal, it is placed in a drill! Place a dowel or nail at the point where the hole will be (the tap will be located). To do this, you need to remove the sink. You can embed the faucet directly into the countertop; the hole in the countertop should be treated with silicone.
Winds:
and these sinks are not designed for a hole)))
The disadvantages of stainless steel with holes are that they bend and after a short time the fastening nut under the sink becomes loose and the mixer becomes loose - accordingly, there may be problems with rapid wear and tear. gaskets and leaks..
a hole is drilled in the countertop, the cut is treated with silicone, a washer must be placed (glued) under the nut - the mixer will remain motionless - acc. more durable.
Sergey Romanov:
There are crowns for metal, our price for them is in the range of 1500-1800, the hole turns out neat, but don’t forget to pour plenty of water, otherwise the edge of the saw will darken, they gave me good advice to drill with a small drill, just not 5mm, take a thinner one (it’s cheaper than a crown)
REM2009:
Drill 6mm in the center and then use a drill like this to the desired size. (in the jargon “carrot”) This drill in thin sheet metal allows you to obtain round, even holes; drilling by other methods is labor-intensive and requires additional effort to obtain a high-quality hole. (often used in car service)
the kindest of the kind:
on the market where sinks are sold, there is a special device, such as a clamp. Immediately squeeze out a nice hole for the mixer. The metal is thin, yes. On such a sink it is better to install a mixer with two valves, and if it is “one-armed”, then with a very easy movement. The fastening is a bit thin, the tap bends.
Mikhalych:
Isn’t it destined to put it on the countertop? there are no problems at all with drilling and installation.... Moreover, it can be installed from any side.
Drilling Precautions
The ratio of resin to stone chips can be very different. Regardless of the proportions, this material lends itself better to a drill than stone . However, you should still be careful and cautious. A sink made of artificial stone requires careful handling: it is not recommended to carry out any work until its temperature reaches room temperature.
Agglomerate
Milling cutter for working with artificial stone
Agglomerate is a softer material. Usually the sink already has a hole almost drilled. It must be knocked out with a core or drilled with the cutter included with the sink. If the kit does not include a cutter or core, then it is necessary to perform the work with a diamond-coated crown. The instructions are completely identical to the process of drilling porcelain tiles.
Acrylic
The third option is acrylic. If your sink and countertop have color cohesion and create a cohesive space, then it's acrylic stone. This option is not difficult to work with. Ordinary drills are suitable for working with metal or wood.
The diameter of the hole for the mixer is 32-35 mm. It can be drilled with a feather drill for working on wood products. The drill speed should be at medium or low speed. When working with acrylic stone, a lot of chips are formed, and a rather unpleasant odor appears from the plastic heated by the drill.
Standard errors
You need to be careful when creating a hole when using a drill with a router bit. Many experts try to make a hole at the moment when the countertop is already installed. There are also advantages to this method. For example, the edge of the front part can be made as smooth as possible. But this method has many more disadvantages. In this case, not only the stone, but also the sink can be damaged; the edges may break off, scratches may appear, and much more.
It is most reliable and safe to carry out all work from the rear sides. Of course, the hole that goes out may have an uneven appearance. But the entire structure will remain intact and unharmed. The mixer will also be stopped in this hole, capable of covering any unevenness. The front part of the sink will be safe and sound. You can work in two ways: using a drill, or knocking out loose cast plugs.
Porcelain tiles
The strongest and most durable of the entire group is porcelain stoneware. It serves for a long time and is durable, tolerates temperature and chemical influences well, so it is in great demand. But it is also the most complex material; it is most difficult to make a hole in it than in other types of artificial stone.
The best option for carrying out the work is to choose a crown for porcelain stoneware. It can be supplied as a set with or without a centering drill.
When working with porcelain stoneware, the drilling site should be constantly cooled, and the drill speed should be at the lowest possible speed.
You need to understand which side to drill from and when. If from the front side, after installation, the edges of the hole will be smooth and neat, but there is a danger that the drill will slip and spoil the appearance, for example, scratch or damage the edge.
If from the back, before installation, you are unlikely to damage the bowl, but perhaps the hole will have uneven edges. Basically it's not a big deal because they will be covered by the faucet.
Remember - the further the hole is from the edge of the product, the better. Don’t forget about the bowl so as not to get another, completely unnecessary hole - porcelain stoneware is both a durable and very fragile material. Therefore, the following rules must be observed:
- Before carrying out the process, fix the sink, put chipboard under the bottom, this will protect the work surface.
- Drill exactly perpendicularly, otherwise the drill may damage the glaze.
- To prevent the drill from moving, cover the area where you will drill with masking tape.
- Before work, wet the drill; while drilling, spray the work area with water, for example, from a plastic bottle.
How to defeat porcelain tiles
For drilling porcelain stoneware, because it is very hard, use a drill with a special attachment.
Drilling porcelain stoneware is not easy; it is one of the hardest materials to process. To get smooth edges of the hole, you should always start from the front side. At the exit, the drill can make a chip, but in this case it will remain invisible. If the slab you are going to drill is not yet secured to the floor or wall, you should place a flat board or piece of fiberboard underneath it.
Read also: Standard range of metric threads
If the diameter of the proposed hole is more than 6-8 mm, you must first drill it with a tool with a smaller diameter. To work with porcelain stoneware, it is better to use a hammer drill or a fairly powerful drill.
The drilling speed is low or medium, it depends on the diameter of the drill. The larger the diameter, the lower the speed. It is better not to use a hammer; there is a risk of splitting the slab. In some cases, especially with a large thickness of material, a striker is used at low speeds if there are no voids under the slab, but everyone does this at their own peril and risk. When drilling, you must use water for cooling.
The best results are achieved when using diamond tools. In practice, different drills are used: carbide tips for tiles, a stylus with a diamond tip, diamond-coated tubes, and diamond bits.
Good results are obtained with thin-walled monolithic diamond-metal tubes made in China, and they are inexpensive, about a dollar per piece.
The drill wears less if you drill perpendicular to the plane of the material. To do this, a drill or hammer drill can be mounted on a vertical stand. In this case, the drill resource almost doubles.
It can be very difficult to start drilling with a crown on a smooth surface; it constantly tries to move to the side, scratching the surface. Therefore, to obtain a high-quality result, you can make a template in advance for holes of different diameters. The template is firmly clamped with clamps and prevents the crown from moving from the drilling point. You can also add water here for cooling.
You can start drilling at an angle to the plane if a template is not used: then the crown cuts into the stone with one side and then is leveled. But this method is better used on softer materials.
You can drill holes in stone using concrete and agglomerates in the same way.
Drilling a hole
We make a hole in the artificial stone sink using a drill step by step:
- To work, you will need a regular drill and a cutter with a diameter of 35 mm. As mentioned above, you need to place the sink on the back side and place a board and newspaper under it.
- Next, mark the location of the mixer so that you can make a hole on the right side and avoid accidentally making a mistake.
- To mark the center of the hole, you need to attach the nut from the mixer and mark its center. Try to keep the hole further away from the edges without touching the bowl.
- Before starting work, make sure that the hammer on the drill is turned off. Begin to work carefully with the drill at medium speeds, avoiding allowing the cutter to move.
- Prepare a small box for the shavings that are generated in sufficient quantities during the process. Passing through the plastic, the cutter heats it up and it emits an unpleasant odor.
- When you finish drilling, clean the resulting hole from dust and chips. The size of the irregularities on the edge will not exceed a couple of millimeters: but they will not be visible under the mixer.
READ How to change a toilet valve
How to avoid mistakes
Let's say you decide to make a hole using a drill with a cutter.
Often, experts make a hole when the sink is already installed in the countertop. This solution has only one advantage - the edge on the front side will be smooth. But it has many more disadvantages: you can scratch the stone, damage the sink, chip the edge, and so on.
Therefore, it is better to drill a hole from the back. But there is a possibility that the hole will have an uneven appearance from the outside. However, a mixer will be located in this place, which will cover the uneven edges. There is no risk of damaging the front side of the sink.
There are two fundamentally different methods of work. The first involves working with a drill, and the second involves knocking out the weakened cast plugs provided for by the design. Let's consider each of them in order.
Punching a hole in the sink
Some artificial stone sinks have cast plugs that are knocked out during installation. They are usually color coded on the front. First of all, the sink is installed in place in the countertop, but is not fixed.
Then you need to choose the right tool and beat off the plugs with a strong blow with a hammer. A punch with a diameter of 8 mm is suitable for this role, but not a screwdriver. You only need to knock out the cork from the top: that is, from the front side. Use a rasp to smooth out the uneven edges of the hole.
Using this method you can make a hole for the mixer .
- The center is outlined and the circle is drawn.
- Using a drill, holes are drilled along the circumference, the distance between which is 4 mm.
- To prevent cracks from appearing when knocked out, firmly fix the sink.
If there is a need to increase the radius of the hole, you need to draw another circle of the required size. All cuts are made from the same front side along the circumference at a distance of 4 mm. Using a punch or chisel, remove unnecessary parts.
Making a hole in an artificial stone sink: step-by-step instructions
Sinks made of artificial stone do not always have a special cutout, so there is a need to make a hole in the sink yourself. A common obstacle is the fear of damaging or crumbling the sink. Although artificial stone is close in properties to natural stone, in essence it is more like plastic: or, better said, like a polymer mass mixed with stone chips.
What are the basic rules for laboratory furniture?
The most basic rule for laboratory furniture is that it should be ergonomic and practical. Conducting experiments and research of various types should be carried out in a convenient and well-planned environment. Different decor in such rooms is categorically unacceptable.
The second rule says that a table or some kind of cabinet, whether it is retractable or not, should be simple and multifunctional. For any business there must be certain furniture that will be responsible for a particular task. For example, a drying cabinet must be used only for drying.
The third rule is: laboratory furniture in Moscow
must be very durable, since it will have to withstand difficult loads. The strength of such furniture must be at the highest level; as a rule, laboratory furniture must be resistant to cracks. Often such furniture is made of durable material, such as plastic, metal or glass.
How to avoid mistakes
Let's say you decide to make a hole using a drill with a cutter.
Often, experts make a hole when the sink is already installed in the countertop. This solution has only one advantage - the edge on the front side will be smooth. But it has many more disadvantages: you can scratch the stone, damage the sink, chip the edge, and so on.
Therefore, it is better to drill a hole from the back. But there is a possibility that the hole will have an uneven appearance from the outside. However, a mixer will be located in this place, which will cover the uneven edges. There is no risk of damaging the front side of the sink.
There are two fundamentally different methods of work. The first involves working with a drill, and the second involves knocking out the weakened cast plugs provided for by the design. Let's consider each of them in order.
How to avoid possible mistakes
Unlike specialists who often drill the sink from the outside after installing it in the countertop, when doing the work yourself, it is better to make a hole from the back. This needs to be done for a number of good reasons, including the possibility of the edge of the product chipping off, especially if it has a too narrow frame, scratches appearing on its surface and many other negative consequences.
The only significant advantage of drilling from the outside of the sink is the ability to make a hole for the faucet with as smooth edges as possible. Yes, if the hole is made from the inside out, its appearance may be visually less attractive, but the sink will remain intact and unharmed, and after installing the faucet, this defect will also not be noticeable.
Drilling a hole
We make a hole in the artificial stone sink using a drill step by step:
- To work, you will need a regular drill and a cutter with a diameter of 35 mm. As mentioned above, you need to place the sink on the back side and place a board and newspaper under it.
- Next, mark the location of the mixer so that you can make a hole on the right side and avoid accidentally making a mistake.
- To mark the center of the hole, you need to attach the nut from the mixer and mark its center. Try to keep the hole further away from the edges without touching the bowl.
- Before starting work, make sure that the hammer on the drill is turned off. Begin to work carefully with the drill at medium speeds, avoiding allowing the cutter to move.
- Prepare a small box for the shavings that are generated in sufficient quantities during the process. Passing through the plastic, the cutter heats it up and it emits an unpleasant odor.
- When you finish drilling, clean the resulting hole from dust and chips. The size of the irregularities on the edge will not exceed a couple of millimeters: but they will not be visible under the mixer.
Punching a hole in the sink
Some artificial stone sinks have cast plugs that are knocked out during installation. They are usually color coded on the front. First of all, the sink is installed in place in the countertop, but is not fixed.
Then you need to choose the right tool and beat off the plugs with a strong blow with a hammer. A punch with a diameter of 8 mm is suitable for this role, but not a screwdriver. You only need to knock out the cork from the top: that is, from the front side. Use a rasp to smooth out the uneven edges of the hole.
Using this method, you can make a hole for the mixer.
- The center is outlined and the circle is drawn.
- Using a drill, holes are drilled along the circumference, the distance between which is 4 mm.
- To prevent cracks from appearing when knocked out, firmly fix the sink.
If there is a need to increase the radius of the hole, you need to draw another circle of the required size. All cuts are made from the same front side along the circumference at a distance of 4 mm. Using a punch or chisel, remove unnecessary parts.
Standard errors
You need to be careful when creating a hole when using a drill with a router bit. Many experts try to make a hole at the moment when the countertop is already installed. There are also advantages to this method. For example, the edge of the front part can be made as smooth as possible. But this method has many more disadvantages. In this case, not only the stone , but also the sink can be damaged; the edges may break off, scratches may appear, and much more.
It is most reliable and safe to carry out all work from the rear sides. Of course, the hole that goes out may have an uneven appearance. But the entire structure will remain intact and unharmed. Also in this hole the mixer , capable of covering any unevenness. The front part of the sink will be safe and sound. You can work in two ways: using a drill, or knocking out loose cast plugs.
READ DIY artificial stone made from cement
Drill hole method
- Initially, for work you need a drill with a diameter of 35 millimeters. The sink is located on the back side, and it is better to put paper or a board under it.
- Afterwards, the location of the mixer is noted in order to avoid making mistakes during operation.
- To do this, mark the center of the mixer nut. This point will be the center of the hole. It is better to make the hole further from the center, but without touching the bowl.
- During operation, the drill blow must be turned off. The work is performed at medium speed. This is necessary so that the cutter moves in the other direction.
- Initially, it is better to prepare a special box for chips, which will be collected during the work process. When the plastic is heated due to the cutter, an unpleasant odor appears. Therefore, you can wear a protective mask to avoid getting sick.
- Afterwards the hole must be cleaned of chips, dirt and dust. The irregularities should be small, a few millimeters in size. Then we can say that the job was done right.
Hole Creation Methods
In general, work can be done in two ways, which are radically different from each other. In the first case, you must use a drill to make the hole. The second method is to knock out the weakened cast plugs that are provided by the design.
How to drill a sink made of artificial stone: step-by-step instructions
When making a hole in a sink using a drill, in addition to it, you also need to have a cutter. It is mainly used with a diameter of 35 mm, which corresponds to most faucets installed on sinks. Otherwise, you need to choose a tool that is suitable for its dimensions. If you have everything you need, you can start drilling, performing actions in the following sequence:
- Initially, you need to cover the surface on which the sink will later be located with newspapers or something similar. As an alternative, you can use a board that should be placed under it. It is also advisable to first prepare a small box for chips, which will appear in quite a significant volume during future work.
- Next you need to place the sink with the back side on the prepared surface.
- At the next stage, you need to decide on the installation location of the mixer and make the appropriate markings, which will avoid accidental mistakes. It is necessary that in the end the hole is located at some distance from the edges and at the same time does not touch the bowls. To find out its center, you need to lean the nut from the mixer against the selected area of the sink and place a point in the middle of the space inside it.
- Now you can start drilling, having first not only installed the cutter in the drill, but also checked that the tool’s impact function is turned off.
In addition, while making a hole, it should operate at medium speeds. Once you start using a drill, you must be extremely careful to avoid driving the cutter. - After drilling is completed, all chips and dust generated during drilling should be removed.
As a result, there may be small irregularities along the edges of the resulting hole, reaching several millimeters, but you should not worry about their presence, because in the future you still have to install the mixer, behind which they will in no way be visible.
Punching a hole
Some models of sinks made of artificial stone have cast plugs that need to be knocked out during installation work.
They are mainly distinguished by color on the outside of the shell. It is necessary to begin work after placing the sink in the countertop, but without securing it to the work surface. Then you need to select a tool suitable for this task, which, as mentioned earlier, can also be supplied with the sink, for example, a center punch, and begin knocking out the plug using it and a hammer, which should be used to deliver a precise blow with great force.
If when purchasing a sink there was nothing designed for this purpose, then you need to get one or a punch with a diameter of 8 mm. A screwdriver is not a suitable option in this case and should be avoided. Upon completion of the work, it is necessary to smooth out the uneven edges of the finished circle using a rasp. In addition, knocking out the cork can be done in another way, relevant in the situation of its complete absence:
- First of all, you need to draw a circle and mark its center in the same way as when using a drill to create a hole.
- Next, using the specified electric tool, you need to drill holes along the length of the intended hole, between which you need to maintain a distance of 4 mm.
- At the next stage, you can start knocking out the circle, having first securely fixed the sink, which will avoid the formation of cracks.
If there is a need to expand the radius of the hole, then it is necessary to draw another one of the required diameter around it. Similarly, on the outer side along the circumference, cuts should be made every 4 mm, and then, using a punch or chisel, excess particles must be removed. After figuring out how to drill a sink made of artificial stone and preparing everything that is needed during the work process, you can begin to carry out the work with your own hands, not forgetting to observe all the important nuances that allow you to make a high-quality hole and avoid mistakes that could spoil the appearance of the sink or even lead to its damage. Video:
Making a hole in an artificial stone sink
Decorating sinks today can be very diverse. For example, there are models implemented as a single unit with a tabletop. In this case, a special acrylic stone is used. It has a low density, which makes working with it easier and simpler. If the sink is made of artificial stone, then many people wonder how to drill a hole for it. For this, traditional drills are used, specially designed for working with metal or wood.
To install a water tap, a hole of no more than 35 millimeters is often cut as standard. If the product is made of artificial stone, then you can use a feather blade or a Forstner cutter of the same diameter. The speed should be low and average. During operation, a large amount of chips will be released. Artificial stone contains plastic that has an unpleasant odor. Therefore, it is better to use protective masks.
This type of material is soft, making it great for creating sinks. You need to be as careful as possible when working with such material. The ratio of resin to stone chips may vary. Drilling such material is easier than ordinary stone. But even in this case, you need to be as attentive and careful as possible. No work should be carried out with such material until its temperature is equal to room temperature.
How to punch a hole in a sink for a faucet
There are types of sinks that have special artificial stone. It has molded plugs, they can be knocked out during installation work. If you look from the front side, they are most often marked. Initially, the sink should be installed on the countertop, but should not be fixed.
After this, the necessary tool is selected and the traffic jams begin to break out. In this case, hammer blows are used. You can also use punches having a diameter of eight millimeters. It is better not to use a screwdriver for this activity. The cork is knocked out from above, from the front side. Next, a rasp is used to smooth the edges. This method is not suitable for all types of sinks, but it is simpler. Even a beginner who has never held a tool in his hands can handle it.
Porcelain tiles
Porcelain tiles are the most durable and durable material of these. It is highly resistant to any external influences. As you might guess, a conventional drill cannot cope with such a particularly strong material. For drilling porcelain stoneware, drills with carbide tips (the best one is diamond) are ideal.
Where is the best place to drill a hole? This question arises because there are two drilling options:
- Drill a hole on the front side after the sink is installed.
- Drill a hole from the back before installing the stone sink.
The choice will be up to you, but keep in mind the advantages and disadvantages of each method. In the first option, the edges will be much smoother, but there is a risk that the drill will damage the front part of the sink. The second option reduces this risk to almost a minimum, but the problem may arise in another way: the result may not be a very neat edge. But in fact, this is especially scary because the edges are processed by the mixer.
Drilling technology
Processing of solid materials involves the use of a certain technology. Drilling stones has its own specifics. For example, granite is a very hard and at the same time very fragile stone. When choosing the rotation speed of the tool, you need to proceed from the diameter of the hole being drilled. The larger the diameter of the hole, the lower the required speed.
To get the hole in the right place, you need to make a small groove by tilting the rotating drill to the side.
During drilling, water supply must be mandatory. Water, firstly, protects the cutting edges of the diamond drill from overheating, and, secondly, washes away the sludge. Before starting drilling, in order to get the hole in the right place, you need to tilt the rotating drill to make a small groove. After this, the drill is leveled, and even drilling begins in this place. This is necessary so that at the very beginning the drill does not move from the given point.
To avoid damaging the edges of the hole, the drill must be well centered. The drilling object must be on a flat surface and well secured. Unlike concrete, drilling granite using perforation mode is not advisable. It is very fragile and can crack if subjected to shock.
When drilling granite, you should proceed from the following parameters: hole diameter and drill rotation speed. With a hole diameter of 6 mm, the rotation speed should be 2000 rpm. With a hole of 12 mm, rotation speed of 950 rpm. If the hole is 24mm, the rotation speed should not exceed 700 rpm. Such data was obtained experimentally and is the most optimal.
In some cases, granite needs to be reinforced. This need arises when a tabletop is made from a relatively thin sheet of granite. A large load on the surface of the table can break it. To increase the strength of the granite slab, it is reinforced with steel rod.
A smooth groove is made on the inner surface of the slab using a grinder and a diamond wheel. The depth and width of the groove should be 1 mm larger than the steel rod. After removing dust from the groove, a steel rod is placed in it. The rod placed in the groove is filled with superglue. After the glue hardens, the strength of the reinforced granite slab will be increased several times. This has also been established empirically.
Sometimes situations arise when working with stones when it is necessary to make a hole. Of course, when you have the necessary equipment at hand, this is much easier and does not cause any inconvenience at all. Unfortunately, such equipment may not be at hand at the right time, but this hole is so necessary. In this case, you can use the tips provided and do everything yourself.
Selection of tools
First you need to select special equipment in order to make a hole in the stone. In this case, a diamond drill bit is best. It is important to remember that a classic drill that has a pobedit tip will not be suitable for such purposes, but they are sold at every step in the construction market. In this case, the quality of drilling will be at the lowest level. In addition, such equipment can even ruin the work, and the necessary hole will not be made. Using such a tool, it quickly burns and breaks the edge, which is not a workable result or a good option.
Diamond drill
Today, diamond drills are available on the world market that can cope with such a task without any problems. This tool also has another name - a diamond crown. Using such equipment, you can make a hole in stone of any diameter that the master needs.
Why is the drill called a diamond drill? This is due to the fact that the tip is diamond coated. It is because of this that the work is greatly facilitated, while making the hole clean and even. As for the cost, it will depend on the thickness of the spraying, as well as the service life of the drill.
Any diamond bit can be used to make multiple holes, although there are exceptions. For frequent use of the tool, it is best to purchase a drill that has been made by thermal sintering. This method implies a rigid connection between the body of the drill and the granules. Such a tool is a significantly higher resource when compared with crowns, the manufacturing method of which is diamond sputtering.
The tools also differ in the way the crown is attached to the tool. Mounting is carried out both on an angle grinder and on a drill, if, of course, there is a tail with an external thread and an internal M14 thread. Mounting is carried out on a special installation that produces diamond drilling.
Once the tool has been selected, you need to start drilling a hole in the stone. But in order for the hole to be neat and even, it is necessary to use well-developed techniques.
Hole drilling technique
In order to drill a hole in the stone, you need to use water. This action is necessary because the water cools the cutting edge, thereby preventing it from overheating. Thus, the diamond drill will work much longer, and all the sludge will be washed out of the spores. In this case, the edge will not jam, and the stone will not overheat during drilling, which is guaranteed to give a neat and clean edge.
For example, companies that process stones have special installations. Diamond drilling is carried out automatically, as well as water supply. This happens through the inside of the device. Thus, the edge is constantly cooled and the drill is cleaned. When drilling at home, you can organize a bath that will be located around the hole, and thereby simultaneously cool the edge. So when drilling, you only need to lift the tool so that water constantly gets into the hole and onto the edges of the drill.
When making holes in stone, it is best to set the tool to the lowest speed possible. Small drills, which are made using diamond sputtering technology, should operate at a speed of approximately 700 to 1000 revolutions per minute when drilling.
For example, crowns that were made using thermal sintering technology operate at a speed that is constantly changing, depending on the diameter. Thus, for hole diameters:
At 4 millimeters, the speed should be from 1900 to 2100 revolutions per minute; At 10 millimeters, the speed should be from 900 to 1000 revolutions per minute; At 22 millimeters, the speed should range from 650 to 750 rpm.
Preparing to drill a hole
If you have minimal or no experience in drilling stone, it is best to practice on some other piece of wood before you start working.
To begin with, it is best to make markings. Pencils very often become invisible on the stone, so it is best to leave marks with masking paper tape on top of which the markings will be made.
Drilling begins at a significant angle, through which a small groove is drilled. Gradually you need to align the crown so that it acquires a vertical position, but you should not put too much pressure on it. If you start to put pressure on the diamond drill, pressing it harder against the stone, the tool will begin to move and ruin the surface.
With little experience working with a drill, you can ruin the polishing of the stone, since it can be very difficult to hold the tool in your hands. In this case, the edges of the hole are broken, and drilling is not done exactly in the intended place.
One important part of the laboratory is the furniture. Each laboratory in which chemical, biological, and medical research will be carried out must have appropriate furniture. Special tables, cabinets, cabinets, tables and cabinets - all this is an integral part of the laboratory.
For a person who has virtually no idea of how the process of working in a laboratory occurs, it is completely unclear why an ordinary table or chair is not suitable for this. But in fact, furniture plays a huge role in the laboratory, which is why household furniture cannot be in the laboratory.
How to drill a hole in a stone sink?
A sink made of artificial stone is expensive, stylish and reliable. But when purchasing it, it is worth remembering that in some cases some difficulties may arise. In one of our materials, we have already said that one of the common problems is caring for a stone sink. Along with this, another common difficulty is drilling holes in such a sink. As a rule, it is done under the mixer . In this article we will tell you how to do it carefully and only correctly.
The most common materials for making stone sinks are considered to be:
- Acrylic stone;
- Porcelain tiles;
- Stone agglomerate.
The mention of the material was not accidental. It depends on what type of stone the sink is made of and which drill will be used to make the hole.
Stone agglomerate (fragranite, silgranite)
Experts believe that working with such material is somewhat easier than with porcelain stoneware. Many brands that produce such sinks include cutters or cores in their kits. With their help, a stone piece that has not yet been completely drilled out is knocked out. If they are not included in the kit, then a diamond-coated cutter will do, and then the method is the same as when working with porcelain stoneware. A forstner cutter will also help when working with stone agglomerate.
Acrylic stone
Acrylic artificial stone is the most fragile material of the above. Acrylic stone is the easiest to drill. Holes in it can be made using a regular drill, which is used in working with metal and wood. For standard faucets, the hole usually has a diameter of 35 mm. Such a hole can be easily drilled either with a feather drill or a milling cutter of the same diameter. In this case, work can be done at medium speeds.
In any case, no matter what stone material you are dealing with, it is better to entrust the work to a trained craftsman. Stone sinks are quite expensive and it is better to play it safe, especially if you do not have any experience working with this type of material.
Nuances of algomerate shells
If you purchased a sink made of stone agglomerate, it will be a little easier to work with.
Well-known manufacturers usually include a cutter or core, which is used to knock out a piece of stone that has already been drilled, but not completely. If they are missing, then it is best to use a cutter or diamond-coated crown and proceed as when working with porcelain stoneware.
The Fostner cutter will also cope with a hole in a stone agglomerate product. But be prepared for the fact that after this you will need to sharpen it, or even throw it away completely.
How to work with a stainless steel sink
Manufacturers often produce stainless steel sinks without the special opening required to install the faucet. As a rule, such sinks are made of durable steel. This sink is very difficult to drill with a regular drill. A diamond-coated crown is barely enough for one hole (after that it will only be scrapped).
We offer for your consideration several options for installing a hole for installing a faucet on a stainless steel sink, although these tips are universal and are suitable for sinks made of ordinary steel.
Option #1
To drill a hole in it, you need to use cobalt drills (or tungsten, but they are more expensive) and a cutter. A cutter, or punch, is a two-part tool. It consists of a die and a knife connected by a bolt.
Before starting work, the sink must be turned upside down. Next, we follow the following procedure:
1. Mark the installation location of the mixer with a pencil or bright marker. 2. Make a small dent in the center of the circle so that the drill does not slip off. 3. Make an initial hole using a 5-6 mm drill, and increase it to 10 mm with a drill of the appropriate diameter. 4. Install the punch (notch) so that the part with a smaller diameter is where the mixer should be. Tighten the bolt until the cutter cuts a hole.
Option No. 2
The second option involves drilling holes only for flexible connections and mounting stud(s). You can use the mixer pressure plate as a template. This option will save you from buying a cutter. But, in any case, you cannot do without cobalt drills.
Option #3
Here's a video as an example:
We hope the article was useful. If you know of other ways to drill holes in a sink or sink, write in the comments.
Related posts:
How to repair cracks and chips in a sink or sink
Installation of an invoice, mortise sink with your own hands
- DIY sink installation
Drilling a sink made of artificial stone - detailed instructions
When purchasing a sink made of artificial stone, the buyer often faces a problem such as the lack of a hole for the faucet. Of course, you should turn to professionals, but you can solve this issue yourself.
In order to understand how to drill a sink made of artificial stone, you must first understand what it is made of. There is no clear definition of “artificial stone”, so different manufacturers use this term for various materials that differ in density and properties.
The most common are:
- porcelain stoneware;
- agglomerate (fragranite, silgranite and their analogues);
- acrylic stone.
Working with any of these materials has its own characteristics. To decide which drill to use to drill a stone sink, you must first understand what exactly was purchased.
The photo shows a porcelain stoneware countertop
Porcelain tiles are the strongest and most durable of the above materials. It is not afraid of temperature and chemical influences, and is resistant to mechanical damage. It stands out due to its ringing “glass” sound.
Other types of artificial stone produce a duller sound due to the addition of plastic and polymer materials. Despite the fact that making a hole in other materials is easier than drilling a porcelain stoneware sink, very often the choice of clients falls on it. Given the extraordinary density of the material, ordinary drills will be powerless here.
READ Installing a heating meter in an apartment
Drilling a hole for a faucet in a DR.GANS stone sink
Only a crown or a carbide-tipped drill, preferably diamond, can handle porcelain stoneware. Sintered ring drills will also be able to work with it, but their cost is much higher, so they are rarely chosen only if there is a need for a large amount of work. Due to its high strength, when working with this material it is necessary to cool the drill and working surface with water. You need to work with porcelain stoneware at minimum speed (300-400 no more).
How to give a slab the desired size and shape
At enterprises, artificial stone is cut on stone-cutting machines with coolant supplied to the cutting site, and laser or waterjet cutting is also performed. The last two methods allow you to give the stone the most amazing, even curvilinear shape.
At home, the choice is not so great. This problem can be solved using a hand-held circular saw or plunge-cut saw, selecting a blade that matches the material being cut. An electric tile cutter will also do the job well.
Electric tile cutters are equipped with a small coolant bath located under the cutting table. Based on their operating principle, there are two types of tile cutters. In one case, the disk is installed motionless, and its work table with a stone attached to it moves. In the other, the disk, together with the drive, moves along guides above the cutting plane.
All of these devices work with diamond blades of various configurations, solid and segmented.
If the relief and thickness of the stone tile allows, it can also be cut using a manual tile cutter.
But the most universal tool for cutting stone is considered to be a grinder with a diamond blade. It is advisable to choose a disk of large diameter. Different discs are available for different materials.
To cut cuts in stone, they sometimes use a jigsaw or a diamond string. There are also special stone blades for a regular hacksaw for metal.
In order to install the faucet in an artificial stone sink, it needs to be drilled. But drilling a hole in such a sink is not so easy; this requires special equipment. Let's talk today - how to drill a hole in a sink made of artificial stone.....
First, let me explain why you need to drill a hole. It's simple, many sinks made of artificial stone do not have a hole for the faucet, and you need to drill it to install this faucet. But it is not advisable to drill such a sink with a regular drill, you can simply damage it, and it is not cheap. In order to make a hole we need a special drill - called a Forstner drill.
Where to cut the hole?
Each method has a number of pros and cons:
- In the first case, the edges on the front side will be much smoother, but there is a possibility of damaging the front side of the sink with a drill, and if it has a narrow side, then splitting the edge.
- In the second option, the risk of damaging the bowl is much lower, but there is a possibility of getting a sloppy edge of the hole on the front side. In most cases, this is not critical, since the edges of the hole are closed by the mixer. When turning over, there is a possibility of unintentionally making a hole on the wrong side, so it is advisable to mark the side on which you want to install the faucet .
Acrylic stone
If the sink is made as one piece with the countertop and the same color as it, then it is an acrylic artificial stone. Of the above materials, this one has the lowest density, so it is the easiest to work with. If the purchased sink is made of acrylic stone, then you can drill it with ordinary drills for working on metal or wood.
The hole for a standard mixer, in most cases, has a diameter of 35 mm. In a product made of acrylic stone, it can be easily drilled with a feather drill for woodworking or a forstner cutter of a similar diameter. It is necessary to work at low or medium speeds. When drilling this material, a large amount of chips is formed, and the plastic contained in the acrylic stone emits an unpleasant odor, somewhat reminiscent of epoxy glue.
Acrylic stone is the most pliable of all types of artificial stone, which is why most countertops are made from it. If there is a need to make a hole in it for a sink or hob, it is better to first practice in the middle of the cut part so as not to spoil the entire countertop. Despite the fact that acrylic stone can be sawed with a jigsaw without any problems, it is not advisable to make cuts with it. When working with a jigsaw, so-called stress concentrators often arise (sharp transitions, sharp corners, microcracks), which will affect the service life of the product.
In this case, it is permissible to cut a hole 5 mm smaller than required with a jigsaw. After the work with the jigsaw is completed, bring it to a clean size using a cutter. It is imperative to make an R3 chamfer along the edges; it will also reduce stress and increase the service life of the tabletop.
More information in this video.
Where to buy laboratory furniture at affordable prices
Innogen LLC is engaged in the sale and production of laboratory furniture. Today, the production of this company is in high demand in all CIS countries. The production facility is located on the territory of the Russian Federation, namely in the city of Pskov.
For the production of laboratory furniture, only high-quality and durable equipment for metal processing and painting is used. It must be said that laboratory furniture of the Expert brand has received a quality mark and is also fully certified according to all GOST requirements in Russia.
Over the past six months, I have answered the question of how to make holes in stones probably a dozen times. I decided to systematize it a little and tell it again, in general terms - now without any individualism.
There is a very simple method - ultrasound, but not everyone has the device, it makes a ringing noise, emits noise, is harmful and does not bring pleasure - however, it works wonders quickly and in capable hands. But we won’t even think about him, we’ll do it the old fashioned way
In relatively soft and non-fragile stones - such as malachite, serpentine, lapis lazuli - you can make a hole simply with a good drill for metal - clamp the drill into a drill, put the stone in water - if possible, secure it - and go ahead. You can simply keep a wet sponge next to the hole - the main thing is that it does not overheat.
If the hole is through, be sure to place it on another stone, it is even better to glue it with wax or paraffin, or even double-sided tape. Otherwise there will be a chip at the exit.
With harder stones the story is more complicated. Here you will need a tubular, diamond-coated drill. They are sold in special stores, such as Sapphira, and in ordinary good hardware stores, and much cheaper. Their diameters range from 1-1.5 millimeters to 12-15, and more are quite rare and very specific. I have the most popular 2-2.5 mm.
I cut such drills right away - I cut off the shank a little - then the drill is clamped deeper and does not hit, and this is very important
We take a stone, figure out why we need it, choose a place, put a mark, cover the bottom with a plaster and put it in a bowl of water. Two to three millimeters of water above the stone is enough. The adhesive will help the stone not to slide in the bowl and will at least protect it a little from chipping at the exit of the drill.
And we begin at low speeds, slowly but surely, pressing the drill in the right place
It is very important not to distort it. Every 15-20 seconds the drill should be lifted to remove debris from the hole
After a few minutes, a groove is formed - and the drill already receives direction.
The drill gets dull quite quickly, and doesn’t even get dull - it gets “greasy”, but this can be solved very simply - just put a piece of ordinary emery next to the stone and touch it with the drill from time to time.
When the drill goes a few millimeters deep into the stone, it is advisable to break the core column that has formed with a pin, a scriber, or a piece of iron and shake it out - then knocking it out of the drill is a little more difficult, although this is also not a problem.
When the hole tends to exit, you can start drilling from the other side, but this is only when increased demands are placed on the quality of the hole.
A little more and the drill will go easily - it means it has reached the surface, which is what we need.
That, by and large, is all.
In this case, a 4 mm cabochon was drilled in about a quarter of an hour, but this drill has already made dozens of holes in agates and flints, the new one works faster.
On paper (on the screen) everything is fast and easy, in reality it is a little more complicated, and not even more difficult - you need to be prepared for the fact that it will start to work out normally somewhere in the fifth or sixth.
I’d like to draw your attention to the following points: the drill is quite soft, its walls are thin, you need to clamp it into the chuck extremely gently. When you put the tip aside with the drill clamped so that it does not cling to anything, it bends instantly and practically does not straighten to its normal state
After work, be sure to immediately clean it from the inside, otherwise the sludge will dry out and there will be problems in the future. It is also better to drill soft stones with such drills - carefully and with dignity. You can also drill with a regular drill - it’s better to put it on its side, and constantly dip the pebble under the drill. And remember the rules for working with electrical appliances!
It seems that we can finish here about the holes
And one of these days I’ll try to continue about this agate.
What is the best way to drill stone?
to drill artificial stone using a drill, the end of which has carbide brazing. In construction, such drills are used when drilling concrete. To make the work more productive, drilling is done with a hammer drill. Drilling with a hammer drill occurs due to the impact force of the drill.
To drill artificial stone, a hammer drill and small diamond-coated drills are used.
At the same time, the drill hardly heats up, and drilling holes is done much faster.
Artificial stone can be drilled using a diamond-coated drill. Here you can use a regular electric drill. If you need to drill a thin hole, for example, in a small natural stone for decoration, a diamond-tipped needle is used. This is done on a drilling machine.
If a large diameter hole is required, artificial drill is drilled with a crown. The crown, like the drill, has carbide brazing. In construction, such drilling is done in load-bearing concrete walls. This is done when it is necessary to lay plumbing or ventilation pipes. It is necessary to drill the material with a crown that has a large diameter only at low speeds. During drilling, cold water must be supplied to the carbide tips of the crown. This is necessary to ensure that the soldering does not overheat. Otherwise, they will fail ahead of schedule.
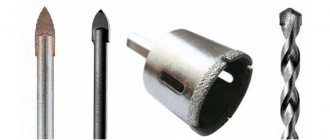
The main tools for drilling stone are:
Drilling tools: carbide-tipped drill bit, diamond-tipped drill bit, carbide-tipped bit, hammer drill, diamond-tipped needles, drill.
how to make a hole in a sink made of artificial stone
- drill with carbide tips;
- diamond-coated bit;
- crown with carbide tips;
- perforator;
- diamond tipped needles;
- drill.
If you need to drill large diameter holes in stones, special equipment is used. So, in order to drill them for communication pipes, such equipment is mounted on a monolithic concrete wall. To prevent the stone from damaging the working surface of the crown, cold water is supplied to it using hoses.
Why is water needed?
When wondering how to drill through granite, you should keep in mind that performing such a procedure without using water as a coolant is not easy. Cooling of the granite drill during operation is mandatory; it is for this purpose that water must be supplied to the processing area.
Device for supplying water to the drilling area
The simplest device for cooling a drill for stone can be made from a plastic bottle by making several small holes in its lid. You will receive a kind of spray bottle, which is very convenient to use during processing. It should be borne in mind that when drilling, water should always be at hand in order to be able to cool the heated drill at any time.
Having selected a diamond drill according to the required diameter, which is optimally suited for drilling stone (including something as hard as granite), the tool must be fixed in the chuck of an electric drill. After this, you can begin to form a hole in the workpiece.
An alternative to water cooling is a bit with a greasy lubricant inside, which flows out into the drilling area when heated
How and with what you can make a hole
To process a material such as artificial stone, you can use the same tools as when working with concrete products. The tool used for drilling the hardest materials can be successfully used for drilling all its varieties. This is usually done with one of the following:
The grinder is used for drilling using special diamond bits, the design of which allows them to be used by screwing them onto a shaft to secure the disk. The crown is installed at right angles to the body of the angle grinder.
Drills or crowns are selected taking into account the size of the required hole and the hardness of the material used. As a rule, they have a carbide tip with pobedite tipped, diamond-coated or brazed diamond segments.
Clamps are used to secure the material. Dry drilling and water drilling are used to cool the cutting edge of the tool and the stone itself. In addition, water cleans the drill from sludge, and the edge of the drilled hole remains smoother. There is much less dust during wet drilling.
In order to drill with water at home, make a plasticine bath around the drilling site or place a rubber ring into which water is added. When using a template, water can be poured directly into it, sealing the cracks with ordinary tape. Sometimes water is simply added little by little from a plastic bottle.
Artificial stone can sometimes have a polished surface on which the marking lines are difficult to see. In this case, paper construction tape glued to its surface will help. The lines are clearly visible on it, even if you draw them with a pencil.
Stone drill: drill granite, marble and other types of stone
to drill a hole in such a durable stone as granite, but it is necessary to thoroughly prepare for this difficult procedure. For drilling, you will need not only a granite drill, but also a set of appropriate tools and accessories. You should also properly prepare your workplace.
Before you start drilling a hole in granite, you should listen to the advice of professionals
How to make a hole in a stone sink for a faucet
Preparation of the workplace
The working surface on which the stone element will be laid for processing must not only be strong and reliable, but also completely flat, and its dimensions must not be less than the dimensions of the product being processed. It is very important that no part of the latter remains suspended.
Special tool with built-in coolant supply – a professional approach to drilling natural stone
What and how to cut decorative stone correctly
Decorative stone is understood as materials of artificial origin that replicate the appearance and, in part, properties of natural stones: granite, marble, tuff, sandstone, etc. Modern development of technology makes it possible not only to imitate any natural finishing material, but also to ensure its good workability .
For an on-site finisher, it is important to know how to cut decorative stone, how to drill it, and how to assemble a whole object from separate parts. Solving these problems requires familiarity with the properties of such materials.
Sources:
https://stroika-1.ru/oremonte/delaem-otverstie-v-mojke-iz-iskusstvennogo-kamnya.html#i-2 https://stroika-1.ru/oremonte/delaem-otverstie-v-mojke -iz-iskusstvennogo-kamnya.html#i-3 https://litstone.ru/delaem-otverstie-v-mojke-iz-iskusstvennogo-kamnja/ https://xn7sbzghf7ail.xnp1ai/articles/vse-o-kamennyh- mojkah/57-kak-prosverlit-otverstie-v-kamennoj-mojke.html https://kvarremontnik.ru/sverlit-mojjku-iz-iskusstvennogo-kamnya/ https://c-triada.ru/masteru/chem-prosverlit -iskusstvennyj-kamen.html