Reliable fastening of the workpiece is a guarantee of the accuracy and quality of engraving or milling processing.
Each CNC machine is equipped with a universal work table designed for installing workpieces of various configurations. For this purpose, they are provided with longitudinal grooves into which clamping screws are inserted. With their help, the workpiece is pressed against the table surface and subsequently does not move due to the forces created by the rotating cutter.
Standard work tables of machines with a movable portal are not suitable for processing large-sized sheets of MDF, plywood, plastics, and composite materials. Part of the machined surface is covered by clamping bars, and there is a risk of damaging the workpiece when tightening the screw. Problems often arise with thin sheets: due to low rigidity, they are deformed when touched by a cutter. Many manufacturers of mechanical engineering equipment equip milling machines with vacuum tables. Most often, this device is offered as an additional option, and its cost is quite high.
Matrix (lattice) work tables of a CNC machine
Matrix tables are made of sheet composite material based on phenolic resins and synthetic fibers.
The surface of the working table is divided by blind channels in the form of a lattice, to which vacuum is supplied through special holes. In order to create a vacuum area for fixing a part on the work table of a CNC machine, it is necessary to insert a sealing cord into the channels around one or more vacuum supply holes. In this case, the cord should not protrude beyond the perimeter of the workpiece being secured, and its ends should be tightly closed to prevent air leaks. The remaining unused openings of the worktable vacuum supply system are closed with rubber plugs.
This method of attaching a workpiece to a CNC machine table is most effective when processing the upper plane of a part with cutters. However, if in the process of manufacturing MDF facades it is necessary to process the sides of the workpiece, or to perform a curved cut, when the lower edge of the cutter should extend beyond the workpiece, then in order not to damage the surface of the work table, a so-called “sacrificial” substrate is used.
Any available porous materials can be used as a “sacrificial” substrate. As a rule, this is sanded chipboard, rough MDF or HDF.
Due to the porosity of the substrate material, by the force of the vacuum system, air is quickly pumped out of its internal structure, and a vacuum area is created on the surface. Thus, if you place the laminated part blank on this substrate, it will be pressed tightly against it and securely fixed.
Using a “sacrificial” substrate on the desktop of a CNC machine, you can mill individual parts, as well as cut and process large-format sheets using Nesting technology.
However, it is worth noting that when cutting large-format sheets on a CNC milling machine in this way, you can encounter a strong loss of vacuum in the area of the cuts and, as a result, small parts and scraps are displaced or fly out from under the tool. To minimize the likelihood of such situations occurring, before using a “sacrificial” substrate, you should make sure that the vacuum pump has sufficient power and the supply elements of the vacuum system have sufficient throughput.
The design features of a matrix-type work table will help solve the problem in a situation where you need to process small workpieces on a CNC machine, or eliminate the possibility of parts moving when processed using Nesting technology. The fact is that manufacturers of woodworking CNC milling machines practically offer a worktable design consisting of several autonomous matrix worktables separated by T-slots.
The effect of dividing the working surface into separate zones is achieved when, in accordance with the programmed order of processing parts from large-format panels, by opening or closing the valves of the vacuum system, all the power from the operation of the vacuum pump is not distributed over several zones, but is transferred to the area where processing is currently being done.
T-shaped grooves on the working surface of the CNC machine allow you to fix the workpiece without using a vacuum system, using mechanical clamps (clamps). On the one hand, this method allows you to reliably fix small parts. On the other hand, turn off the vacuum pump and save energy when processing workpieces using the engraving method, when the entire process can take several hours.
It should also be noted that some CNC machine manufacturers offer a set of vacuum suction cups, similar to those used on console tables, as an additional option for the matrix work table.
DIY vacuum table for a milling machine
A vacuum table for a milling machine remains the most popular method of fastening sheets and workpieces.
The dimensions of such a surface may differ depending on the dimensions of the machine, and the working surface itself is divided evenly into sectors.
What is it?
A vacuum table is necessary for working on a CNC milling machine with large sheets and workpieces. This surface securely fixes the parts and presses the product to the surface. Since the workpiece is securely fixed, operation of the machine becomes more accurate and convenient.
The table operates using a vacuum pump. This is expensive equipment, sometimes it comes complete with the machine, but if you wish, you can make it yourself.
Design features and operating principle
Vacuum is a term that characterizes the area of rarefaction that is formed between the vacuum table and the workpiece fixed on it. In fact, it is not vacuum that acts on the part, but atmospheric pressure. It presses the workpiece to the table surface.
The strength of the vacuum may vary depending on the power of the installed pump, but it will never be greater than atmospheric pressure. At the moment, there are several types of vacuum tables.
Lattice
This device creates a closed loop for the workpiece. The grooves on the working side are made in the form of gratings. Suitable for non-through processing of parts. The grid table includes an aluminum alloy plate with a grid of grooves on the working side, as well as a special hole for pumping air from under the workpiece and vacuuming.
Rotary for CNC
The principle of operation is no different from the previous model, but it is designed in such a way that it can be rotated. This significantly speeds up and simplifies the workflow. The vacuum hose can be connected both in the central part of the stove and at its end.
This allows you to make vertical, transverse and longitudinal movements on the treated surface. Also, such a slab model can create the desired angle of inclination. this allows you to work with round or spiral blanks in different planes.
Splined
This table is necessary for working with small blanks, as well as with parts that have many holes. This table is distinguished by an increased coefficient of friction, which creates a high vacuum force. This reduces the possibility of the blank shifting during operation and increases the accuracy of its processing.
With porous inserts
The plate of this table is designed for blanks of any shape and size. The fixing force depends on the area of the treated surface. Porous slab blocks can be made of aluminum, steel or bronze and eliminate the need for foil or other thin material during the process. There is also no need to reconfigure the table when the type of work changes.
Is it possible to do it yourself?
Buying a finished stove is quite expensive, so you can make it yourself. This is not a complicated process, but it is necessary to have all the necessary tools and parts in the kit.
Workpiece alignment
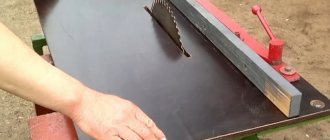
To ensure that the workpieces being processed do not copy the unevenness of the slab, the table must initially be perfectly flat. Therefore, the prepared sheet of metal should be leveled. It is enough to make 1-2 passes with a spiral cutter until it touches completely. The diameter of the cutter is 20 mm.
We make the work surface and boxes
The first step is to create a working surface. In the prepared and leveled sheet, it is necessary to make neat holes in a checkerboard pattern using a drill. The back side of the sheet is intended for adjoining the pump.
To make the structure more reliable, it is necessary to install partitions on the working surface. Their main function is to protect the future table from deformation during operation.
DIY groove cutting
The grooves should be cut in accordance with the selected pattern. Be sure to order the sealing cord in advance and cut grooves depending on its diameter. To begin with, it is better to make the depth of the grooves 2.5 -2.7 mm. If necessary, you can increase it. In operating condition, the cord should not protrude above the surface, otherwise there may be a loss of vacuum.
Making the route
You will need a PVC pipe with a diameter of 25 or 32 mm. The purchased equipment has through holes through which the pipes are routed to the circuit. If the working surface is continuous, you will have to make a slab of two parts, seal the joint and feed the route from the end.
For each branch you will need a separate ball valve, with which during operation you can use only those zones that are necessary.
Drilling holes
The holes in the plate have different purposes. The number of different holes also varies:
- each zone has 1 hole for supplying vacuum at the intersection of the grooves;
- along the centers of the squares to secure to a standard table, and the quantity will directly depend on the rigidity of the slab;
- to fix the workpiece at the ends - holes in the center of the squares.
Pump selection
This is the main detail in the entire design and special attention must be paid to the selection of the pump. If the stove itself is made according to a certain pattern, then you can see which pump is in the original. If this is not possible, then you will have to select equipment experimentally.
The cheapest option for a DIY table would be vortex blowers. Their advantages: do not require shutdown when the maximum vacuum threshold is reached, small size, ease of installation.
Control block
This is the electronic part of the table, which is necessary to regulate the heating of the working area. As a result, the workpieces are more securely fixed. The control unit has several types of implementation, and which one is suitable largely depends on the CNC machine to which the table is being made.
The main differences between professional equipment and homemade equipment
A homemade table has several specific advantages:
- it is cheaper than the factory version;
- can be made to individual sizes and for certain functional features;
- easy to maintain, since it is easier to get all the necessary spare parts for repairs.
At the same time, the factory model has original parts and can last longer than a homemade one. At the same time, creating a vacuum table with your own hands requires effort and time.
The vacuum table for the milling machine makes work more convenient and fixes the workpiece. Some equipment models allow you to rotate the workpiece at the desired angle. If the CNC machine does not include a table, then you can make it yourself using the available diagrams and drawings.
Preparing for work
How to make a coordinate table with your own hands
Before assembly, we study the structure in parts. If there is nothing to choose from, then we buy the necessary materials for one-by-one assembly.
What materials should I use?
It is not forbidden to assemble a structure with your own hands from available materials. Everything comes into play:
- Plywood of any thickness.
- Boards or shields made from them. Any bars.
- Chipboard, fibreboard.
- Rolled steel and aluminum.
- Pipe rolling.
Required components
It is necessary to purchase additional components if a CNC milling table is planned. But a classic stationary machine is not difficult to make from:
- Any hand router.
- Drills.
Tools for work
For work we prepare:
- Wood glue.
- Nuts, screws and bolts of the required size.
- Cover material (MDF or plywood).
- Power tools (jigsaw, miter saw, etc.).
- Sandpaper.
- Marking tool.
Materials and tools for creating a vacuum table for CNC with your own hands
Before you start assembling a vacuum table with your own hands, you should evaluate what work will be performed on the CNC machine in the future. The materials that will be used also play a role. In the process of creating a project, it is necessary to find a balance between the area affected by the downforce and the force that will act on each of the sections (to avoid deformation of the material), determine the power of the required pump, etc.
In order to assemble the table yourself, you will need the following materials and tools:
- a sheet of wood or metal of the required size;
- metallic profile;
- Vacuum pump;
- heating element;
- control unit;
- drill;
- set of wrenches;
- soldering iron;
- screwdriver.
Types of clamping elements for console tables
How to make a table for a circular saw with your own hands?
Suckers. May differ in size (for wide and narrow parts) and height. A significant disadvantage of suction cups is the weak fixation of porous materials (sanded chipboard, plywood).
Vertical clamps. They can operate both from a vacuum system and from compressed air from the pneumatic system of the machine.
Stop plates. They are installed on stops when it is necessary to block small parts that do not allow for strong blocking using suction cups alone.
Horizontal clamps. Used for parts of large thickness (for example, made of solid wood).
CFT table. A smaller version of the matrix table. Separately, using hoses and fittings, it is connected to the vacuum system of the machine.
Counterpatterns. An analogue of a “sacrificial” substrate, which is fixed on the work table with suction cups, but has additional holes for inserting tubes for connection to a common vacuum system.
How to make a mounting plate
How to make a carpentry workbench with your own hands?
The mounting plate must be wider than the diameter of the cutter if you plan to work with several cutting attachments. It is more profitable or cheaper to form this element from 20 mm birch plywood.
But it is more practical to work on a homemade machine with cast polycarbonate as a mounting plate. The essence of the work is this:
- Remove the soleplate from the power tool, having first placed the mounting plate face up.
- Temporarily connect the plate and sole using double-sided tape.
- Select drills to match the diameter of the factory fasteners and drill the correct holes for fastening on the plate.
- Next, connect the homemade plate with the router and place it on the table for adjustment.
- An 8 mm drill is placed in the collet and the motor is lowered. You need to touch the plate with the drill and mark the center.
- Next, follow the mark to make a hole of the required diameter.
Manufacturing stages
After preparing all the tools and components, as well as studying the drawings and the principle of the equipment, you can begin assembling the table with your own hands.
Workpiece alignment
To ensure that the workpieces being processed do not copy the unevenness of the slab, the table must initially be perfectly flat. Therefore, the prepared sheet of metal should be leveled. It is enough to make 1-2 passes with a spiral cutter until it touches completely. The diameter of the cutter is 20 mm.
We make the work surface and boxes
The first step is to create a working surface. In the prepared and leveled sheet, it is necessary to make neat holes in a checkerboard pattern using a drill. The back side of the sheet is intended for adjoining the pump.
To make the structure more reliable, it is necessary to install partitions on the working surface. Their main function is to protect the future table from deformation during operation.
DIY groove cutting
The grooves should be cut in accordance with the selected pattern. Be sure to order the sealing cord in advance and cut grooves depending on its diameter. To begin with, it is better to make the depth of the grooves 2.5 -2.7 mm. If necessary, you can increase it. In operating condition, the cord should not protrude above the surface, otherwise there may be a loss of vacuum.
Making the route
You will need a PVC pipe with a diameter of 25 or 32 mm. The purchased equipment has through holes through which the pipes are routed to the circuit. If the working surface is continuous, you will have to make a slab of two parts, seal the joint and feed the route from the end.
For each branch you will need a separate ball valve, with which during operation you can use only those zones that are necessary.
Drilling holes
The holes in the plate have different purposes. The number of different holes also varies:
- each zone has 1 hole for supplying vacuum at the intersection of the grooves;
- along the centers of the squares to secure to a standard table, and the quantity will directly depend on the rigidity of the slab;
- to fix the workpiece at the ends - holes in the center of the squares.
Pump selection
This is the main detail in the entire design and special attention must be paid to the selection of the pump. If the stove itself is made according to a certain pattern, then you can see which pump is in the original
If this is not possible, then you will have to select equipment experimentally.
The cheapest option for a DIY table would be vortex blowers. Their advantages: do not require shutdown when the maximum vacuum threshold is reached, small size, ease of installation.
Control block
This is the electronic part of the table, which is necessary to regulate the heating of the working area. As a result, the workpieces are more securely fixed. The control unit has several types of implementation, and which one is suitable largely depends on the CNC machine to which the table is being made.
Manufacturing procedure
To make a working vacuum table with your own hands, you only need to find a workpiece of the appropriate size. You already have the equipment for this - this is a portal milling machine. We suggest considering a homemade lattice-type vacuum table as the easiest to manufacture. In the future, you can buy an adapter board and work with VAC-MAT polymer mats.
Workpiece design and selection
To make a vacuum table for CNC with your own hands, you will have to develop the drawings yourself; the machine manufacturer is unlikely to share them. However, the main dimensions can still be taken from catalogs. As a sample, you can take any of the products from Witte Barskamp KG, which produces vacuum tables for CNC milling machines.
They make grid slabs with a grid pitch of 12.5 mm, a groove width of 4 mm, and thicknesses of 32.5, 38 and 48 mm. The width from the edge of the plate to the axis of the first groove is half a step (6.25 mm). Horizontal dimensions can be chosen arbitrarily, based on the dimensions of the parts being processed.
The manufacturer offers modular plates, but owners of milling machines prefer to make one-piece structures with several vacuum zones (closed circuits).
The most budget-friendly materials are 16-20 mm plywood or laminated chipboard sheets. If there are no financial restrictions, you can purchase a textolite or duralumin plate (D16T, D16AT) 8-12 mm.
Workpiece alignment
Initially, the workpiece for the CNC vacuum table must be made perfectly flat, so that subsequently the processed parts do not copy the unevenness when clamped. To do this, you need to make 1-2 passes on both surfaces with a finishing spiral cutter with a diameter of 20 mm until they touch completely.
Grooving
The grooves are milled in accordance with the selected pattern. The width of the groove must correspond to the diameter of the sealing cord, so it is better to order it in advance. As for the depth, you will have to experiment here: make the depth 2.5-2.7 mm, and then deepen it if necessary. Depending on the stiffness and porosity, the seals compress differently.
It is necessary to ensure that in working condition the cord does not protrude above the working surface, and there is no loss of vacuum.
Making the route
To make a vacuum route, a PVC pipe with a diameter of 25 or 32 mm is suitable, and if the standard table has through holes, the pipes are fed through them from below (to each circuit). If the work table is solid, then the vacuum plate will have to be made of two parts (in the form of a sandwich), the joint will have to be sealed and the route will have to be fed from the end.
It is worth installing a ball valve on each branch of the vacuum wire in order to use only those areas where the workpiece falls. The line is connected into a single manifold and connected to a vacuum pump.
Drilling holes
It is necessary to make holes in the slab for the following purposes:
- To supply vacuum, 1 for each zone - at the intersection of the grooves.
- For fastening to a standard table - in the centers of the protruding squares. The number of holes must be selected based on the rigidity of the vacuum plate. If it is made of aluminum, you can do without drilling and only attach the edges. The holes must be countersunk so that the nut is completely recessed. The clamping screw should also not protrude above the surface.
- To fix the workpiece at the ends - at the centers of the squares. You need to press the nuts into these holes (from below). A thread is simply cut into a duralumin table. When processing a workpiece of a small area, the pressing force is often insufficient to securely hold it. To prevent shifting, it is fixed with strips with grooved holes.
You can view the designs of additional fasteners on the websites of manufacturers of equipment for machine tools.
Pump selection
In order for a home-made vacuum table to work no worse than the “factory” one, maximum attention must be paid to this issue. If the mesh in the slab is made exactly according to the sample, just look at which pump is recommended. Otherwise, you will have to experiment or order a calculation.
When choosing a pump version, you should pay attention to vortex blowers. This is the most budget-friendly equipment, in which, apart from bearings, there are no other wearing elements. It does not require mandatory shutdown when maximum vacuum is reached, and is compact and easy to install.
One important design step that was not mentioned in the article is drawing up cost estimates. However, it is after completing the work on the estimate that you can definitely decide whether to try to assemble a vacuum table for CNC with your own hands, or whether it will be easier and more profitable to order a finished product.
Vacuum operating principle
To understand the principle of operation of devices with vacuum fixation of workpieces, it is necessary to understand the very definition of vacuum, its strength and possibilities of use.
By definition, a vacuum is a space free of matter. In this case, vacuum refers to a technical term that characterizes the area of vacuum that is created between the vacuum table of a CNC machine and the workpiece installed on it. However, in reality, the workpiece is not affected by vacuum, but by atmospheric air pressure, which presses it to the table surface.
In normal conditions, atmospheric air presses on the part from all sides. If you pump out the air under one side of the part using a vacuum pump, the atmospheric pressure under it will decrease. According to the law “The force of action is equal to the force of reaction,” external atmospheric pressure will press the part against the plane of the vacuum table until the resistance force of the table is equal to the pressure force of the atmosphere.
On the surface of the earth, the force of atmospheric air pressure is approximately 1 kg/cm2. That is, a weight of approximately 100 kg presses on the plane of a part with sides of 10 by 10 cm. However, in reality, the clamping force of a part on the vacuum table of a CNC machine can differ significantly from the calculated force.
In the technical characteristics of vacuum pumps there is such an indicator as the maximum residual pressure - the maximum vacuum value that the design of this unit can achieve. In addition, due to air leaks in the vacuum supply lines and the fixing elements of the CNC work table, the vacuum force may be lost. Therefore, the actual effect of atmospheric pressure on the part is much less.
It should be noted that the vacuum force may vary depending on the power of the vacuum pump, but it will never be higher than the force of atmospheric pressure.
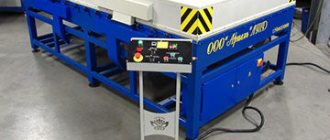
What is a vacuum table for CNC and why is it needed?
To effectively work on computer-controlled laser and milling machines using large flat parts, a vacuum table is essential. Such equipment is expensive and does not always meet consumer needs. Therefore, owners of CNC machines often design such tables on their own, taking into account individual needs and the size of the workpieces that will be processed on it.
In order for work on CNC machines to proceed with high precision, a surface is needed that can reliably fix the materials being processed. A vacuum table can perform this function by strongly pressing the product against the surface, preventing movements unplanned by the operator, and making the work on the machine more accurate and consistent with the loaded layout. In addition, the table provides heating to the required temperature. Such equipment is more functional than a magnetic table, which is only suitable for processing metal workpieces.
The downforce in such devices is created due to the pressure difference that arises between the rarefied medium (vacuum) formed under the part and the pressure of the atmospheric column, which presses the part to the table. Depending on how large a surface such a table has, the downforce can be up to one kilogram per 1 square centimeter of surface.
IMPORTANT! The reliability of fixing the material to the table is directly proportional to its area.
Vacuum tables serve as a powerful aid in working on CNC machines, providing effective fixation of material during processing, preventing cutting tools from moving the part and eliminating the need for manual fixation with clamps or screws.
Vacuum tables are effective when working with the following types of materials:
- all types of plastic;
- composite materials;
- organic glass;
- wood;
- metals.
The use of holding devices of this type allows you to process the thinnest sheets of material without deforming them.
The advantages of vacuum tables are:
- Reduced time spent on fastening workpieces (by more than 70%).
- Reduced risk of material deformation when processing thin sheets.
- Possibility of vibration-free clamping of bendable materials.
- It is possible to fix non-metals, unlike magnetic tables.
- High downforce performance.
The main differences between professional equipment and homemade equipment
A homemade table has several specific advantages:
- it is cheaper than the factory version;
- can be made to individual sizes and for certain functional features;
- easy to maintain, since it is easier to get all the necessary spare parts for repairs.
At the same time, the factory model has original parts and can last longer than a homemade one. At the same time, creating a vacuum table with your own hands requires effort and time.
The vacuum table for the milling machine makes work more convenient and fixes the workpiece. Some equipment models allow you to rotate the workpiece at the desired angle. If the CNC machine does not include a table, then you can make it yourself using the available diagrams and drawings.
Required materials and tools
To make a vacuum table for a milling machine, you need to find all the components. To create functional equipment you will need:
- wooden or metal sheet of appropriate size;
- metal profile;
- Vacuum pump;
- a heating element;
- Control block.
Tools you will need: drill, screwdriver, wrenches, soldering iron. The remaining tools are used optionally, if available.
Efficiency of the vacuum system of a CNC machine
In comparison with other methods of fixing blank parts on the work tables of CNC machines in the production of MDF facades, the vacuum system has the following advantages:
- Easy and quick installation. Equipment of the matrix table and positioning of the suction cups is an order of magnitude faster than when using any other type of clamp;
- Ease and speed of changing workpieces. For example, when using a pedal to turn on/off the vacuum supply, the time for changing a part can reach 10-15 seconds;
- The ability to process large-format workpieces and parts with unusual geometry (if there is at least one flat surface on them);
- Unobstructed tool access to grip-free sides of workpieces;
- Gentle blocking of fragile and soft materials.
The vacuum system for fixing parts for processing on a CNC machine has its disadvantages. The main disadvantage is the weak clamping force of small parts and porous materials. There is a need to switch to the use of other workpiece fixation devices, including mechanical ones or those powered by high-pressure compressed air.
Another significant disadvantage is the need to constantly maintain cleanliness on the vacuum elements of the work table. On the one hand, this is necessary to prevent sawdust and shavings from getting into the vacuum system of the CNC machine, and on the other, to ensure the tightest fit of the workpieces to the surface of the vacuum clamps.
Vacuum
Vacuum systems range from simple home installations using Shop-Vacs to commercial units that can cost more than the CNC itself. For most hobbyists and small production shops, a Shop-Vac or basic vacuum motor is more than sufficient for vacuum table systems.
Vacuum motor
The goal is to create both a high vacuum and a high volume of air, as this allows your table to maintain the required vacuum despite significant leaks in the system. With a small table area of approximately 50 x 50 centimeters, a typical full-size Shop-Vac works great. If you need a special system, you can buy vacuum motors from industrial suppliers. For example https://www.shtray.ru/
Milling table design
It is customary to take strong sheet material as the basis for the design. It could be:
- MDF board;
- thick plywood;
- board made of boards of any thickness.
For each type of table, a material that is convenient for processing is selected. But it is logical to assume that the working part itself (the cover) or the plane receives the most load. Therefore it must be made of metal. Stainless steel is the ideal option.
To install a manual router, use a classic workbench or assemble a separate structure. The latter must be as stable as possible, since vibration during operation is guaranteed.
The tool itself is installed at the bottom of the table or workbench, so they provide such a position so that it is easy to remove and put back the hand router. After all, stationary milling machines are increasingly used for woodworking not on an industrial scale. In theory, nothing complicated: they assemble the stand, mount a power tool (drill, not a new router). If you try, then such an installation will not be inferior to the commercial version, because the master prepares the device for himself.
How to make a vacuum table for a milling machine with your own hands?
Often CNC (Computer Numerical Control) machines are sold with a vacuum table. It is designed for fastening sheet parts with their subsequent processing. As a rule, processing of such workpieces is curvilinear in nature.
In this case, parts can be made from a variety of materials - chipboard, veneer, plywood. Most often, vacuum tables are used on milling machines that process solid sheets (for example, in the manufacture of furniture).
What does a vacuum table look like?
This device is a processing surface with a coating divided into sectors. Special suction cups and grooves are evenly distributed over the area of the device, which secure the workpiece in the required position. The larger the area of the vacuum table, the more functional and expensive it is.
The workpieces are fixed using a special vacuum pump. It is he who is responsible for reliable fastening of the workpiece to the table surface. Thanks to this invention, curved processing of sheet parts with large dimensions became possible.
It is noteworthy that vacuum vacuum cleaners are preferably used for processing wooden workpieces. If there is a need to perform similar work with metal, then magnetic tables are used for these purposes.
It is worth noting that depending on the size and functionality, the price of vacuum tables can vary significantly. At the same time, even the cheapest factory vacuum table will cost the buyer at least 150-170 dollars.
You can also purchase a used device, but the quality of such a table will always be in question. It is because of the factors listed above that many craftsmen create vacuum tables at home.
Vacuum clamp for plastic molding
It is possible to make such a device at home, but it is not an easy task. You need to understand the specifics of the device’s operation and the principles of its structure. Any stable sheet material, for example MDF, is suitable for forming a vacuum table. We create the contours of the table like a box and drill holes on the front side of the panel using an ordinary drill.
We attach special legs to the same box and install partitions with holes with a diameter of 7 to 8 centimeters. We do all this to add stability to our table and prevent it from deforming during use.
Non-chrome wire is often used as a heater. This approach entails quite high costs, and it is also quite difficult to find suitable material. As an alternative, you can use halogen lamps. It is better to sacrifice the heat level, but get affordable and effective heaters for your homemade vacuum table.
Halogen lamp sockets should be installed in pre-drilled slots in the metal sheet.
We make tracks for conducting current from printed circuit boards, install them on the base and only then solder them. Otherwise, you will have to spend a lot of time soldering the tracks.
The panel with light bulbs must be in a box with a lid that will allow servicing of the device.
This approach to creating a heat source allows you to heat the entire area, and, if necessary, only individual areas. But to make such a “smart” device, you need to pay more attention to connecting the lamps.
Key Vacuum Table Controls:
- Symmetrical thyristor with operating parameters from 20A and 240V. Its function is to regulate the heating process and coordinate the operation of the fan.
- Front panel with liquid crystal display. The table interface should display the status of each heating row. The panel also contains the device activation key and an emergency shutdown button.
- Board with electromechanical relays (6 pieces). 5 relays activate the heater lines, and the sixth one activates the fan.
- Table temperature indicator.
- Neutral relay board. It consists of electromechanical relays (7 pieces). Their function is to connect the heater lines to the neutral cable.
- Microcontroller with board (ATmega644). It is to this device that the temperature sensor, pressure indicator, display, mode switch, and relay board are connected.
- AC control unit. Its function is to compare the signal from the microcontroller, the symmetric thyristor and the AC lines.
Installation of supports for heaters is carried out on a box that has been prepared in advance. After this we install the heater panel. It is also necessary to install a special frame for plastic. We insert it into the supports on special bearings. To better secure the frame around the perimeter of the table, use insulating tape.
The key element of the vacuum table is the fan, which must be attached to the underside of the box. It is worth noting that the vacuum source can be mounted using an additional plate and neoprene gaskets.
After the final creation of all the key elements of the vacuum table, you can begin its installation. Before testing, you should check the quality of all connections, the uninterrupted and safe operation of the electrical equipment of the machine and table.
A similar type of table, only without heating lamps, is also suitable for a milling machine. Thus, we have described for you the independent development and installation of the most complex type of vacuum tables designed for plastic processing. To work with metal or wood, it is enough to correctly make only the lower part of this device.
Instead of a fan, a powerful pump can be used as a source of vacuum. In the place where the heating elements are located at the plastic table, you should have a milling machine.
: vacuum table.
Important nuances
- A special vacuum generator can be used as a source of vacuum. It looks like a small box with a hole for air outlet and vacuum inlet. Also, for devices of this type, an indicator must be installed to measure vacuum indicators.
- The ejector and its level of performance depend on the speed and volumes of air that fly past it. That is why it has little to gain compared to a conventional vacuum pump. After all, to create a high-quality vacuum, you should also use a high-quality compressor. The fact is that to fasten a large part over the entire area of the table, a fairly weak compressor is enough, but to fix a small plate, you need to use a more powerful unit.
- An ordinary industrial vacuum cleaner is poorly suited for creating vacuum clamps, since it is not very suitable for working with a completely closed hose. That is why it is recommended to use a special vacuum pump.
Grid vacuum table
Manufacturer:
V&F (ViF) Lattice vacuum table is designed for fixing workpieces of simple geometric shapes
| Modularity: | Yes |
| Application of coolant: | Yes |
| Foil processing: | No |
| Possibility of through processing: | No |
| Production of non-standard sizes: | Yes |
| Dimensions, mm: | 200x300…600x900 |
| Weight, kg: | from ~7 to ~40 |
Grid vacuum table
One of the most familiar vacuum clamping fixtures since the days of vacuum clamping ever discovered is the grid vacuum table. This type of clamping device is used to secure workpieces of simple geometric shapes. The working surface of the table is made in the form of a lattice with grooves. The grooves are used to lay the vacuum sealing cord around the perimeter of the workpiece, forming a closed loop. The workpiece is laid out on the laid out contour and is based on the stops at the ends of the vacuum table. When vacuum is applied, the workpiece is pressed tightly against the table surface.
You can find out how the vacuum table works in the ARTICLES section.
Download catalog:
Vacuum tables and vacuum fastening systems ViF_VF.pdf
| Dimensions | |||||
| vendor code | Name | a, mm | in, mm | s, mm | Weight, kg |
| VSA-101-2030 | Grid vacuum table | 200 | 300 | 32,5 | 7 |
| VSA-101-2040 | Grid vacuum table | 200 | 400 | 32,5 | 9,5 |
| VSA-101-3030 | Grid vacuum table | 300 | 300 | 32,5 | 10 |
| VSA-101-3040 | Grid vacuum table | 300 | 400 | 32,5 | 12 |
| VSA-101-3050 | Grid vacuum table | 300 | 500 | 32,5 | 15 |
| VSA-101-4040 | Grid vacuum table | 400 | 400 | 32,5 | 18 |
| VSA-101-4060 | Grid vacuum table | 400 | 600 | 32,5 | 25 |
| VSA-101-6090 | Grid vacuum table | 600 | 900 | 32,5 | 36 |
| VSA-111-2030 | Modular grid vacuum table | 200 | 300 | 32,5 | 7 |
| VSA-111-2040 | Modular grid vacuum table | 200 | 400 | 32,5 | 9,5 |
| VSA-111-3030 | Modular grid vacuum table | 300 | 300 | 32,5 | 10 |
| VSA-111-3040 | Modular grid vacuum table | 300 | 400 | 32,5 | 12 |
| VSA-111-3050 | Modular grid vacuum table | 300 | 500 | 32,5 | 15 |
| VSA-111-4040 | Modular grid vacuum table | 400 | 400 | 32,5 | 18 |
| VSA-111-4060 | Modular grid vacuum table | 400 | 600 | 32,5 | 25 |
Operating principle and design of vacuum tables
The fundamental principle of operation of a vacuum table is the creation of an airless space by pumping air out of the chamber formed by the working chambers and the part. In fact, the material being processed is not affected by the vacuum itself generated by the device, but by atmospheric pressure, which ensures that the workpiece is pressed against the working surface.
The force of impact varies depending on the type and power of the pump installed in the mechanism, but it cannot exceed atmospheric pressure.
There are several types of vacuum work surface designs:
- Lattice. The chambers here are formed by longitudinal and transverse grooves applied to the working surface and forming a closed contour. If it is necessary to fix parts that are smaller than the table area, a specialized seal is used, which must be placed in grooves around the perimeter of the clamping area.
- Grooved (slotted). Such tables provide only longitudinal grooves. Tables of this type can be used for fixing small-sized parts with low tangential forces during processing, for example: drilling holes, engraving, etc. When working, it is necessary to have locking contours.
- Porous. A design feature is the presence of microporous inserts, which contribute to the distribution of pressing forces over the entire area of the workpiece. The devices allow you to fix even the thinnest materials (foil, etc.)
- VAC-MAT. The working field is divided into many autonomously operating vacuum chambers, which allows for through drilling, milling, etc. Such inserts wear out quickly and are consumables.
- FLIP-POD. The design of the table assumes the presence of many suction cups with high vacuum. It is designed for fixing workpieces with high mass and uneven surface.
Lattice vacuum tables in modular design
The modular principle allows you to connect several vacuum tables. Vacuum supply to each table is maintained thanks to connecting fittings.
| Options (grill) | Application |
| Ability to work using coolant | + |
| Possibility of straight through processing | — |
| Modularity | + |
| Foil processing | — |
| Manufacturing of non-standard sizes | + |
Calculation of shear force and separation of the workpiece from the vacuum table
Price on request
x
download page in PDF format Print page
About the companyDealersPartnersArticlesContactsDemonstration
Shtray, 2000-2020
Home | Milling machines | Machining centers | Marking | Milling and engraving machines CNC lathes | Vacuum equipment | Measuring tool | Site Map
117437, Moscow, st. Ostrovityanova, 13 Directions
Vacuum tables for MULTICUT machines
The MULTICUT company is one of the leading Russian manufacturers of CNC milling and engraving machines and tenoning and slotting coordinate units with program control. The company offers a wide range of machines whose tasks include cutting sheet materials and producing furniture facades.
One of the main advantages of the equipment is the integrated vacuum clamp in the basic configuration of the table. It consists of a pipeline system, shut-off valves and channels on the working surface. The following series of machines are equipped with a vacuum clamp:
- 3000;
- 3200;
- 4000;
- 4400;
- 5000.
The vacuum pump model is selected by MULTICUT technical specialists in accordance with the required pressing force.
Main parts of the milling table
We mean the set of elements from which it is not difficult to assemble the installation on your own:
- Aluminum guides.
- Steel plate for working area. It's also a mounting plate. A router is attached to it.
- Sheet of plywood.
- For the base there is an MDF panel.
On this kind of tables, it is advisable to install the buttons necessary for turning on and quickly stopping (emergency lights). Upper clamping devices are included in the assembly plan in case of working with large parts.
Table type
There are only three of them. Milling tables are:
- Aggregate. It is possible to expand the saw plane.
- Portable. Small size, easy to carry weight.
- Stationary. The structure is weighty and very difficult to move on your own.
Cover material
- The base, cover or working surface must be covered with plastic (if we are talking about an MDF panel). But such a table can become saturated with moisture, which will affect the quality of the milling cut, plus the grooves in the swollen panel lose their normal mobility.
- Phenolic plastic. Optimal for a machine, but more expensive than an MDF panel.
- Steel. Aluminum, stainless steel or rolled sheet. Sometimes they also install cast iron. But the issue of corrosion is solved with paint.
Groove for stop
This is just a recess for a movable longitudinal stop or a built-in carriage. The groove is an ideal element of the table design; additional devices are used due to it. An analogue of a groove is a movable slide. They are perpendicular to the longitudinal stop, plus they are also movable.
Fixing the router
The hand tool is mounted on a rigid plate made of steel, stainless steel, aluminum, textolite, etc. The plate itself is mounted with a recess so that it can be recessed into a level with the lid.
Longitudinal stop
Fixed on the table. Its purpose is to correctly feed the workpiece. Longitudinal stops are stationary. This is convenient for processing the same type of material.
Sliding stops are ideal for milling various elements according to dimensions. The quality of operation of the entire machine depends on the longitudinal stop, its stability and smoothness.
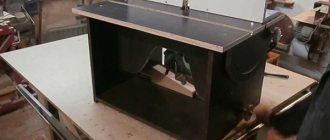
DIY vacuum press. Part III. Vacuum table
Making a vacuum table is the most critical stage in constructing a thermal vacuum press with your own hands.
At the design stage, it is necessary to determine the dimensions of the table, select the material for its manufacture, and think over ways to fix and seal detachable elements to maintain internal negative pressure (vacuum). The vacuum table is made with the same basic set of tools as the press bed.
Further in the text, we will call a vacuum bath a part of a vacuum table - a steel container, inside of which the workpieces to be coated are located, and from which air is pumped out.
By working dimensions (dimensions) of a vacuum bath we mean its useful volume, measured by internal dimensions.
We will agree to call the vacuum table the entire structure as a whole, consisting of a vacuum bath, an upper (movable) pressure frame, clamps and other smaller elements.
Illustration of external and internal (working) dimensions of a vacuum bath.
External and working dimensions of the vacuum bath
Let's consider the general principles for choosing the size of a vacuum bath, and outline specific numbers for our press.
The longer the vacuum bath, the more workpieces can be placed in it, or a larger workpiece can be veneered. On the other hand, the longer the bath, the more film has to be consumed in one working cycle, the larger the dimensions of the machine, which entails a greater consumption of room space. You need to find the optimal size.
As experience has shown, the optimal working length of a vacuum bath intended for the manufacture of standard furniture facades and decorative door trims can be considered to be from 2.4 to 2.6 m.
We will make a vacuum bath 2500 mm long, the working length of which will be 2500 - 40 x 2 = 2420 mm (40 mm is the width of the short wall of the profile pipe).
The width of the bath is directly related to the width of the PVC film used. Depending on the film manufacturer, there may be different widths, the most common is 1.4 m, which is what we will focus on.
Let's choose the width of the bath equal to 1400 mm, the working width will be 1400 - 40 x 2 = 1320 mm.
When facing tall workpieces, for example, for curved (radius) facades, the width of the bathtub must be reduced (made smaller than the width of the film), but to work with such workpieces a press of a different design is needed, so these issues will not be considered.
The working height of the bathtub should be calculated based on the requirement that there is a small free space between the upper surface of the facades and the covering film. In other words, the film stretched over the workpieces should not touch them before air is pumped out. The calculation is as follows.
Firstly, the vacuum (breathable) tabletop, which will be the first to be placed on the vacuum table, will be made of 10 mm thick MDF board. Secondly, the linings for the facade blanks will be small pieces of MDF board 16 mm thick (this is the simplest, most common and optimal option for linings).
Thirdly, the thickness of the veneered blanks will range from 8-10 mm (door linings) to 16-32 mm (facades and other furniture elements). Fourthly, the sealing rubber will add about 2 mm to the depth of the bath. As a result, the maximum height of the entire “pie” inside the bathtub will be: 10 + 16 + 32 = 58 mm.
To make a vacuum bath, we will use a profile pipe with a cross-section of 60×40 mm, placing it on the short side. At the same time, the height of the free space will be no less than: 60 + 2 – 58 = 4 mm, which is quite enough.
Elements of a vacuum table.
Vacuum bath
The bottom of the vacuum bath will be a sheet of steel 2 mm thick. To minimize the deflection of the sheet under the influence of negative internal pressure, and to give the table surface an even shape (close to an ideal plane), it is necessary to make a rigid frame. To make the frame we will use the same profile pipe 60x40x2.
The pre-cut pipe, in accordance with the design, is laid on the slipway, rigidly fixed with clamps, and all connections are welded. After making the stiffening frame, a steel sheet is welded on top of it.
This is the most critical stage of welding work; it requires a continuous weld to be hermetically sealed (it is recommended to perform double penetration).
To avoid warping of the sheet under the influence of prolonged high temperatures, you can use the following alternative method of welding the sheet to the stiffener frame.
Before laying the steel sheet on the stiffening frame, it is necessary to apply a sealing compound that can withstand high temperatures along its perimeter (for example, high-temperature silicone sealant), and welding should be carried out not with a continuous seam, but with small regular fixing tacks with a pitch of about 50 mm.
This method is designed to ensure that short-term, local welding effects will not damage (burn out) the entire sealant, but only a small part of it in the immediate vicinity of the tacks, while most of the sealant, after curing, will perform its direct function.
Vacuum table dimensions.
Detailing of the stiffening frame and the procedure for assembling the vacuum bath: the stiffening frame is welded, a steel sheet is welded to it, a stationary (lower) frame with a part of the hinge joint for attaching the lifting (upper) frame is hermetically welded around the perimeter of the steel sheet.
Photo of the vacuum table from below. The stiffening frame is made partly from an angle profile.
Lifting (clamping, upper) frame
Frame material - profile pipe 60x40x2 mm. The dimensions of the pressure frame must be exactly the same as those of the vacuum bath.
If it was not possible to find a sufficiently even (not bent, not twisted) profile, then it is necessary to pre-select in pairs several of the smoothest rods from which the parts of the vacuum table will be made tightly adjacent to each other.
The clamp frame will rise thanks to adjustable hinge joints. The adjustment of the hinges is carried out after gluing the seal - strips of sheet rubber of medium hardness, about 2 mm thick.
Pressure frame hinge. Welded washers are needed to increase the friction area. The hinge pin is a D12 steel rod with threaded ends.
Photo of the clamping frame hinges.
To hold the clamping frame in a raised state, gas lifts can be used. For safety reasons, it is recommended to install four gas lifts (two per side) and ensure that any three of them can support the frame.
If the opening angle of the frame (45°) turns out to be insufficient, the frame will cause significant inconvenience in operation; it can be raised as high as possible at an angle of slightly more than 90°, using the thermal module parked behind as a support (gas lifts are not used).
The lifting frame rests on the thermal module.
Clamps
To securely and tightly hold the film during vacuum pressing, it is necessary to firmly and evenly press the upper frame to the perimeter of the vacuum bath, ensuring that the rubber seal fits everywhere.
For these purposes, you can use various ready-made clamps, or make them yourself.
To make homemade clamps operating on the eccentric principle, you will need the following rolled steel: half a meter of DN50 pipe (external diameter about 60 mm), two meters of rod with a diameter of 10 mm, and approximately the same amount of profile pipe with a cross-section of 20x20x2 mm.
Firstly, the DN50 pipe is cut into 8 equal 60 mm sections. Each pipe section is finished with a semicircular central cutout having a width of 10-11 mm and an arc length equal to 3/4 of the length of the outer circumference of the pipe. We get 8 pieces of eccentric rotary cylinders, to which we need to weld a handle 220 mm long from a square profile 20x20 mm.
Secondly, the steel rod is cut into 16 pieces: 8 pieces 190 mm long (for studs) and 8 pieces 55 mm long (for kingpins). An M12 nut (or M10 with a drilled thread) must be welded to one end of the stud so that it can rotate freely on the pivot, and an M10×50 thread must be cut at the other end.
Thirdly, to complete the manufacture of the clamp, we weld the ends of the kingpin (with a nut with a welded pin pre-installed on it) to the inner surface of the eccentric rotary cylinders.
To install the clamps on the vacuum table of the press, at eight points of the table, according to the design, through holes with a diameter of 10 mm are drilled. After which, the upper holes are enlarged, giving them an oblong shape.
The clamps are adjusted by installing combination nuts in the desired location on the stud thread, followed by fixing them with locknuts.
This operation is performed at the last stage of manufacturing the vacuum table, after gluing the rubber seal.
Operation of the eccentric clamp.
Elements and dimensions of the hinge clamp.
Eccentric clamp in the table. The hooks for the clamps are made from 50x50x3 angle steel.
If you cannot achieve a flat table surface
If during the welding process the sheet has undergone significant deformations that go beyond the permissible values, then there is no need to pick up a grinder and cut off the welds and redo everything again.
You can ensure a perfectly flat plane of the vacuum table by additional measures, namely by using epoxy leveling compounds, which are used in the manufacture of poured floors.
To do this, the vacuum table is set strictly according to the level, the required volume of the filling mass is determined (for example, by test filling with water), the bottom of the vacuum bath is cleaned of rust, and it is primed. Fill with the prepared epoxy mixture according to the manufacturer's instructions.
For reasons of economy, the mixture can be diluted with some cheap filler, for example, quartz sand. To speed up the curing of the mixture after pouring, the table can be controlled from above with heat from the thermal module. It makes sense to carry out this filling leveling operation after the vacuum press is fully ready, test samples of products have been manufactured, and a decision has been made about the need to improve the geometry of the working surface.
Estimate for material for a vacuum table
Name Length, mm Quantity, pcs. Purpose
| Profile 60×40 | 2500 | 6 | Rigidity frame. Bath. Lifting frame. |
| Profile 60×40 | 1380 | 4 | Rigidity frame. |
| Profile 60×40 | 1320 | 4 | Bath. Lifting frame. |
| Profile 60×40 | 1001 | 6 | Rigidity frame (diagonals). |
| Profile 60×40 | 753 | 3 | Rigidity frame. |
| Profile 60×40 | 250 | 4 | Hinge. |
| Profile 60×40 | 180 | 2 | Hinge. |
| Profile 60×40 | 150 | 2 | Clamp support. |
| Profile 60×40 | 140 | 2 | Hinge. |
| Corner 50x50x3 | 50 | 8 | Lifting frame (clamp hook). |
| Profile 20×20 | 220 | 8 | Clamp. |
| Pipe DN50 | 60 | 8 | Clamp. |
| Rod D10 | 190 | 8 | Clamp. |
| Rod D10 | 55 | 8 | Clamp. |
| Rod D12 | 150 | 2 | Hinge. |
| Nut M10 combi | 8 | Clamp. | |
| Nut M10 | 12 | Clamp Table mount. | |
| Nut M12 | 16 | Clamp Hinge. | |
| Washer d12 | 12 | Hinge. | |
| Bolt M10×60 | 4 | Table mount. | |
| Sheet 2500x1500x2 | 1 | Table (bottom of the bath). | |
| Gas elevator | 2 | Lifting frame. |
Upon completion of the main scope of work, the vacuum table is installed on the frame (on specially provided supports) and fixed in the corners with four bolts, as shown in the figure, after which they move on to minor work: installing and adjusting the clamps, adjusting the lifting frame hinge, gluing the seal.
Mounting the vacuum table on the frame.
Vacuum table in operation.
The metal structure is beginning to take on the shape of a future thermal vacuum press, but it still lacks many elements: a vacuum system, a thermal module, an electrical control unit, which will be discussed in the following articles.
Features of choosing a router design
The capabilities of modern CNC equipment are enormous. But no machine is universal. Each model has its own characteristics and preferred area of application. Before choosing a specific design, you should clearly determine what the machine will be used for. An attempt to combine everything in one will lead to large material and physical costs, without guaranteeing results.
Today, there are two directions in the design of desktop routers. The first, the simplest, is focused on processing wood, plastic and other soft workpieces. Such machines do not place high demands on structural materials and are simple and low in cost. They are available for self-production, without the use of additional equipment. Metal products on such devices are usually not milled. In rare cases, only soft non-ferrous metals are sharpened at low feed rates.
The second direction of milling cutters is focused on working with metal workpieces. These machines have a significant mass and consist of parts that can only be completed using a serious machine park.
The second most important parameter of the machine is the dimensions of the processed parts. Beginners immediately want a large field where they can do whatever they want
But the larger the machine, the more technical problems will have to be solved during its design. And its cost will not be the most optimal. If there are no specific tasks for a large machine, then it is recommended in the first project to limit the processing field to the size of a standard A4 paper sheet. The maximum you can choose is A3.
Do-it-yourself vacuum table for CNC: step-by-step instructions | mk-soyuz.rf
To work on a CNC milling machine with large parts, a large vacuum table is required. Such equipment is very expensive due to the complexity of transportation and is not always suitable for certain tasks, but you can design a table yourself, to suit your individual size and needs.
Vacuum tables for CNC are designed for milling machines that work with large sheets of wood or metal. Most CNC machines use curved machining. To work on milling machines, you need a surface that reliably holds the workpieces.
The vacuum table presses the products to the surface, preventing them from moving, making work on the milling machine more accurate and comfortable. In addition, complete equipment provides heating to the required temperature.
It is more versatile than a magnetic table, which is only suitable for processing metal products.
Quite often, CNC milling machines come complete with a vacuum table, but if it is absent or is not large enough, another device is required. In this case, you can buy a used device of questionable quality or make it yourself.
The difference between factory equipment and individual equipment
Creating working equipment allows you to adapt the tool to individual needs. Self-designed vacuum tables can be adjusted to the required dimensions and include all functions from milling to forming work. The main advantages of such a table are:
- saving money,
- individual sizes and functional features,
- ease of maintenance due to the availability of spare parts.
The main disadvantages are the large expenditure of time and effort, less high reliability compared to factory analogues and the lack of warranty service.
Loading…
Manufacturing stages
After purchasing all the necessary materials and tools, you can proceed to assembling the table yourself.
Manufacturing of working surface and box
At the beginning of making a vacuum table for CNC, you need to create a working surface with your own hands. To do this, take a pre-prepared sheet of material. Holes are carefully drilled in it, in a checkerboard pattern, using a drill or screwdriver. Later, from the back, the surface will be adjacent to the vacuum pump, which serves to securely fasten the products. To increase the reliability of the structure, partitions are installed. They prevent the table from deforming during use.
Box
The most significant thing here is the height, since the table is designed for a numerically controlled machine. A stable structure is assembled from metal and wooden parts to secure the working surface. The surface above the working area will act as a holder for the heating element. It is desirable that the box be collapsible: this will facilitate further work, setting up equipment or transporting the table in the future.
The desktop should be as stable and reliable as possible. Therefore, it is advisable to avoid short-lived or moving connections in the design. To make it easier to move the tool, you can use adjustable height feet. This will allow you to work on uneven surfaces, providing stability.
A heating element
Vacuum forming of plastic also requires a special table. During operation, the product is exposed to a vacuum field and a heating element, which heats the plastic to the required temperature. To do this, a heating panel is installed above the table. Nichrome thread has proven itself best as a heating element. However, due to the high cost of the material, as well as the difficulty of finding it on the open market, halogen lamps are usually used for self-production.
A sheet of metal is taken as a workpiece. Holes for lamps are also drilled in it, after which the heating elements are secured and the electrical part is installed. All lamps must be connected in parallel. With a more complex design, the electrical part is output to a controller or separate switches to heat certain parts of the work area. The connection is made using soldering and copper wires. To reduce wiring, have a more pleasing appearance, ease of operation and greater wiring reliability, it is recommended to use a printed circuit board or several small circuit boards. The design of the light panel should also be dismountable for maintenance.
Vacuum pump
The most important piece of equipment. Serves to create a vacuum and securely fix the part. It is best to use a specialized vacuum generator with a pressure gauge. If a dedicated vacuum pump is not available, several vacuum fans will do. It is possible to replace them with industrial vacuum cleaners, but in practice their efficiency is lower.
When connecting, it is important to reduce the air flow as much as possible, that is, insulate from the entrance to the working surface. A pressure gauge is needed to measure results: too much vacuum can damage the part, work surface or equipment
With a more complex table design, the heating part regulators and pressure gauge are installed in the control unit.
Control block
The electronic part of the vacuum table is needed to effectively regulate the heating of the working area and create a more stable fixation of parts. There are many options for implementing a control unit; the biggest role here is played by a milling machine and numerical control installed in the working equipment. The most optimal one is selected based on the tasks, budget, and availability of specific elements. For optimal operation, a microcontroller with display and one relay per control unit are required.
Temperature and pressure sensors are used for comfortable operation. The minimum configuration requires one sensor and 2 relays: one to turn the pump on/off, the other to control the heating panel. To delimit the work area, use the clamp and heat only for part of the table, it is necessary to use a larger number of relays and, accordingly, a more efficient controller. Installing a reliable control unit will make work more comfortable and will allow you not to be distracted by pressure gauge readings.
Do-it-yourself vacuum table for CNC: step-by-step instructions
To work on a CNC milling machine with large parts, a large vacuum table is required. Such equipment is very expensive due to the complexity of transportation and is not always suitable for certain tasks, but you can design a table yourself, to suit your individual size and needs.
Vacuum tables for CNC are designed for milling machines that work with large sheets of wood or metal. Most CNC machines use curved machining. To work on milling machines, you need a surface that reliably holds the workpieces.
The vacuum table presses the products to the surface, preventing them from moving, making work on the milling machine more accurate and comfortable. In addition, complete equipment provides heating to the required temperature.
It is more versatile than a magnetic table, which is only suitable for processing metal products.
Quite often, CNC milling machines come complete with a vacuum table, but if it is absent or is not large enough, another device is required. In this case, you can buy a used device of questionable quality or make it yourself.
Required materials and tools
To make a vacuum table for a milling machine, you need to find all the components. To create functional equipment you will need:
- wooden or metal sheet of appropriate size;
- metal profile;
- Vacuum pump;
- a heating element;
- Control block.
Tools you will need: drill, screwdriver, wrenches, soldering iron. The remaining tools are used optionally, if available.
Manufacturing stages
After purchasing all the necessary materials and tools, you can proceed to assembling the table yourself.
Manufacturing of working surface and box
At the beginning of making a vacuum table for CNC, you need to create a working surface with your own hands. To do this, take a pre-prepared sheet of material.
Holes are carefully drilled in it, in a checkerboard pattern, using a drill or screwdriver. Later, from the back, the surface will be adjacent to the vacuum pump, which serves to securely fasten the products.
To increase the reliability of the structure, partitions are installed. They prevent the table from deforming during use.
Box
The most significant thing here is the height, since the table is designed for a numerically controlled machine.
A stable structure is assembled from metal and wooden parts to secure the working surface. The surface above the working area will act as a holder for the heating element.
It is desirable that the box be collapsible: this will facilitate further work, setting up equipment or transporting the table in the future.
The desktop should be as stable and reliable as possible. Therefore, it is advisable to avoid short-lived or moving connections in the design. To make it easier to move the tool, you can use adjustable height feet. This will allow you to work on uneven surfaces, providing stability.
A heating element
Vacuum forming of plastic also requires a special table. During operation, the product is exposed to a vacuum field and a heating element, which heats the plastic to the required temperature.
To do this, a heating panel is installed above the table. Nichrome thread has proven itself best as a heating element.
However, due to the high cost of the material, as well as the difficulty of finding it on the open market, halogen lamps are usually used for self-production.
Among the advantages of use, it is worth noting uniform heating, as well as high-quality lighting of the work area.
A sheet of metal is taken as a workpiece. Holes for lamps are also drilled in it, after which the heating elements are secured and the electrical part is installed. All lamps must be connected in parallel.
With a more complex design, the electrical part is output to a controller or separate switches to heat certain parts of the work area. The connection is made using soldering and copper wires.
To reduce wiring, have a more pleasing appearance, ease of operation and greater wiring reliability, it is recommended to use a printed circuit board or several small circuit boards. The design of the light panel should also be dismountable for maintenance.
Vacuum pump
The most important piece of equipment. Serves to create a vacuum and securely fix the part. It is best to use a specialized vacuum generator with a pressure gauge. If a dedicated vacuum pump is not available, several vacuum fans will do. It is possible to replace them with industrial vacuum cleaners, but in practice their efficiency is lower.
CNC machine stop systems
An integral part of any work table of a CNC machine or CNC machining center is a system of stops.
Typically, stops are placed on the front and side of the workbench, forming perpendicular stop lines, the intersection of which indicates the zero point of the origin of the machine's X and Y axes. Pneumatic cylindrical stops are installed as standard on CNC machines. Upon command from the control panel or when the pedal is pressed, the stops are raised to position the workpiece. Once the workpiece is locked by the clamping elements, an additional command is given to lower the stops, or they are retracted automatically after starting the machining program. In a more advanced version, the stop lines can be located on all four sides and the center line of the desktop. In this case, the working area of the CNC machine can be divided into 3-6 locking zones, in which several parts can be fixed at the same time and processed according to one program.
The difference between factory equipment and individual equipment
Creating working equipment allows you to adapt the tool to individual needs. Self-designed vacuum tables can be adjusted to the required dimensions and include all functions from milling to forming work. The main advantages of such a table are:
- cost savings;
- individual sizes and functional features;
- ease of maintenance due to the availability of spare parts.
The main disadvantages are the large expenditure of time and effort, less high reliability compared to factory analogues and the lack of warranty service.
https://youtube.com/watch?v=NtEWNCyI64Q
What is the difference between a homemade and factory vacuum table?
Working equipment created independently allows you to adapt the device to the needs of a specific production process. Do-it-yourself vacuum tables allow you to take into account all the nuances of processing parts related to their size, as well as include all functions - from milling to molding work. A vacuum table for a CNC machine, assembled independently, saves the user money and simplifies further maintenance of the device.
Vacuum tables can significantly improve the efficiency of the production process and improve the quality of manufactured products. This is achieved by creating the powerful clamping force needed to achieve consistent quality. If the CNC machine does not come with a ready-made table, you can make it yourself. This is a simple process, and diagrams and drawings of devices can be found freely available on the Internet.
- November 15, 2020
- 2090
Table manufacturing stages
Before starting to purchase the material, determine the location in the workshop for future installation. When the future design will be used occasionally, then portable tables are chosen. But if there is a lot of space in the carpentry workshop, then a wide milling table, convenient for processing boards or panels of 2 meters, is productive.
Manufacturing of bed and table top
By frame we mean a frame with a support, but which also houses the tabletop itself. It is customary to assemble a bed from whatever is spared. No particular preference. You need to achieve rigidity and stability.
Before assembling the frame, it is advisable to take care of the operator’s comfort. Typically, the lower part of the frame deepens 10-20 cm from the lid itself. It’s more comfortable and therefore safer.
If you study the drawings and design features, it is not difficult to fit a convenient carpentry workbench under an old router. We remember that vibration occurs from the operation of the machine, so we are considering this option if the workbench is firmly standing.
It is customary for homemade products to use a reliable, stable, motionless frame, and it is advisable to weld it from a profile, since the entire load is transferred to the base. Fits:
- Steel pipe.
- Corner (trimmings).
- Channel.
Only then wooden beams and chipboard.
It is inexpensive to assemble a milling table for periodic use from a 25x25 or 40x20 profile pipe. Using an angle grinder, cut the profile into 4 legs, a rectangle (frame) and lower connecting parts. All this is strictly in size.
Then the profile is welded into a frame, complementing the structure with a pipe. The latter is necessary for the parallel stop. 4-6 legs must be framed with a profile or corner. But this is after installing the table top itself. Plus, the metal frame makes it possible to pre-weld a limiter for electrical equipment.
Operating principle of a vacuum table
Vacuum tables create downforce due to the pressure difference under the part and atmospheric pressure pressing from top to bottom. Each square millimeter of area subject to this difference can have a force reaching 1-1.2 kilograms (the difference between vacuum and air pressure at sea level).
The clamping force is proportional to the pressure difference and the surface area. A large area over a large area can have impressive force. A 25 x 25 square area potentially has 625 square centimeters multiplied by 1.2 kg per square inch, or about 750 kilograms of holding force!
However, small parts have significantly less force to hold them. It is necessary to understand this difference.
Another way to limit the force is that you will not be able to apply vacuum to the entire bottom surface of the part. Consider a vacuum system made of aluminum with minor vacuum chambers underneath. It looks something like this:
Aluminum vacuum table
Now, to keep the part flat and not warped, we want it to sit on a vacuum table. We may not have much vacuum anywhere other than the chambers. In this case, the downforce is determined by the surface area of the chambers, and not by the surface area of the part, and it is noticeably less than the surface area of the part.
Most vacuum tables for CNC routers avoid this difficulty by using an MDF board on top of the vacuum table to distribute the vacuum. MDF is porous, so vacuum is everywhere. This works well, but it requires a vacuum pump that can pull in more air because the MDF will leak anywhere there isn't something on it.
Just like MDF, your part can be used to spread the vacuum if it's made of anything permeable (foam, MDF, etc.) or if you make too many through holes in it during processing.
The last thing you need to know is that there are two forces trying to move the part on the vacuum table. One is directed to the side, the other is directed upward. Lateral force is the frictional force between a part and what it rests on. Make sure that the surface of the vacuum table is not too slippery to withstand this force. In most cases, the friction index will be such that to move the part to the side it will take at least twice as much force as to lift it.
The lifting force required to overcome the holding force of the vacuum table is simply a parameter of the weight of the part plus the clamping force of the vacuum. If the part is lifted even a little, it is possible that even you may not see it, the vacuum will leak, and if your vacuum pump does not have enough capacity, the part will simply pop out when the pressure drops. If there is enough lift, the part may even launch across the table.
Application area
Milling machines are used for complex machining of parts in three coordinates. Among the simplest types of milling: the process of engraving and cutting parts from sheet materials. Feedstock: plywood, textolite, plastic. The result is flat parts, which are later assembled into some kind of structure. These can be boxes, caskets, electrical equipment housings, frames of volumetric products. Two-dimensional processing is also used to create artistic products.
A more complex type of processing is volumetric or three-dimensional. It allows you to cut products with complex surfaces from massive blanks. For example, machine-made wood carvings are often superior to hand-made ones. Installing an additional rotary axis on the machine further expands its capabilities. Four-axis turning allows you to produce cylindrical parts or three-dimensional products with highly complex relief. Examples include sculptures or curved furniture fronts. It is possible to create machines with an even greater number of degrees of freedom, but today this remains the domain of professionals.
In addition to classic milling, a CNC router can be used to perform other types of work. Instead of a milling head, plotter knives, lasers or 3D printer extruders can be easily mounted. In some cases, plasmatrons are installed for cutting metal. All these tools do not change the equipment design and control methods.
Do-it-yourself vacuum table for CNC - Metalworker's Guide
To work on a CNC milling machine with large parts, a large vacuum table is required. Such equipment is very expensive due to the complexity of transportation and is not always suitable for certain tasks, but you can design a table yourself, to suit your individual size and needs.
Vacuum tables for CNC are designed for milling machines that work with large sheets of wood or metal. Most CNC machines use curved machining. To work on milling machines, you need a surface that reliably holds the workpieces.
The vacuum table presses the products to the surface, preventing them from moving, making work on the milling machine more accurate and comfortable. In addition, complete equipment provides heating to the required temperature.
Quite often, CNC milling machines come complete with a vacuum table, but if it is absent or is not large enough, another device is required. In this case, you can buy a used device of questionable quality or make it yourself.