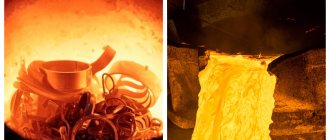
Since melting iron at home requires a heat source with a high temperature, the design of a homemade furnace is chosen based on this condition. It must meet environmental safety requirements and not take up much space in the workshop or garage. These requirements are fully met by installations in which even refractory metal is melted by electric current.
Making a furnace for melting metal
If there is free space for placement, make a stationary diesel or coal stove from fireclay bricks. A fan will be required to supply air. The compact electric furnace creates temperatures of up to 3000⁰C due to the flow of current between two electrodes through a layer of carbon-graphite powder. It melts small portions of any metals. The disadvantage is the long period of heating to the melting temperature and the need to manually turn the metal for uniform heating.
An induction furnace heats the metal throughout its entire volume due to the induction of eddy currents in it by the magnetic field of a coil (inductor) connected to the generator. The advantages include:
- uniform and rapid heating of the metal;
- high efficiency, since only the melting object is heated, and not the installation parts;
- no evaporation of alloying additives:
- mixing of the metal during smelting occurs naturally;
- heating temperature regulation;
- due to high productivity, it is possible to melt small portions of molten metal in short periods of time;
- Melting is carried out in accordance with environmental safety requirements.
Among the disadvantages it should be noted:
- lower temperature of the slag compared to the metal, since eddy currents are not induced in it;
- During melting, it may be difficult to remove sulfur and phosphorus impurities from some types of metal.
Depending on the location of the heated object, induction installations are:
- Channel, when the containers where the metal is melted are made in the form of channels that are installed around a coil with an internal core. They are used in industrial enterprises when large volumes of cast iron, steel, and non-ferrous metals need to be melted.
- Crucible with a removable container made of heat-resistant material - a crucible, which is placed inside the coil. This design is compact and convenient for home use.
You can buy a ready-made induction furnace or, if you have the skills to work with electronics, make it yourself.
A homemade crucible installation will cost an order of magnitude cheaper.
The generator is assembled using a transistor or tube circuit, or an inductor is connected to a welding inverter. When making a homemade installation, it should be taken into account that the duration of metal remelting is affected by:
- generator power and frequency;
- magnitude of eddy current losses;
- interference from nearby metal objects.
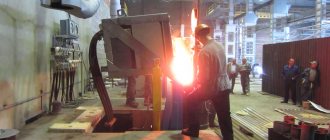
Induction furnace from a welding inverter
This option is easy to make yourself and is safe to use, since the inverters are equipped with protection against short circuits, overloads, and overheating. To assemble the stove, it is enough to make an induction coil. It is wound with a copper tube with thin walls with a diameter of 8 - 10 mm on a cylindrical template with a pitch of 5 - 8 mm. The number of turns, from 7 to 12, is selected depending on the parameters of the inverter. It should be taken into account that with low inductor resistance, melting will often be interrupted due to overload protection.
Melting metal in an induction furnace from a welding inverter
The finished coil is installed on a heat-resistant surface or placed in a housing made of graphite or textolite. If you use a conductive material, melting will take longer, since part of the magnetic field energy will be spent on the passage of eddy currents through the walls of the housing. To connect the welding inverter, install a socket that can withstand the maximum current consumed by the equipment.
Important!
The inverter frame must be grounded.
Transistor induction furnace
A furnace for melting metal using transistors that is simple in design can be assembled from available parts:
- two field-effect transistors IRFZ44V;
- pairs of UF4007 diodes (can be replaced with UF4001);
- two resistors with a nominal value of 470 Ohm, 1 W;
- several film capacitors with an operating voltage of 250 V, so that the total capacitance is 4.7 μF;
- copper wire with enamel insulation with a diameter of 1.2 and 2 mm;
- two ferrite rings for chokes (bought at a radio store or removed from old computer power supplies).
Transistor induction furnace
Assembly is carried out in the following order:
- Since the transistors will get very hot when melting is in progress, they are installed on radiators. The larger the cooling area, the better. When placed on a common radiator, the transistors are isolated from the surface with plastic gaskets with high thermal conductivity.
- The chokes are wound with 1.2 mm wire on ferrite rings. 7 - 15 turns are evenly laid around the circumference at the same distance from each other.
- Film capacitors are soldered in parallel into a battery;
- The induction coil is wound with a 2 mm wire on a template with a diameter slightly larger than that of the crucible. After 7 - 8 turns, the ends are left for connection to the generator.
- The prepared parts are installed on the board and connected to each other as shown in the diagram:
Transistor oven circuit
Voltage is supplied from a 12-volt battery with a capacity of 7.2 A/h. With a load of 10 A in operating mode, the charge will last for 30 - 40 minutes of melting. The battery can be replaced with a power source connected to the mains, with an output voltage of 10 - 20 V and a current of at least 10 A. If desired, a housing is made of heat-resistant dielectric material for installation. To regulate power, change the number of turns of the coil and/or its diameter. But it’s easier to make several replaceable inductors with different parameters.
Do-it-yourself molding sand for casting – vending-doctor.ru
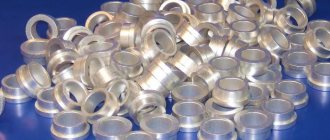
Mankind knows many metals and alloys based on them. One of the most famous is brass. This is a copper-based compound to which third-party non-ferrous metals are added.
Various parts and elements for electrical equipment are made from this material. Casting brass allows you to make workpieces of various shapes and sizes from it.
It can be carried out at the enterprise or at home.
Brass casting
History of technology
Historians say that brass appeared simultaneously with bronze. Alloys were used to make jewelry, tips for tools, weapons, dishes, and cutlery.
To make any item, you had to know the technology of brass casting. Over time, the method developed and improved. Today, the material can be made at home or in production. To do this, you need to accurately carry out the technological process, follow the rules, choose the right tools and raw materials.
Product made of brass
Disposable flasks
Having learned what a flask is and how it is used, it is easier to understand the intricacies of the process. It no longer seems so complicated, but rather interesting and simple. Modern technologies allow you to try to make your own jewelry almost at home.
The Chinese market offers a wide range of disposable molds with ready-made molds. All that is needed to work with such a form is the required amount of precious metal and the ability to melt it.
They are used both by jewelers who do not have their own foundry, and by freelance craftsmen who make custom-made jewelry.
Anastasia Razulite
What is required for casting?
To melt brass, you must initially prepare equipment and tools for the work. This includes:
- Molding compositions. Made from fireproof materials. The shape is selected depending on the required finished product.
- Special tongs used to make it are removed from the molds after hardening.
- Heating equipment. You can use a purchased model or make a stove yourself. For assembly you will need fireclay bricks and fireproof mastic. For heating, you can use a gas burner or nichrome wire.
- A crucible is a container that is filled with consumables. They melt when heated. Then the master pours the molten metals into a mold prepared in advance. The crucible is made of clay or graphite. Additionally, heat-resistant coating is used, which increases the durability of the container.
In order to remove the crucible from the furnace, semicircular tongs are used.
How to melt metal at home
The metal is placed in a cup or crucible and transferred to the furnace. First, large pieces are melted, then small ones are added. Fill the entire container with small shavings and sawdust at once. To obtain castings without harmful impurities and reduce losses, you need to know how to melt different types of metal. Precious metals are placed in glass ampoules of medicinal solutions and melted together with them. The glass crust that forms on the surface of the castings cracks and crumbles after cooling with water. Non-ferrous metals are melted in iron containers, and steel, cast iron, and iron are melted in graphite crucibles.
Security measures
When starting to operate a homemade furnace, you should take into account the threats that arise during smelting:
- Splashes of molten metal and heated parts of the installation often cause severe burns.
- In case of fire, there should be a bucket of cold water near the workplace.
- The lamp circuit must be placed in a housing to prevent accidental contact with parts that are supplied with high voltage.
- The range of the electromagnetic field is not limited by the dimensions of the housing. Therefore, before melting begins, you need to remove all metal jewelry and put electronic devices away. If you are near the oven, a mobile phone, digital camera, or MP3 player may be damaged. People with an implanted pacemaker are not recommended to be near the induction unit while melting is in progress.
In a home furnace, not only melting is performed, but also parts are heated before tinning, molding, and hardening. Despite the simplicity of the considered circuits, homemade induction installations are not inferior in basic characteristics to factory-made models for domestic use. If necessary, they can be easily configured to solve a specific problem by changing the parameters of the induction coil and the output signal of the generator.
Under pressure
Injection molding is a manufacturing process adapted for the production of parts in high volumes. The casting mold includes a sprue channel through which the molten material exits the nozzle of the injection molding machine. The mold has a system of channels that connect to the sprue (usually inside or as part of the mold) and direct the molten material into the mold cavity. The part of the channel after the slider, called the gate, leads directly into the tool cavity. After the injection mold cycle (usually lasting only a few seconds), the entire melt is cooled, leaving a solidified casting in the sprue, runners, and mold cavity.
The main advantage of the injection molding method is the ability to mass produce castings. The initial costs of implementation and development of production are quite high, but subsequently the cost per unit of production becomes extremely low.
Other benefits of the process:
- low defect rate (compared to traditional production processes, including CNC machining);
- reduction of production waste due to small losses of metal in the sprues, guides, and the location of holes for the melt outlet;
- possibility of producing parts from thermosetting plastics.
Injection molding can be reproduced in any volume, since the durability of the molds is very high. This ensures uniform quality of castings and stability of their characteristics during large-scale production.
Injection molding technology virtually eliminates any modification of the shape of finished products.