general information
So why is it necessary to study the instruction manual at all? The instruction manual can be your guide to using the device if you are a beginner. After reading it once you will already receive a lot of useful information and will be able to perform your first welding.
And if you are a welder in production, then studying the instructions is a must. The fact is that the operating instructions for the device allow you to quickly and easily read production instructions for any type of welding work. The production instructions include technical specifications, types of equipment and consumables used, as well as direct operating instructions for the welding machine.
In this article we provide standard instructions for using a welding inverter. Of course, the instructions may differ for each individual welding machine, but the essence of their operation is the same. So after reading this article you will be able to use absolutely any welding inverter without the need to study additional information.
Arc gap control
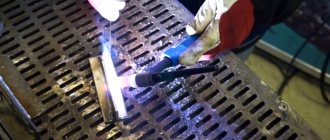
Welding arc diagram
You can speak with confidence about the initial skills of a welder when you develop the skill of correctly forming and holding the arc gap - the welding arc.
In fact, this is a simple process, the main thing in it is the understanding that the arc will be constant and melt the electrode most efficiently with the correct, slightly slow movement of the holder.
In many ways, this is achieved by trial and error - a consolidated skill will appear when, when moving the electrode, a homogeneous seam begins to form, connecting both parts being connected.
User manual
The operating instructions for the welding inverter consist of several steps that need to be studied once and simply remembered. It will be easier later.
Connecting a network cable
A power cable must be included with the welding machine. Check its integrity. Connect the cable to the inverter and then connect it to a 220V outlet. Check that all connections are correct. Make sure the welder's power light is on.
Connecting welding cables
Any welding inverter has two connectors on its body, marked with the symbols “+” and “-”. Simply put, plus and minus. Cables are inserted into them regardless of the type of work. They just connect. But then the cables need to be correctly connected to the holder and to the part that you will weld. It all depends on what polarity you choose to work with.
If you are going to weld with straight polarity, then connect the negative cable to the holder, and the positive cable to the part being welded. When working with reverse polarity, everything is exactly the opposite. We talked in more detail about the features of working with reverse polarity in this article.
Note that these recommendations apply to DC inverters.
Features of operation
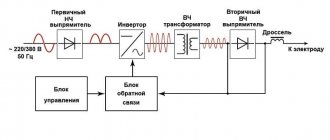
Ease of operation distinguishes inverter welding from transformer welding. To start welding work, you just need to power the inverter from a regular home power outlet.
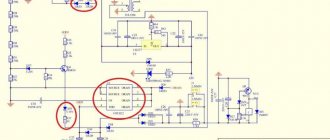
To smooth the incoming alternating current, a rectifier filter is built into the device. Transistors are responsible for converting direct current into high-frequency alternating current. Now the frequency is 20-50 kHz.
This is just the first stage. The next phase is to reduce the high frequency alternating current. The value of the welding current will be about 100-200 Amperes.
Safety precautions
Safety precautions are a mandatory section to study. Do not start work until you remember all the rules.
- Do not use the machine if the cables and/or their insulation, plug, or welding machine body are damaged.
- The welder must use welding gloves and never handle cables with bare hands.
- Be sure to turn off the inverter when not using it.
- Do not switch the welding mode directly during operation, the machine may break.
- If you are not using the device, disconnect the cable leading to the electrode.
- If unexpected situations occur, turn off the inverter using the emergency switch.
- Welding work must be carried out using certified components that meet safety requirements.
- Do not inhale fumes while welding.
- Ensure good ventilation in the workplace.
- Use protective clothing and a mask, do not forget about the hat, shoes and gloves mentioned above. Clothing must be made of non-flammable material.
- Do not allow strangers to your workplace. Or provide them with the proper level of security.
- To reduce the risk of fire, remove all flammable items from the work area.
- Keep a fire extinguisher or any other fire extinguishing equipment nearby. Read the operating instructions for these products.
- Do not work with containers that are under pressure.
- Do not handle uncleaned containers that have contained flammable liquids.
- Do not work in clothing stained with flammable liquids.
- Do not carry matches or a lighter in your work clothes pockets.
- Monitor noise levels while welding. Increased noise levels can lead to partial or complete hearing loss. Use additional hearing protection methods.
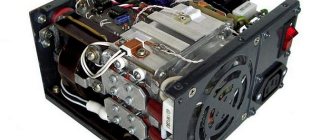
Description of equipment
Resistance welding equipment is used in a group of processes in which metals are joined by heat generated by the resistance of the welded object to electrical current, in the circuit of which the object is a part, and by the application of pressure. External device device:
- belt;
- frame;
- display;
- current adjustment;
- power button;
- overheat indicator;
- ventilation grille;
- cable connectors;
- support legs.
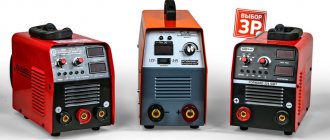
What does a welding machine look like?
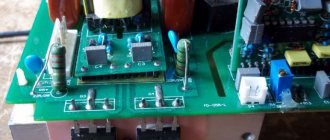
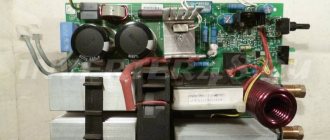
The internal structure of the machine:
- power block;
- control block.
Rules for welding work
Welding rules may vary depending on the model of welding inverter you use. For example, some models may have increased protection against dust and moisture, and therefore they do not require careful storage conditions and can be used in field conditions.
Also, some inverters are equipped with indicators that indicate overheating of the device. After this, the device must be turned off and allowed to cool. But if your model does not have such an indication, then you will have to monitor the temperature yourself.
If you have temporarily suspended welding work or finished it, turn off the welding inverter from the network. If there are other people in the work area with you, install a special screen for them to protect them from radiation and sparks.
Use protective clothing made of thick, non-flammable fabric, do not forget about a protective mask (we recommend a chameleon mask), shoes and gloves. Shoes should not conduct current. If you don't have such shoes, you can use a rubber mat. Do not store flammable items in your work clothes.
Check the condition of the cables and the inverter itself before welding. Make sure all cables are connected correctly. Follow safety precautions to avoid harm to health.
Before welding, thoroughly clean the surfaces to be welded. There should be no traces of corrosion, oil, dirt, paint, etc. To clean, use solvent, sandpaper, grinding wheels, etc.
Welding thin metal with an inverter
The capabilities of the inverter are fully realized when welding rolled metal with a thickness of less than 2 mm. Welding of such materials is carried out at low welding currents and requires high stability of the welding process, which can be implemented without problems when using a device with an inverter current source. Thin metal sheets can easily be burned when a short circuit occurs in the welding arc. To prevent this phenomenon, inverters have a special function that automatically reduces the current value during the occurrence of a short circuit. Another useful feature of inverters is the selection of optimal parameters when igniting the arc, which allows you to avoid lack of penetration and burns in the initial section of the weld. In addition, during the welding process, the inverter is able to adaptively maintain the required operating current when the size of the welding arc fluctuates.
Welding machine maintenance
Basic maintenance of the device is to clean it from dirt and dust. This cleaning must be done regularly. Maintenance of the device must be performed by a specialist at a service center or production site. Do not perform maintenance unless you have sufficient skill and experience.
Before servicing, unplug the device. Wipe all cables and the housing with a damp cloth or a special cleaner if the dirt is ingrained. Do not disassemble the inverter housing unless necessary. Do not use a wet cloth for cleaning. Do not kink wires during cleaning, and generally perform maintenance carefully.
If you give the inverter to a specialist, he should clean the device from dust using compressed air. An air compressor is often used for this. If certain parts are constantly getting oily, they need to be cleaned regularly with a cloth. The specialist should also inspect how securely all the parts are fastened and adjust them, if necessary.
The service technician should also regularly check all cables for breaks or faults. This check must be performed either before sending the device for long-term storage, or once a month.
Storing the welding machine
Storage of the device is no less important than its proper operation. The service life of the inverter and the frequency of its breakdowns largely depend on storage.
The inverter can be stored in the box in which it was supplied. But it is better to use plastic packaging. This can be a bag made of thick polyethylene, roll packaging, etc. In short, protect your device from dust, dirt, water and snow. In this case, there is no need to pack the inverter tightly; leave holes for air access.
Modern devices can be stored at extreme temperatures (from +50 to -20 degrees), but we do not recommend experimenting. It is better to store the inverter at room temperature. Do not store the device directly on the ground (even in its packaging), in a damp basement or in a place with high humidity.
Tips and possible mistakes
When starting to use a welding inverter, the most important thing you need is to be patient; more than one pack of electrodes will go away before you get a really beautiful seam.
But you need to strive for this from the first time you turn on the device, and the following points will help a lot:
- At the initial stage , it is enough to learn how to hold the arc so that the electrode heats up evenly.
- In the first lessons, it is recommended to first learn how to form a horizontal seam, and only then diversify the tasks - welding vertical and ceiling elements.
- It is important to get into the habit of cleaning rust and deposits from the joints.