A screwdriver is one of the most popular electrical tools used by professionals and home craftsmen. It is necessary for carrying out construction and finishing work in the house and in production. They can be used to unscrew and screw in self-tapping screws, bolts, screws. There is a wide range of different bits available for this purpose. By inserting a drill bit, you can drill a hole in metal or wood. Knowing how to disassemble a screwdriver chuck is necessary for its maintenance and repair. Regular cleaning will extend the life of the tool.
What is a cartridge
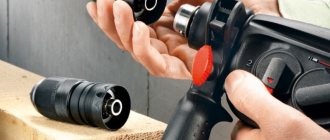
The cartridge resembles a metal cylinder. The part is attached to the screwdriver shaft.
The purpose of the element is to fix the working bits of fasteners.
Chuck device
The internal thread on the chuck or a special cone is designed for mounting on the shaft. Structurally, the most wearing components are divided into three main types:
- quick-clamping (BZP);
- self-clamping;
- gear-crown (key).
The most common option is BZP.
The shank in this case is clamped by manual rotation of the tool sleeve.
Clamping elements, which are installed on modern screwdrivers and drills, allow you to securely fix shanks with a diameter of 0.8-25 mm.
Perhaps the only disadvantage of a new product of this type is the higher cost relative to key sleeves.
To fix an element in a clamping product like BZP, a few seconds are enough.
In this case, the help of auxiliary components is not required.
The blade of the adjusting sleeve is corrugated, so rotation of the cylinder is not difficult.
The pressure on the product shank is adjusted using a locking element.
Over time, parts of the clamping mechanism wear out.
Therefore, the design of a cartridge of the BZP category implies a gradual loosening of the clamp.
As a result of wear, the sleeve is not able to reliably fix large diameter round shanks.
In disassembled form, self- and quick-clamping models are:
- sleeve;
- base;
- movable jaws;
- washer;
- bearing;
- serrated nut.
Design and features of the toothed chuck
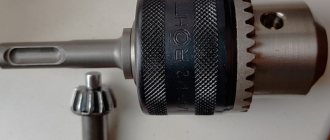
Unlike popular modern sleeves, this classic version requires the use of a special key. But in this case, a more reliable fastening is possible in any situation.
ZVP refers to cam or collet type clamping sleeves.
They make it possible to clamp both products with round shanks and cylindrical elements. Main components of cam VEP:
- cylindrical body;
- an adjusting sleeve or ring that rotates externally;
- cam mechanism, which is mounted inside.
The collet mechanism is made of durable steel.
It consists of three twin cams.
When the sleeve or ring rotates, the latter form a single whole.
Due to this, reliable fixation of products occurs.
Screwdriver "Makita"
Description, general information
produces various power tools, including screwdrivers. The company began its history at the beginning of the 20th century, and to this day it continues to delight consumers with its high-quality products. Let's look at the general features and characteristics of the models of this company.
Makita screwdrivers are very powerful. The average speed for various models is about 2300 rpm, which is a good indicator compared to other brands. The weight of most instrument models is within 1.5 kg. Its small mass means that such a tool will be comfortable to work with. The manufacturer also took care of the convenience of working in poorly lit rooms, making most models backlit with LEDs. Separately, it is worth highlighting the type of handle for holding these tools on weight. As a rule, they are made with rubber, and therefore they are convenient to hold in the hand, and accordingly, the work process is much easier.
The disadvantage of these screwdrivers is the strong vibration of the handle during operation, as well as their short-lived batteries. In addition, the price of this company’s products is quite high, which is important for domestic consumers.
Diagram, device of a Makita screwdriver
Let's look at the design of a screwdriver on a specific model 6271D. The diagram of this model is presented in the figure below.
Scheme 1
The diagram shows:
- Shift lever
- Housing assembly
- Nameplate
- Screw
- Spring
- Reverse shift lever
- Start button
- Contact terminal
- Screw
- Keyless chuck
- Gearbox assembly
- Electric motor
- Screw
- Housing assembly
- Charging node
- Battery
A modern screwdriver is a high-tech device. Important design elements:
- Removable battery
- Rubberized handle grip
- Powerful electric motor
- Metal planetary gearbox
- Soft start button
- Reverse switch button
- Torque regulator
These are the main components of the screwdriver design, which are included in the basic package of any screwdriver model.
Disassembling a Makita screwdriver
To disassemble the screwdriver you will need a Phillips screwdriver and a little personal time. To disassemble the screwdriver completely, you need:
- unscrew the housing mounting screws;
- remove the composite start button mechanism;
- remove the electric motor together with the gearbox;
- disconnect the gearbox from the engine by unscrewing the bolts holding them together.
To disassemble the screwdriver battery, you need to unscrew the bolts connecting the case, or separate the adhesive-based connections of the case using a soldering iron. Inside the battery there are several nickel-cadmium batteries that have a certain capacity and carry a charge. If the battery is repaired, they must be replaced with new ones.
The cartridge is changed using a screwdriver and a hex key. First, you use a screwdriver to unscrew the mounting screw in the cartridge, rotating it clockwise. Then the hexagon is inserted, the reverse button is turned on, it is clamped, and then the cartridge gives in easily.
Types of cartridges
More details about the types.
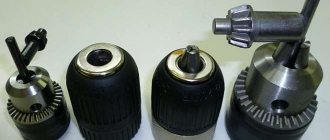
Screwdriver clamping devices are divided into:
- quick-clamping:
— single-coupler; — two-coupling;
- self-clamping;
- key.
The first two types are similar.
The difference lies mainly in the fact that self-clamping models fix the products automatically.
If the tool has a locking mechanism, single-clutch cylinders can be used.
If there is no blocker, you will have to use a two-clutch type.
Elements with one coupling can be clamped with one hand.
To work with another type, the participation of both hands is required.
Quick- and self-clamping models are intended mainly for modern tools.
For example, for pneumatic screwdrivers.
Models with automatic clamping are convenient for those who need to quickly and often change different attachments.
Key options are less convenient, but more reliable. They clamp better and are more resistant to shock loads.
If the cylinder will be used intensively, it is recommended to choose a screwdriver with a key.
Brushes for Makita screwdriver
The brushes used for the screwdriver have a graphite base. Their cost today varies between 2–5 USD. e. They are located in the electric motor housing and consist of two graphite cubes mounted on metal plates. With intensive work, they wear out and wear out.
When doing DIY repairs, you can sharpen them with a file from brushes from another tool, for example, a car starter. After recessing, they should be inserted into the brush holder and put in place, assembling the engine.
Mounting methods
There are three ways to attach the clamping cylinder to the spindle:
- using thread;
- using a fixing screw;
- using a Morse taper.
The first method involves the presence of threads on two parts in contact.
The cylinder is screwed onto the shaft.
The screw is used as a contact amplifier between the sleeve and the shaft.
In this case, screwing also takes place, but the fixing component serves for additional fastening.
The screw is usually characterized by a left-hand thread and the presence of a “cross” head.
To see the element, you need to move your fists as far apart as possible.
The Morse taper is a variant that has been used for over a hundred years.
The surface of the shaft has a cone-shaped format, similar to the shape of the cartridge.
The matching parameters of both cones make it possible to reliably and quickly combine parts.
This option is used in many modern models (pneumatic, etc.).
How to determine the fastening method
Before figuring out how to remove the chuck from a screwdriver, you need to determine the method of fixation.
A tool that uses a clamping device with a Morse taper fastening type may be marked B10, B12, B14, etc.
According to GOST, there can be 9 standard sizes - from B7 to B45.
The number indicates the size of the cone.
Next to it, in millimeters, the range of diameters of the shanks of fasteners that are suitable for fastening in this screwdriver is indicated.
The screwdriver chuck with a threaded fastening has a different marking.
On domestic models you can find the type designation 1.0-11 M12x1.25.
This marking is in metric format.
The numbers before the letter indicate the permissible shank size, the rest - the thread size.
Foreign screwdrivers use the inch designation.
For example, a part may be marked as follows: 2-13 mm ½-20 UNF.
Here the first numbers are the diameter of the bits, the fraction is the diameter of the thread in inches, 20 is the number of threads in each inch.
How to repair a clamping cylinder
Often the reason for removing and disassembling the screwdriver head is to repair individual parts and eliminate defects. Read more about how to do it yourself at home.
With backlash
If the deviation of the sleeve during operation does not exceed 1 mm, then this is not critical. If there is more play, you will need to disassemble the device. Repairing a screwdriver chuck for this case is performed as follows:
- Unscrew the fasteners on the top cover of the tool and remove it.
- Disconnect the engine from the gearbox and carefully check all fastenings.
- Disassemble the gearbox. If the bushing fails, then it is the cause of the strong play. This part must be removed manually and replaced with a new one.
Disassembled gearbox
- Next, you need to lubricate all the rubbing elements and assemble the gearbox back in a clear sequence: bushing - shaft - bearings - retaining ring.
- The gearbox is attached in place to the engine.
- The top cover of the screwdriver is screwed back.
When the cylinder runs out
If there is beating of the chuck in the screwdriver, the reason also lies in the gearbox. It must be dismantled, disconnected from the electric motor, disassembled, and carefully inspect all the parts. A broken cartridge case is a consequence:
- violations of shaft geometry;
- wear of gears, pins;
- failure of the shaft bearing.
After identifying the broken elements, you need to purchase new ones, install everything correctly, assemble the gearbox back and attach it to the engine.
When jammed
Another common problem is that the cartridge begins to jam. This is caused by the jaws losing full clamping over time. To repair the head, there are several methods:
- Carefully lubricate the cylinder in all places - perhaps this is the only reason.
- Squeeze the cartridge in your hand and hit it hard 1-2 times on a hard wooden object - a beam or a stable table.
- Compress the body with a vice and the cylinder with a gas wrench. Place the screwdriver against the table with the chuck and turn it on.
Often the head jams after it becomes clogged with sawdust and other small debris. If there is a suspicion of clogging, the cylinder should be thoroughly heated with a hair dryer, or even better, held over an open fire for several minutes. The part is then thoroughly lubricated.
When scrolling
If the cartridge rotates, then the problem is most likely due to the abrasion of the teeth on the locking coupling. The problem is solved like this:
- Remove the coupling.
- In place of the ground teeth you need to drill small holes.
On the left is the coupling and its teeth.
- Insert screws into the holes. Their protruding parts are removed with pliers.
- Return the coupling to its place and check how the cylinder now moves.
How to remove and change the cartridge
You need to understand how to remove the chuck from a screwdriver even if repairs have not yet been made and are not expected.
The procedure must be performed periodically for routine cleaning and lubrication.
This will increase the service life of the tool.
There are various ways to remove the clamping device.
The method depends on the manufacturer of the screwdriver and the specific type of model.
Below we will look at how to remove the Bosch and Makita cartridge.
Using the example of these brands, it will be possible to handle tools from other manufacturers - remove the cartridge "Interskol", "Metabo", "Dewalt", "Zubr", etc.
Attention!
It must be remembered that we remove the cartridge only from a cooled tool.
Correctly removing a heated element will be more difficult, since the rotating parts are firmly fixed in the socket for a long time.
First, let's look at how to unscrew a cartridge with a fixing screw.
To do this you will need a hexagon of the appropriate size.
A diagram describing how to change the cartridge with this mounting method:
- unscrew the screw clockwise (if the part has a left-hand thread); To do this, open your fists to the maximum;
- insert the key into the cams and turn it sharply counterclockwise; for this you can use help - for example, a hammer;
- unscrew the cartridge.
Read more about how to replace a cartridge with a different type of mount.
Recommendations and tips
How to unscrew a jammed cartridge on a screwdriver? To do this, you need to pour a lubricant into it, for example, WD-40. You should wait about five minutes for it to penetrate into all holes and grooves. To make this happen faster, you can use a hairdryer. Warm up the cartridge with it and then lightly hit the jaws with a hammer from all sides.
It is important to know that the cartridge is unscrewed only after the device has cooled. Removing an element from a heated tool will be very difficult, because the elements are firmly fixed in the socket.
Methods for removing the cartridge
To remove the cartridge you need to know how it is secured.
If you need to replace the chuck in a screwdriver with Morse taper type locking, you need the help of a hammer.
The last thing to knock out is the shank from the housing socket.
Sometimes the method may not work.
In this case, you need to take a radical path:
- disassemble the screwdriver;
- we take out the shaft with gearbox and chuck;
- Using a pipe wrench, unscrew the clamping cylinder.
In rare cases, the sleeves may have wrench-type recesses.
This simplifies the task, but it is better not to count on it.
Malfunctions of the Makita screwdriver
The most common screwdriver breakdowns are as follows:
- The screwdriver does not turn on. Everything is clear here. The first thing you need to do is inspect the battery, as well as the contacts and connections in the case, and the wiring. A multimeter will help you check.
- The reverse button does not work. This means that you will not be able to either tighten or remove screws and bolts. Here you should check the resistance of the button with a multimeter by placing test leads on the input and output wires of the button.
- The speed controller does not work. In this case, the speed will be either constantly reduced or constantly increased. The regulating transistor or brushes may be to blame here. A visual inspection of the parts is required.
How to remove a cartridge with a threaded connection
Let's look at how to remove a chuck from a screwdriver, in which the cylinder is attached to the spindle using a thread.
The scheme is as follows:
- unscrew the threaded fastener using an L-shaped hexagon;
- insert the key (usually 10 mm) with the short part into the cylinder and securely fix it with cams;
- turn the screwdriver on and off at low speeds; in this case, the free part of the hexagon should hit the support.
As a result, the threaded fixation will loosen and the clamping cylinder can be easily removed from the spindle.
If the mount is very strong and all three methods do not work, then you need to disassemble the tool.
How to remove the sleeve in this case is described above.
Situations requiring disassembly of a drill or screwdriver arise when preventive maintenance is neglected - routine removal and cleaning of the “clamp”.
In addition, it is recommended to rest the instrument at least every 15 minutes.
Then the repair can be postponed, and unnecessary difficulties with removing the clamping device can be saved.
Examples of cartridge removal
Owners of Makita screwdrivers are usually faced with the need to remove a chuck that uses a threaded fixation with an auxiliary screw fastening.
In such cases it is necessary:
- unscrew the screw;
- activate the shaft stop button;
- wrap the screwdriver body with thick cloth and secure it in a vice;
- hold the hex key in your fists;
- hit the key with a hammer and unscrew the cylinder.
Bosh tools are also most often equipped with a locking screw.
To remove the chuck, it is not always necessary to clamp the screwdriver body in a vice.
In many cases, it is enough to place it on a table or other support, press the stop button, remove the cartridge retainer and the cylinder itself.
Models from other manufacturers must be dealt with using one of the described methods.
The sequence of actions in these cases is similar:
- determine the fastening method;
- According to the diagram, we remove the part.
Features of removal for screwdrivers of different brands
Makita often makes plastic cartridges for low-power household models. When working with such a design, you need to be especially careful not to damage the housing. If you remove the jaw chuck , you will first need to open the jaws.
Speaking to Makita, its tools are equipped with automatic locking. The cartridges are single sleeve.
Bosch models are similar in structure. Most brands use similar structural principles. The only difference is that Bosch screwdrivers have an autolot in the chuck.
Milwaukee are good quality tools with a threaded design and optional screw retention. It must first be unscrewed, then knocked out. The manufacturer does not recommend changing the cartridge , but advises contacting a service center. First, the standard parsing procedure is performed. Sometimes, if the usual option does not help, the tool has to be completely disassembled, removing the gearbox with the spindle.
Manufacturers Bison and Hitachi, Metabo , DeWALT are very similar to each other. If you need to dismantle the cartridge for replacement or preventive cleaning, you need to unscrew it from the shaft. Working with screwdrivers from these manufacturers is not difficult: the screw is unscrewed using the standard method (clockwise), and then the housing is pulled out without additional effort.
Modification of the cartridge / Metabo PowerMaxx BS
Each owner must ensure that the instrument is in proper condition. All elements of the cartridge are thoroughly lubricated - this way it will last longer and will be easier to disassemble for replacement.
Sources:
https://profistroy74.ru/instrumenty/kak-razobrat-patron-shurupoverta-Metabo.html
How to disassemble a screwdriver chuck
Sometimes disassembly of the cartridge is required.
To perform this operation, you need to remove the plug at the base.
It is enough to pry off the plastic part with a knife.
The metal one can be knocked out with a heavy object by hitting the base of the clamping sleeve.
The process is as follows:
- take a large bolt and insert it into the cylinder, after which it is slightly centered with a small clamp of the cams; in this case, the head of the bolt protrudes a couple of centimeters above the sleeve;
- hit the bolt with a hammer.
After this, the most interesting part remains - disassembling the cylinder itself.
It is necessary to divide it into its component parts - sleeve, base, washer, bearing and nut.
The design may be slightly different, but in general the part consists of these elements.
In rare cases, it is impossible to disassemble the cylinder without damaging it and being able to reassemble it in the same form.
But if the design suggests such a possibility, then you can use the following method.
Instructions on how to disassemble the cartridge in the simplest and most effective way - using a hammer drill:
- some kind of adapter is inserted into the hammer drill; the role of the latter can be played, for example, by a broken drill with a diameter of 10-12 mm;
- put the cartridge on the adapter with the back side - the one opposite the cams;
- remove the cams and rest the cylinder against a hard surface, but always through a shock-absorbing buffer (rubber, foam, etc.);
- turn on the hammer drill in impact mode.
Thanks to vibration, we disassemble the cartridge in a matter of seconds.
As a result of manipulations, the sleeve flies off the cylinder, exposing other parts.
After cleaning, the elements are easily put back together.
It is important not to mix up the cams - although they are similar, during the operation of the tool the parts grind in and require correct assembly.
Some complex designs require sawing of the coupling.
After maintenance or repair work, the halves are assembled using a makeshift “tire”.
But in most cases, the indicated method - using an impact drill or hammer drill - works.
Makita screwdriver repair
Repair of Makita screwdriver button
The tool's on/off button is a complex electronic mechanism. It consists of several constituent elements:
- start buttons;
- reverse buttons;
- speed switch buttons;
- engine soft start buttons.
When repairing a button, you first need to disassemble it by unscrewing the screws securing the case and disconnecting the battery. After this, you must check the connections and contacts for contamination and clean them. If cleaning the contacts does not help resolve the problem, the button assembly should be replaced.
Repair of Makita screwdriver charger
When repairing the charger, it is necessary to unscrew the screws holding the housing covers together. Inside there is a printed circuit board with contacts. First you need to check the transformer with a tester. To do this, you need to measure the voltage at the output. Then you should ring the cable to prevent it from breaking. Then the primary and secondary windings of the transformer and the fuse are checked. You need to assemble it in the reverse order.
Makita screwdriver battery repair
When repairing the battery, use a Phillips screwdriver to unscrew the screws securing the case. There are several cans inside the case. Using a visual inspection, it is necessary to inspect them and identify irregularities in geometry, such as swelling, for example. We test the banks using a multimeter for the presence of residual charge. If it is missing, the bank is replaced with a new one.
How to choose a new cartridge
A screwdriver chuck is selected based on a number of aspects. When choosing a suitable part, you should be guided by the following recommendations:
- if bits have to be changed frequently, it is better to prefer quick- or self-clamping cylinders; otherwise the work will go slower;
- gear-rim design - the choice of those who strive for maximum cartridge reliability; if 100% fixation of the bit is a priority, it is better to purchase a key cartridge;
- when choosing a part, it is necessary to take into account its characteristics; parameters are regulated by relevant GOSTs; the larger the clamping cone, the larger the number with which it is marked;
- it is necessary to take into account the country of origin - the alphanumeric designations of foreign models differ from domestic ones.
If it is difficult to decide on the type of “clamp” on your own, it is better to seek advice from a specialist.
An incorrect choice is tantamount, at a minimum, to incorrect operation of the tool.
In the worst case, it is possible not only to re-spend on a new cylinder, but also to replace the entire screwdriver.
Selecting a New Tool
If the old cartridge could not be carefully disassembled and repaired, then it is necessary to replace it. You'll have to choose a new one. It should be noted that different types of cartridges can be installed in the design of screwdrivers. They can be keyed or keyless, as well as quick-clamping. The key product is different in that the clamp on it can be done better. Keyless chucks are not inferior in this parameter, but they have to be changed quite often, since the clamping mechanism very quickly becomes unusable.
READ How to Make a Straightener for a Screwdriver
If you have to frequently change the equipment when removing the chuck, it is preferable to choose a quick-clamping option, since if you replace the old part with it, you can save time on this procedure. When using large-diameter equipment, it is best to purchase a key chuck .
There are cartridges that are secured inside the device using a cone. They are also available with a key or are quick-release. The choice always remains solely with the buyer.
