Not all users like standard methods of restoring battery performance. As a rule, comments are caused by the excessive duration of the process. A homemade charger for a screwdriver will help eliminate this drawback. The information presented below will help you implement such a project without errors and extra costs. They are useful for professionally performing repair operations with your own hands.
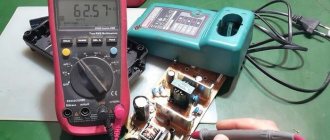
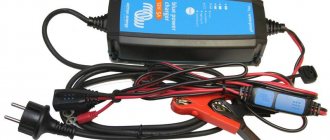
Factory charger for a screwdriver in disassembled condition
Benefits of cordless tools
The main advantage of power tools in this category is autonomy. The built-in rechargeable battery ensures the functionality of the equipment without connecting to a stationary power supply of 220 or 380V. This feature is used to carry out repairs in new buildings, in “camping” and other difficult conditions.
Other benefits:
- Without the interfering power supply cable, it is easier to carry out individual operations;
- Low battery voltage reduces the risk of electric shock;
- This tool is much quieter compared to an alternative autonomy solution based on a gasoline generator.
For your information. To be fair, it should be noted that adding a battery adds weight, cost and complexity.
What to do if the charger does not charge the battery
There may be several reasons why a cordless screwdriver stops charging:
- fuse burned out;
- wire is broken;
- battery problems;
- the battery overheated, the microcontroller forcibly limited the charge;
- The connector is dirty.
Charger wire broken.
The choice of solution depends on the source of the fault. If the charger fails, the reason requires internal intervention; it is better not to try to repair it yourself, but to take it to a service center.
The presence of a battery in a construction tool significantly expands the scope of use and makes work comfortable. At the same time, the user has a need to monitor the battery charge level and regularly replenish energy. It is important that the charger is in good working order, suitable for the type of battery of the screwdriver, and, if necessary, allows you to charge a spare battery when the main one is in use.
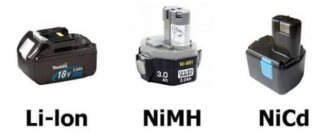
Types of batteries
A charger for a screwdriver is created taking into account the features of an autonomous power source. The following sections discuss popular rechargeable batteries. When studying the compatibility of the functional components of a screwdriver, it is recommended to pay special attention to charge recovery modes.
Nickel-cadmium
Lithium battery charger
These batteries are different:
- reasonable cost;
- good energy indicators;
- long service life.
Unfortunately, big problems arise at the disposal stage. Harmful chemical compounds in Ni-Cd batteries cause great harm to the environment. For this reason, the use of such products is gradually being phased out in many countries.
If other data is not indicated by the manufacturer, select the operating mode along with a suitable electrical circuit diagram for the screwdriver according to the following data:
- to extend service life, it is recommended to “train” with 2-6 full work cycles before starting operation and subsequently every 6-8 months;
- long-term storage in a discharged state is permissible;
- pre-discharge voltage – from 0.9 to 1 V;
- the nominal capacity is maintained only at positive temperatures;
- overheating is unacceptable during the recovery process (not higher than +40°C);
- the completion of the cycle is indicated by a slight decrease in voltage;
- The charge current is calculated using the formula:
2*C.
Important! The letter “C” denotes the capacity indicated in the battery passport. If C=2.5 A*h, you can use a charge with a current of 5A = 2*2.5.
Sulfuric acid batteries for screwdrivers
Products in this category are created on the basis of lead cells with an acid-type gel electrolyte. Advantages:
- simplicity;
- reasonable price;
- Possibility of use in any position.
The main disadvantages of sulfuric acid batteries are their significant dimensions and heavy weight. The cells are charged with a voltage of 1.8-2 V while maintaining a current of 0.1-0.15 * C.
Li-ion batteries for screwdriver
This is the most common modern solution. Batteries of a similar design are used in smartphones and laptops, and other household and professional equipment. Pros:
- better performance compared to the analogues discussed above in terms of energy storage per unit volume (weight);
- wide operating temperature range;
- long-term preservation of good operating parameters;
- no excessive recycling requirements.
One standard cell is charged with a voltage of 3.6V to a level of 4.2V. Exceeding the threshold set by the manufacturer will shorten the service life. A low level limits savings capabilities. The energy potential of batteries is restored with careful temperature control.
Restoring the drill
When working under increased loads and in a polluted repair environment, the screwdriver may break. The most common causes of malfunctions are dirt or dust. Sometimes a screwdriver stops working when the copper connections on the contacts oxidize. You can repair and at the same time configure the screwdriver yourself after studying the manufacturer’s instructions in the following sequence:
- Precautions must be taken before any type of repair work.
- Before replacing the chuck or removing the housing, make sure that the electric screwdriver is not connected to power.
- Try turning on the tool via the battery. If it does not function, there may be a problem with the battery or power supply. Replace the battery and check operation. If the electric screwdriver does not turn, there may be something inside that is blocking the start and you will have to remove the socket.
To do this, use a screwdriver to loosen the screws and carefully remove the cartridge. Before that, you need to make sure that there is a spare part for replacement.- Carefully unscrew the housing using a screwdriver. Open it, lift it up and check the device for internal defects.
- Cleaning the copper connection. If they are covered with dust or copper oxide, they need to be cleaned. To do this, you can use sandpaper until the surfaces are shiny and smooth.
- Wipe the instrument from dust and copper filings with a soft cloth.
- Save the connection diagram by taking photographs and a drawing on paper. This is very important, otherwise it will be difficult to assemble the wires in the same way as before the repair.
- Replacement and reassembly. Identify the parts where the parts are stuck and carefully replace them.
- Assemble the screwdriver, connect the wires and install the housing.
Troubleshooting the adapter
It often happens that the user charges the battery, but it stops working almost immediately; the indicator reports that the batteries are low. In this case, diagnostics are necessary to determine exactly what is faulty - the battery or the charger.
If the wireless mechanism (with built-in rechargeable battery) does not work, there is not enough power, you need to make sure that:
- The power is on at the output and the outlet is not connected to the network.
- Check the electrical cord and replace it if it is faulty.
- Test the power supply and carry out repairs.
- If your wireless device or rechargeable batteries are operating for shorter periods between charges, they are likely worn out. They should be inspected for damage or leaks and replaced if necessary.
Self-charging lithium-ion batteries
Sometimes for older tool models it is impossible to purchase a new charger and it is necessary to modify it or make a new one yourself. Lead-acid Ni-Cd and Li-ion batteries will require a charger circuit for an 18-volt screwdriver. The main features of this universal source are:
- DC voltage.
- Automatic shutdown when fully charged.
- The maximum current is 5 amperes, batteries can be charged normally.
- Fully customizable mode according to battery specifications.
- Low cost.
- Optimal electrical circuit. No special parts are required, they are all standard and easily available.
- LED indicators to monitor cut-off and charging status.
- Suitable for garages and home use.
This multi-purpose fixture is a 5 amp DC source, however, charging at a lower current may require an additional DC circuit between the input power supply.
When deep charging, the battery may overheat, which must be protected by automatic temperature controller circuitry or cooling fan. List of parts for repairing a screwdriver with your own hands:
- Resistors.
- Capacitors.
- Simistry.
- Zener diodes.
- Gearbox.
Types of chargers
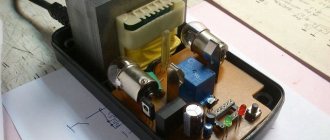
Battery charger
This section describes typical electrical circuits. Select a suitable charger for a screwdriver taking into account the following factors:
- battery type;
- number of cells;
- possibility of careful control of the charging process;
- availability of skills and knowledge for high-quality assembly (adjustment) of a certain design;
- additional requirements for weight, dimensions, and other individual criteria.
Analog with built-in power supply
The popularity of such engineering solutions is explained by their comparative simplicity and low cost. The device shown in the following drawing provides stable voltage maintenance for charging a 12-volt unit with a sufficiently high current.
Analog charger
Explanations for the electrical diagram:
- the KR142EN microcircuit performs the main function - stabilization;
- for the example given (at 12V), the modification with the index “8B” in the designation is suitable;
- this element heats up, so it is mounted on a metal radiator with a dispersion area of 20-25 cm2;
- transformer windings (conductor cross-section) are calculated based on the required output current;
- capacitor C1 removes residual ripples after rectification by a diode bridge;
- The completion of the charging cycle is indicated by the extinguished LED (HL1), there is no automatic shutdown.
Analog with external power supply
The circuit diagram in this embodiment is similar to the considered example. The main difference is the separate design of the rectifier block:
- transformer;
- diode bridge;
- capacitor.
Electrical circuit of the charger control unit
Such a device can be made miniature. It can be connected to a standard, fairly powerful rectifier (this is a power supply for a laptop, tablet, or other equipment). Assembly instructions:
- the KT 818 transistor dissipates a lot of power, so it is installed on an efficient radiator (area from 35 to 45 sq. cm);
- using a tuning resistor, the optimal output current is adjusted taking into account the characteristics of the battery;
- as in the previous version, the end of the procedure is the LED going out.
Pulse
Previous devices are capable of restoring the functionality of a standard screwdriver battery in 4-6 hours. The scheme presented below will perform a similar task much faster (45 minutes - 1.5 hours). The main advantages are minimal size and lightness.
Pulse memory
This circuit is designed to charge advanced Ni-Cd batteries. They are equipped with a special contact, which is necessary for monitoring temperature indicators. Such a device reproduces the accelerated discharge cycle without additional commands. The user can set various combinations of output parameters using jumpers.
Basic charging rules
To extend the life of the screwdriver battery, we recommend:
- adhere to the operating rules specified in the instructions;
- do not charge at critical temperatures, outside the range;
- Use only branded chargers or certified models for charging;
- When operating, observe the polarity of attaching the battery to the slot;
- if the charger is not equipped with a microcontroller, disconnect the unit from the network at the end of the procedure;
- Do not use damaged accessories.
If the screwdriver is not used for more than a month, in order to avoid battery degradation, it must be recharged regularly.
Charge modes
Nickel-cadmium (sulfuric acid) cells are charged with a voltage of 1.2 (1.8-2) V, respectively, while maintaining a current of (0.1-0.15) * C. In lithium-ion models, the voltage is increased to 3.3 V A standard 18 volt screwdriver charger maintains the same level during charging. The end of the operation is controlled at level 21 V.
Important! Lithium cells are especially sensitive to overheating. An increase in temperature above +60°C can cause not only structural destruction, but also ignition. To eliminate dangerous situations, this parameter is carefully monitored.
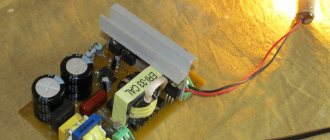
Wireless power supply device
Battery chargers convert 220 V alternating current from the mains into direct current. To perform its functions, the charger has a transformer and a special printed circuit board. Batteries produce current through a chemical reaction between two electrodes and an electrolyte. The voltage ranges from 1.2 to 24 V or more, depending on the battery type and amperage.
Many wireless devices are powered by a rechargeable nickel-cadmium (nicad) battery or a 20-cell battery. Each cell provides approximately 1.2 V DC current. The packs are built directly into the tool and have snap-on clamps.
A number of batteries have permanent built-in batteries that cannot be removed and are charged in the unit.
Charge voltage and form factor
There is no international standardization for the voltage of autonomous power supplies for power tools.
You should understand! Increasing this parameter allows you to reduce the weight and size of the battery. Lithium blocks are assembled from standard cells (1.2V).
For this reason, the resulting voltage will be as follows (for the number of batteries):
- 10 pcs. – 12V;
- 11 – 13,2;
- 12 – 14,4;
- 13 – 16,6;
- 14 – 17,8.
What it is?
A screwdriver battery charger is a device that allows you to replenish battery energy lost due to the use of the tool. Due to the ability to charge the battery many times, the battery itself can have a relatively small size and capacity, as long as the number of recharge cycles is large and the charger provides a high rate of restoration of the original charge.
All chargers can be globally divided into 2 classes: built-in and remote. In the first case, there is no need to specifically remove the battery for charging - the cable with an electrical plug is attached directly to the body of the instrument (or even permanently attached to it), which is quite convenient. Remote chargers are a separate mechanism that involves removing the battery from the screwdriver body, inserting it into a special clamp, and the latter has the same cable with a plug and is plugged into a socket. Each of the solutions has its own advantages and disadvantages, but more on that later.
If the above division into classes does not fundamentally affect the operation of the mechanism, then matching the type of charger to the type of battery is critically important. The fact is that even today batteries for power tools are available in several types, each of which has its own operating characteristics. If the charger does not meet the required parameters, this can lead to very rapid battery damage. To understand what criteria a charger should have, let’s briefly consider the features of all the main types of batteries.
- Nickel-cadmium batteries are quite rare today - their popularity is falling due to many factors, including the toxicity of the contents, the ability to quickly self-discharge, high weight with a relatively low charge, and the “memory effect”. The last criterion means that the battery must always be first completely discharged and then fully charged; if this rule is not followed, its capacity, already low, will begin to decrease literally before our eyes. Perhaps the only huge advantage of this type of battery is its ability to operate normally at any low temperature. At the same time, they are also capable of withstanding high loads, which is why chargers for them are often made with the ability to charge as quickly as possible - this is very important, since you always need to charge from 0% to 100%.
- Nickel-metal hydride batteries are considered an improved version of nickel-cadmium batteries - the disadvantages are generally the same, but they are all expressed to a noticeably lesser extent. In addition, the contents of such batteries do not contain toxic components. The advantages are also very similar to those of the previous type of battery, which is why these batteries are already much more common, and the chargers for both types are very similar. The only indicator in which metal hydride power supplies are worse than cadmium ones is cost.
- Lithium-ion batteries are rightly considered the most modern and technically the best. They are devoid of most of the disadvantages of the batteries described above, for example, they weigh little with a significant amount of charge, self-discharge by a few percent per month of inactivity, and are completely devoid of the “memory effect”. For a long time they were criticized for a somewhat accelerated discharge when working in frosty conditions, but in recent years this problem has been gradually solved. True, there are still disadvantages, and the highest cost is far from the only one. So, it is extremely undesirable to completely discharge such a battery - after this it may not restore its original capacity, although the advantage is that it can be recharged at any time due to the absence of a “memory effect”. Another problem is the possibility of a battery exploding when overheated from overcharging, so the charger for such a battery must be equipped with a microcontroller.
Among other things, chargers can differ in voltage - 12, 14.4 or 18 volts (this indicator must correspond to that recommended in the instructions for the screwdriver). Additional options include a special option for accelerated charging, as well as an indication of the charge level and automatic shutdown in case of a full charge or some unforeseen situation. The presence of additional functions negatively affects the cost of the charger.
Principle of operation
The charger should not be perceived as a simple cable that allows you to power the battery from an electrical outlet - this device is always somewhat more complicated. Depending on the exact set of functions of a particular instance, it may be structured differently, however, in general, the methods for achieving the goal are always approximately the same. Since it is impossible to charge a screwdriver battery directly from a 220 V outlet, the key part of any charger is a step-down transformer, which provides a significant reduction in voltage. He himself, as a rule, does not lower the voltage to the required value - the current acquires the necessary characteristics only later, passing through diode bridges and microcircuits.
To prevent the entire contents of the charger, not to mention the battery or the screwdriver as a whole, from burning out due to too high voltage in the power supply network, a fuse is installed at the very beginning of the circuit. Charge limitation is usually achieved in one of the two most common ways - either the microcontroller measures the current in the battery, or the charging time is limited by a timer.
The first option is good in the case of lithium-ion batteries, since they can be charged at any time, which means that the exact charging time cannot be determined. In this case, overcharging threatens to explode, so it is very important that the microcontroller is able to determine the charge level and turn off the power supply in time. The timer is good for recharging different types of nickel batteries - they are not afraid of overcharging, and they must be completely discharged before the procedure, so the charging time is always approximately the same.
For increased ease of use, some expensive charger models are also equipped with indicators, which are usually ordinary LEDs. Often they perform different functions - one can demonstrate the fact that the device is connected to the network, another shows that the current is not lost anywhere in the microcircuits and flows into the battery, others can even indicate the approximate charge level, highlighting only a certain part of the line in which they are lined up.
Charger upgrades
The first example (analog memory) shows an electrical circuit for a 12V battery. You can set other electrical parameters at the current and voltage output by changing the parameters of the transformer and the microcircuit. Refinement is carried out on the basis of preliminary calculations.
For your information. If you are only repairing the screwdriver charging, you should take pictures during the disassembly process. They will subsequently help you correctly install the functional components of the structure.
Popular models
When choosing a charger, the following are important: brand, slot compatibility, range of charging parameters. Among the popular ones:
Bosch AL 1130 CV.
- MAKITA DC10WA – compatible with screwdrivers from the Japanese manufacturer, with a holder shape for inserting the handle inside. The mounting socket is located at the front. Its depth is sufficient for vertical installation of the battery.
- Bosch AL 1130 CV – charger with automatic power control. The microcontroller provides fast, yet gentle battery charging. The charger is suitable for lithium-ion batteries operating at a voltage of 10.8 V.
- DEWALT DCB118 is a professional charger capable of charging batteries operating from 18-54 V. The adjustable current range makes the model compatible with most screwdrivers. DEWALT DCB118 has a forced cooling system that prevents overheating of both the charger and the battery.
How to make a charger for a screwdriver
First, the general parameters of the project are clarified. The existing unit is used as a basis, which ensures that the battery is fixed in the correct position and reliable electrical contact. Specify the type of battery and the corresponding charger.
Diagram and order of assembly of the power supply
Analog circuits are simpler, but take up a lot of space. Pulse devices are compact and highly complex. Having chosen the appropriate option, they use wall mounting or create a printed circuit board taking into account the free space in the case. During manufacturing, ventilation holes are created to effectively cool powerful transistors and microcircuits. At the final stage, functionality is checked and assembly is completed.
How to use an electrical appliance
The charger is used taking into account a certain circuit design. The simplest models only signal the completion of the process, but do not turn off the mains power. Some types of batteries must be charged with careful temperature control. After a practical study of the assembly process, it will not be difficult to repair a failed product.
Repair of current sources
Rechargeable batteries actually do not have complex spare parts, since they are assembled from simple charging elements. In order to determine the repair, you need to open the source and check for damage. Tools and materials that will be needed when performing repairs:
- Multimeter.
- Screwdriver.
- Electrical contact cleaner.
- Insulating tape.
There are times when the coil of a cordless screwdriver is defective and hence overheats the device. The insulation melts easily, the batteries are damaged and the cordless screwdriver cannot be used. A technical error cannot always be determined by external inspection and disassembly of the instrument is required.
Sequence of operations:
- Unplug the tool from the electrical outlet.
- Use a rag, sandpaper, or electric contact cleaner to clean the contacts between the power handle and the charger.
- Plug in the power supply several times to make sure it is functioning correctly.
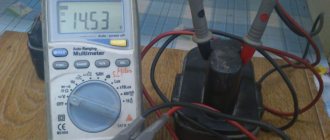
- Check the device for DC output. Set the multimeter to 25 DCV. Plug it into an electrical outlet.
- Touch its two probes to the corresponding contacts (+ and -). If the meter readings are zero, swap them.
- The DCV output should be around or slightly above the power rating of the source. That is, at 9 V DC the device should show no more than 10 V.
- Check the AC output source. Set the multimeter to 25 ACV. Touch the two probes to the contacts. If there is no reading, the transformer is faulty. Select a replacement with the same denomination and size.
- Check the battery. Fully charge the battery. Set the meter to a DCV scale greater than the rated power of the battery pack.
- Touch the red probe to the + terminal and the black probe to the terminal and measure.
- Replace the battery if the reading is 1 volt below rated power.