Home / Components and accessories / How to attach pendants to the ceiling
When starting to install suspended ceilings, you need to know some of the nuances of assembling such structures. In particular, how the suspensions are attached to the ceiling. This part of the frame bears the main load, and the appearance and service life of the assembled structure depends on how correctly the installation of this component of the base is carried out.
Features of ceiling hangers for plasterboard
Ceiling hangers are a universal product, the functional purpose of which is to provide reliable fastening of drywall and perform certain decorative functions for the coating.
These elements not only help to obtain a perfectly flat surface of the ceiling covering, but also give the structure special stability and strength, significantly improve heat and sound insulation characteristics, and help in creating a design of any complexity.
Marking and installation of lathing on the wall
Depending on the structure and material of the supporting structure on which the sheathing needs to be installed, we select the element with which the direct suspension will be attached. I propose to consider the option of a brick wall in an ordinary apartment. In this case, we will need a 6/40 dowel nail (provided that the wall is not made of foam blocks or tripod bricks). The most optimal solution would be to use a long level or profile for gypsum boards to make markings over the entire surface of the wall. The distance between each vertical row should be 40 cm (in some cases, when finishing with metal siding or decorative stone, the frequency of the lathing is reduced to 30 cm).
You can first mark the installation locations, namely the points for drilling for the dowel. Then, having drilled the required number of holes with a hammer drill, we attach the suspension for PP 60x27 and hammer the dowel. I consider the second option to be the fastest; I personally work using this method. Press it against the wall at the level of the markings. We hold a hammer drill in our other hand and drill holes straight through it. The drill bit is a little wider, so it will break up the mounting area slightly, but not much. The dowel-nail fits well into the resulting hole along with the plug.
Distance between hangers on plasterboard ceilings
When installing drywall, you must first determine how many hangers will be needed. This value directly depends on the load-bearing capacity of the part. It should be taken into account that a standard sheet of drywall with dimensions of 1200x2500 cm will weigh around 22 kg.
According to the stated characteristics, various types of parts can withstand this level of load:
- straight – 40 kg;
- anchor – 25 kg;
- vernier – 40 kg;
- vibration suspension – 12-50 kg;
- butterfly – 40 kg.
The optimal amount is calculated based on the load-bearing capacity and weight of the drywall. They should be located at a distance of 60-70 cm from each other. In some situations, this value can be increased to 100 cm, but no more.
Some nuances when working
- The first and very important one is compliance with safety precautions. The edges of the product are sharp so it is very easy to cut yourself. When installing on a brick wall, in order to save time, you don’t have to mark the drilling spots. I use this option for mounting the suspension 60x27. With one hand we press it against the wall, with the other we drill a hole through the petals with a hammer or drill. It is in such cases that a drill (or drill, in the case of a hammer drill) can wrap it around itself and leave deep cuts on your hands (I warn about this for your safety, since I myself have been finishing gypsum board premises for a long time).
- The straight Knauf drywall hanger comes in different thicknesses and lengths, so before buying, measure how far from the load-bearing wall you need to extend the sheathing. The surface that you plan to cover may turn out to be very uneven or, on the contrary, you will need to make, for example, a niche in the wall or a multi-level ceiling.
Sometimes you have to increase its length with a piece of profile. This is done like this: cut the ceiling profile to the required length, screw it on both sides along the suspension. We attach one to the main wall, and bend the second forward for future sheathing. But if the distance from the sheathing to the wall is minimal (no more than 10 cm), then the thinnest and cheapest ones are quite suitable.
Back to contents↑
Dimensions of drywall hangers
As practice shows, the choice of a suitable suspension depends largely on its dimensions and purposes. The most popular type is direct suspension, with standard dimensions of 12.5x6.3 cm. It should be used in a situation where the consumer plans to insulate the ceiling or level it. These dimensions are quite enough to hide the wiring between the base of the ceiling and the plasterboard structure.
If there is a need to create a ceiling with complex geometric shapes or plan to install volumetric elements (ventilation cabinet), then you need to use a wire rod. The length of the wire-type plasterboard hanger is 50 and 100 cm.
Frame cladding tips
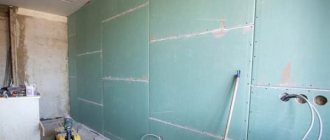
You should remember that poor sheathing can be identified by the presence of a large number of small pieces of drywall that cover the entire frame. To make high-quality cladding, it is necessary to reduce the number of gypsum board pieces as much as possible, and ideally, use only whole pieces. The fewer seams you create, the better and more reliable the product will be.
Under no circumstances should you install sheets of drywall close to the floor or ceiling, as moisture accumulates there; you need to make a distance of 1 centimeter between the ceiling or floor and the drywall; later these holes can be filled with putty or sealed with decorative elements.
When putting putty, use two types, that is, starting and finishing. Choose a spatula according to your preferences. Also, do not forget about using reinforcing tape. More specific recommendations can be obtained for a specific product, articles about which are on this site. We indicate all the details in them, so here we have provided general tips and instructions that will help and enrich the knowledge of both beginners and specialists.
Types of drywall hangers
The building materials market offers a wide range of suspensions, which differ in shape, technological nuances and methods of fastening. Drywall hangers vary noticeably in size and type. Each type of product has its own characteristics, advantages and disadvantages.
Direct hanger for drywall
The most common and popular option. In appearance, it is a rectangular plastic made of galvanized steel. The main reason for the popularity of this option is that, thanks to a slight mechanical effect, the suspension can be modified, as a result of which it will receive a U-shape.
Despite its small dimensions, the galvanized steel part can withstand significant loads (up to 40 kg). It is not susceptible to the negative effects of corrosive activity and has increased protection from moisture. The standard dimensions of a direct hanger for drywall are 12.5 x 6.3 cm.
The design features make direct suspension indispensable when it is necessary to install plasterboard sheets to concrete, brick and stone bases. Thanks to this, it can be used in premises for various purposes.
Often direct suspension is used for:
- frame assemblies for cladding wall and ceiling surfaces;
- preparing a frame base for subsequent lining with plasterboard (this option has become an ideal solution in rooms where there are serious ceiling defects, including an uneven base, cracks, etc.);
- leveling any surface.
Extended drywall hanger
This device is used in cases where a metal profile needs to be installed at a distance exceeding standard parameters. Often such parts are 52 cm long and are produced to order.
If there is a need for an elongated profile, it is possible to create it from a direct suspension thanks to simple steps.
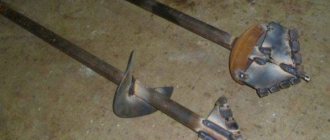
Drywall anchor hanger
This option is also known as a clip hanger. Its main purpose is the installation of plasterboard structures and the fixation of suspended ceilings. The anchor helps create the required space under the ceiling. This means that thanks to the use of this design, the user will be able to independently adjust the height of the assembled ceiling.
Height adjustment is carried out using a wire rod. The anchor design includes a rod and an anchor element with a clamp. It is inserted into the profile, after which the location is fixed with a clamp located at the bottom of the structure.
Important! Unlike direct suspension, the anchor has a weaker load-bearing capacity (no more than 25 kg).
Suspension rod for drywall
Often, when installing a plasterboard ceiling, it becomes necessary to change the height of the structure by up to 0.5 m. There can be many reasons for this, the most popular ones include the need to lay utility lines, install a ventilation duct, or install a multi-level ceiling.
In this case, you need to use a drywall sliding hanger, also known as a drywall hanger. The diameter of the suspension is approximately 4 mm. On one side it has a special eye for anchoring to a reinforced concrete floor, on the other there is a clamp made of galvanized steel.
The height of the ceiling structure can be adjusted by increasing or decreasing the length of the wire rod. They are produced with standard length parameters, there are two types - 50 and 100 cm. When changing the height of the ceiling structure, the excess draft is cut off.
Vernier suspension
A special device that provides additional rigidity to the structure. The vernier suspension consists of the following elements:
- The lower part is presented in the form of a clamp, a fastening part with protrusions. For ease of fastening in the required position, this part has many holes.
- The suspension itself, the length of which is in the range of 40-100 cm.
- A fixing element in the form of a fastening bracket, due to which the suspension is secured in the desired position.
Important! The standard load-bearing capacity of a vernier is 40 kg. During installation, it is necessary that the distance between the hangers be at least 60 cm.
Vibration suspension
A special type of adjustable drywall hanger, which is designed to impart soundproofing functions to the structure. It is not used so often when installing plasterboard ceilings. This can be explained by its excessive cost and the ability to muffle extraneous sounds using other methods.
As practice shows, the use of this device in combination with a seal allows for maximum sound insulation. This type of design is available in several variations:
- standard suspension;
- polyurethane vibration suspension with high sound suppression capabilities;
- design with anti-vibration mounting, externally resembling a standard anchor;
- removable vibration platform. This is an adjustable design, thanks to which profiles can be fixed at different lengths.
General installation procedure
Mark the location points on the ceiling. Then, according to the markings, drill holes for mounting to the ceiling. After this, installation begins. Fasten with dowels or anchor connections. It is better to use the latter, since they meet fire safety requirements - the ceiling will not collapse even if the plastic cup of the dowel burns out. After fixing the supporting profiles to the antennae, check the plane of the ceiling using a level. After adjustment, the profiles are attached to the hangers with self-tapping screws, and the excess parts of the “antennae” are bent, pressed and fixed to the profile also with self-tapping screws.
Adjustable suspension
Installation of adjustable ones is approximately the same. First, install the top link. Attach to the ceiling with anchors. After the profiles are installed, the hangers are simply put on the rod and inserted into the profile, some are clamped. Then the length of the wire is adjusted to ensure the required height and even surface of the drywall. After this, everything is fixed with self-tapping screws.
How to extend a straight drywall hanger
Direct suspension is a universal mount, presented in the form of a narrow perforated strip of galvanized steel with increased flexibility. When using these parts, it is recommended to fix them on the ceiling at a distance of 50-70 cm from each other.
If there is a need to lengthen the profile, for example, to create a multi-level ceiling structure, you can purchase a special hanger for the plasterboard profile. However, due to its high cost, it is often cheaper to enlarge a standard straight part.
The simplest extension option is to screw small pieces of another part to the existing hanger. They can be secured using small screws (it is recommended to use at least two fleas for each plate).
Another popular way to increase the length of a straight part is the use of a UD guide element. You can cut a suspension from it to the required length.
To assemble the metal structures of the suspended ceiling frame, you will need the following components:
Types of profiles for drywall.
- guides;
- suspension elements;
- elements for joining the profile and guides.
The main element of the metal frame structures for suspended ceilings made of plasterboard sheets are guides. Structurally, the guides are a U-shaped profile of various lengths and thicknesses made of galvanized steel.
Suspensions are used to attach the frame to the base surface and give it rigidity. Each manufacturer, as a rule, can offer several types of suspensions. Their main task is to withstand weight loads from the ceiling, regardless of design features.
[custom_ads_shortcode1]
How to attach ceiling hangers for plasterboard
The fastening of ceiling profiles for plasterboard is carried out during the process of assembling the base for gypsum panels along the entire length of the part. If for guide-type profiles it is enough to select fastening material that matches the material of the wall ceilings, then with ceiling slats the situation is somewhat different.
The main nuance of attaching ceiling suspensions is that it is necessary to connect several different parts to form a single structure. Therefore, you will have to use special devices for this.
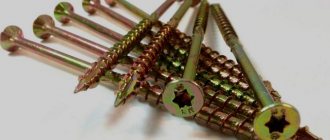
In most cases, the fixation of most metal parts of the profile occurs thanks to self-tapping screws. This is a special group of hardware products. To create an effective fastening, you need a large number of hardware of various types:
- press washers and bugs (flea beetles). Two similar types of hardware for working with metal parts. The first option is characterized by a wider cap and larger size. The second option has small dimensions (length no more than 10 mm). For the installation of ceiling structures and drywall, it is recommended to use “flea beads”, since they do not create difficulties when installing the sheathing;
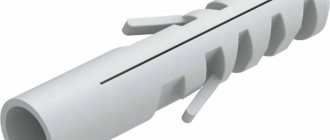
- dowel-nails. Externally, this hardware is practically indistinguishable from standard plastic dowels. The difference between them is manifested in installation technology. If a classic dowel needs to be screwed in, then the dowel-nail must be driven in using a hammer or impact drill.
Important! Dowel-nails guarantee a strong fastening in the thickness of the ceiling, however, due to its structural features, this option is not suitable for a ceiling base that has a fragile structure (buildings with clay and wooden ceilings).
Drywall mounting options
Many people work with drywall, both experts and beginners. If the former, because of their experience, know, for example, what distance can be made between the profiles, and what should be done better, so as not to spoil the structure. Beginners do not know such details, since they have not worked with drywall before. But we decided to correct this and publish a separate article, where we will tell you about all the parameters and numbers that must be observed when creating plasterboard products.
Of course, these are not mandatory values that must be observed absolutely, but it is still worth adhering to them. There are also specialists who work, I don’t know this data, and the work they do is quite high-quality, so we will mainly talk about the types of materials, their areas of application, and how to install them correctly. Some tips that are suitable for one type of drywall will not be suitable for another.
If you decide to take a thorough approach to studying the subject of drywall, before you start working with it, we recommend reading about tools for drywall. Also, depending on the shape, purpose and features of the plasterboard structure that you will build, it is necessary to vary the fastening parameters, installation distance, maximum weight of profiles, screws, plasterboard sheets and all other materials.
Most structures that are built from plasterboard are made on a frame, which can contain both metal and wooden profile slats. Therefore, the mounting distance for a metal profile may differ slightly from the mounting distance for a wooden profile. For each individual case, it is necessary to select individual parameters and solutions, but we will describe the basic standards generally accepted among specialists that should be followed when working with drywall and products made from it.
What is this article about?
DIY installation of plasterboard hangers on the ceiling
Installing profiles for drywall is a simple procedure; any user with minimal knowledge of installation technology can handle it. Despite this, you need to know that the process has some features that should be foreseen in advance.
The technology for laying and fixing the ceiling profile is carried out according to a strict procedure:
- The metal strip must be cut according to the required dimensions. This task should be performed using a hacksaw or metal snips. You should absolutely not use an angle grinder. This is explained by the fact that due to high speeds, the angle grinder will cause irreparable damage to the anti-corrosion coating of the profile.
- Markers are placed on the ceiling, according to the location of which the installation takes place. This operation must be treated with special attention. The pendants should be positioned as evenly as possible to avoid any distortions. Otherwise, problems may occur when attaching the slats, as the structure will be deformed.
- Suspensions for drywall guides are installed in special grooves. They are mounted according to previously established marks on the plane. The profiles need to be attached to the guides using fleas. In this case, it is necessary that at least 2-3 fasteners be installed on each side.
- After completing all the above steps, you need to level the structure. To do this, the free ends of the hangers are bent at right angles to the slats. So that they touch as tightly as possible, they are fastened with “fleas” (2-3 pieces on each side).
Important! When cutting the required length of the strip, you need to make the workpiece a few millimeters shorter than necessary. This will make it more convenient to place parts in the grooves without deforming the ends.
Application of adjustable fastenings
Working with such fasteners is both easier and more difficult. It’s simpler because only one anchor is needed for fixation, but more difficult because you’ll have to first adjust the height using an adjustment plate, and only then carry out the final fixation. It is carried out at the final stage of installing the part.
The first to be mounted is the part that is directly fixed to the ceiling. After a hole is drilled in the desired location on the ceiling, the main rod is applied to this point and an anchor is inserted through the eye and driven in with a hammer. The rod is securely fixed and an adjustment bar can be attached to it.
Expert advice
Despite the fact that installing hangers is not considered an unnecessarily difficult task, not all users are able to complete the installation work efficiently. During the installation process, great attention should be paid to such criteria as weight and thickness of the material. Based on the available information, make a choice of fasteners.
Experts also recommend paying attention to the following points:
- Before installing fasteners, you need to mark the fastening points on the surface. At the same time, they should be as close as possible to the joints of the profiles; ideally, the distance between the hangers on a plasterboard wall should be 60-70 cm. When fixing plasterboard, it is necessary that there are small gaps between the sheets of building material.
- To ensure maximum density of the suspensions and guides, you can stick a special spacer tape between them.
- The supporting profiles should not adhere too tightly to the surface; the heads of the screws should not be left below the level of the drywall.
- The easiest way to check the strength of the fasteners is to pull it with a little force. If all the components remain in place, this means that the fixation is as strong as possible and the fastening was done correctly.
- To fix the structure you need to use galvanized fasteners. They will help not only prevent corrosion, but also increase the fire resistance of the structure. Nylon-coated dowels are best used for attaching guides to wall surfaces.
- It is necessary to determine in advance the places where lamps, wall cabinets and decorative elements will be located. This will avoid subsequent partial destruction of the plasterboard coating.
Technology of fastening the profile to the wall
The stages of work include marking the surface, setting up guide units, installing vertical posts, and introducing horizontal jumpers.
Marking
To get an even frame, it is important to correctly outline the plane of the wall; the markings will also extend to the floor and ceiling (the profile must be indented from the base). At this stage you will need the following tools:
- construction plumbs – 2 pcs.;
- nails or dowels necessary for fastening;
- chalk or pencil;
- fishing line or construction cord;
- rule with level.
The procedure for applying markings:
- The most protruding point on the wall plane is determined. Using a plumb line, make a corresponding mark on the ceiling and floor, step back 3 cm from it to place the profile and fix it with straight hangers.
- At the extreme points of the walls, plumb lines are fixed to create vertical guidelines: they are hung on dowels or nails in the ceiling so that the tip of the load does not reach the floor surface. Nothing should touch the fishing line or rope, otherwise the vertical will be distorted.
- The fishing line or cord is pulled horizontally so that a point of contact with the thread is formed from a plumb line. If you manage to organize three horizontal lines, you will get the most accurate and fast markings.
- Marks are applied every 50 cm, so the entire perimeter is demarcated. It is necessary to monitor the indentation in the most protruding area of the wall so that during assembly the frame does not rest against the surface.
- After the cords and plumb lines are removed, a line is drawn along the perimeter.
If you have a laser level in your arsenal, all manipulations are carried out much faster, since with its help you can automatically set the verticals and horizontals.
Installation of vertical racks
This segment of the structure determines the strength and flatness of the wall; for it it is necessary to prepare:
- the main profile, marked PP, PS, CD, its linear parameters are 27x60 mm. The blanks are tightly placed in the guide frame and form a high-quality base for further fastening of the finishing material. Products with a thickness of 0.5 mm or more are optimal; it is important that the zinc coating is uniform and streak-free;
- straight metal hangers are necessary for rigid fixation of elements; they look like perforated strips up to 30 cm long;
- quick-installation dowels for fastening hangers, self-tapping screws with a sharp tip;
- hammer drill, screwdriver;
- building level;
- chalk, pencil.
- Preliminary marking is organized. If you plan to install plasterboard sheets, the width of the panel is measured from the wall and marked on the floor. This way the entire plane is demarcated so that it is clear where the joints will be placed. In the case of window and door openings, the cladding should be positioned so that the joint is not close to the edge.
- Another line is drawn in the middle so that the stiffener does not fall on it. The transfer of lines between planes is carried out using a plumb line.
- As a standard, the profile is supplied in 3 m lengths; it must be cut in accordance with the markings, making it 10 mm shorter so that it becomes possible to correctly place the product in the guides.
- The cutting is performed as follows: the desired area is limited by a line on all sides to create a clear landmark. The side boards are cut first so that the profile can be bent and divided along the resulting line. It is important to be careful not to injure yourself on sharp edges.
- Next we start attaching the hangers. Each of them is placed on vertical lines or marks set perpendicular to the profile; the middle of the strip should coincide with the markings. For fixation, use 2 screws or dowels. A distance of 40-60 cm is maintained between the hangers; the smaller the step, the stiffer the wall structure will be.
- When setting the outer profile, they also adhere to the marking line, after which the hangers are bent and pressed against the stand. The plane is checked with a level and all elements are brought to the optimal position.
Installation of horizontal lintels, arrangement of openings
Cross members help strengthen window and door openings and increase structural strength. In most cases, horizontal jumpers are not fixed to the work surface; they are installed directly between the vertical components.
Euro hangers made of galvanized steel from
offers high-quality Euro hangers for suspended ceilings made of galvanized steel.
Advantages of our Euro-suspensions:
- Euro suspension is universal for various suspension systems;
- The zinc coating of the Eurosuspension guarantees protection against corrosion;
- The Euro-suspension does not require painting, as it is located in the closed part of the suspended ceiling system.
We also manufacture custom suspension rods of the required length (from 125 to 2000 mm).
Technical characteristics of the Euro-suspension for suspended ceilings
| thickness (mm) | 0.45; Ø 3.00 |
| length (mm) | 250-2000 |
| standard size (mm) | size (min-max) 100-350, 400-800, 850-1600 |
| equipment | 25x24 — 0.6, 1.2, 3.6 |
| steel | HDGI; steel OTs 08ps 08kp |
| maximum load (kg/m2) | up to 10 kg |
At the buyer’s request, the order may include not the Euro-suspension assembly, but an adjustable spring single Primet suspension and suspension rods made of galvanized wire with a diameter of 3 mm with a ring or hook in packs of 100 pcs.
Euro-suspension made of galvanized steel for suspended ceilings is designed for a long service life and meets the requirements of Russian and international quality standards.
Performance characteristics of Armstrong ceiling components
Structurally, panel cladding is just slabs of a certain composition and material, laid on a supporting frame made of galvanized profile. This entire mass of parts and components for the Armstrong suspended ceiling is held on the concrete floor using adjustable hangers.
The frame is assembled like a construction set from individual planks
The main difference in the different types of Armstrong ceilings is the material of the slabs. The specific type of panel is selected according to operating conditions:
- For premises of public institutions, shops and offices, warehouses with constant temperature changes, high dust loads and special fire safety requirements, mineral boards based on pressed granules of mineral wool, latex, gypsum and cellulose fiber are used;
- In medical, sanatorium and hospital institutions, in kindergartens and schools, panels with metal coatings that are highly resistant to ultraviolet radiation and sanitary treatment are used to decorate Armstrong ceilings;
- For swimming pools, baths, laundries, kitchens, slabs made of polymer compositions are used that can withstand humidity up to 98% and temperatures up to 120°C;
- In retail and entertainment establishments, Armstrong ceilings are used with slabs of cellular structure made of mineral wool and fiber, which block noise and sounds well and at the same time have excellent fire-fighting characteristics.
With rare exceptions, when decorative slabs are made of glass, plaster or wood, the characteristics of Armstrong ceiling panels with components allow them to be used in almost any room.
Important! They were especially attractive for production and technical facilities, where the ability to repeatedly dismantle the ceiling trim means easy access to communications hidden in the ceiling space.
Thanks to the suspension system, the slabs are easily removed and just as accurately returned to their place, on the supporting corner profile, so repairing the Armstrong ceiling is considered one of the simplest and most affordable.
Tools for starting renovations in an apartment: dowel-nail, hanger and level
One of the main elements for the manufacture of a “lathing”, a frame made of a ceiling profile (PP), onto which plasterboard is subsequently attached, is a direct suspension. To secure it, you need screws, nails or dowel nails. The construction of a wall or ceiling using this device is the simplest and most reliable.
The straight suspension, the photo of which you see, allows you to adjust the distance between the main wall and the new one (the one we plan to mount) without any difficulties. If necessary, insulation, hydro- or sound insulation is placed in the gap between the gypsum board and the wall; there is now a huge selection of various types of insulation on the construction markets.
Ceiling suspension system Armstrong
For ceilings made of mineral fiber on an invisible suspended structure, you can install strips with an edge: SL2 or K2S2.
If you choose a semi-hidden system, then the best choice is the slabs:
- Mineral fiber;
- Metal;
- Tree with edge vector.
Armstrong ceiling design
The suspension system includes a steel frame that includes locking guides assembled in a square or rectangular shape. The main side of the guide profile has a white coating, which is produced on technological equipment. Lamps that are suspended from the base are built into the suspension system. The important guide rails of the hanging device are equipped with vertical slots along the length at a certain interval to secure the slats. The suspended system can be used to install metal, mineral fiber, fiberglass tiles.
The T-shaped profile is made of android aluminum, the ceiling design using the suspension system is of good quality and is durable in use, as well as corrosion-resistant design. Aluminum wall corner is used for installation in many rooms.
The wall corner is considered a horizon-forming component of the frame, which provides the product with an attractive appearance. Suspensions allow you to adjust the level of the suspended ceiling from the main one, covering damaged areas, they create levels of the ceiling surface.
They can be of the following types:
- Rods with springs;
- Brackets;
- Wire.
One of the most common suspension options are products consisting of rods and a spring bracket with holes.
To install the suspended structure, a standard scheme is used, allowing craftsmen to install the product quickly and accurately. The suspended ceiling will serve for a long period of time and is durable in use.