Wood glue is a solution that is prepared based on many components. Among its components there may be substances of both organic and inorganic origin. It provides reliable connection of all kinds of materials - from paper and fabric to wood and glass, plastic and ceramics.
The adhesive layer forms adhesive bonds with the working surface. Wood glue is mainly used when it is necessary to securely fasten wood and other wood-based materials.
Rules for using wood glue
The use of wood glue involves a number of important features.
First of all, the working surface is cleaned and thoroughly dried. As a result, it should become smooth and clean. Immediately before application, the wood adhesive composition is heated to a temperature of 50 degrees in order to achieve the optimal degree of penetration of the active substance into the wood pores. But it is important not to overdo it with heating, otherwise it will lose its properties.
At the end of the preparatory stage, it is necessary to carefully coat each of the parts with glue, which are then connected and left to dry.
Experts remind that if gluing is carried out along the grain of the wood, the adhesive mass is applied in one layer. If you need to connect the ends, then wood glue is applied twice. It may take two days for the parts to dry completely.
Main components of the compositions
You can make almost any glue with your own hands - the only difficulty that may arise is in selecting the necessary components. Just a few years ago, it was considered the norm to make your own wallpaper product, and the wallpaper could last for decades. This material was prepared from flour and potato starch, since these products contain a lot of adhesives.
When creating tile adhesive, you will definitely need cement - it is this substance that can hold the tiles on the wall. To make rubber glue, you can use pieces of old rubber. The composition of the stationery includes gelatin and wood glue. There is even a special conductive glue that is used to fasten electrical circuits and mechanisms. Usually, to make it, you take a ready-made “Moment”, add grated graphite, and the electrically conductive composition is ready!
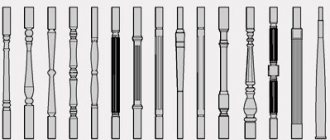
Types of wood glue
There are many varieties of wood glue. In each specific case, it is chosen depending on the characteristics of the working surface and the future use of the finished product. Thus, it is recommended to connect items that will be used in a humid environment with casein glue, which is characterized by pronounced water-resistant properties.
The most common varieties are:
- fleshy;
- fishy;
- bone;
- casein;
- PVA;
- synthetic-based compounds.
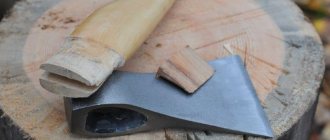
Hide glue
To prepare hide glue, substances obtained during the processing of animal skin are used. During the process, the protein is separated - the subcutaneous layer, freed from fatty tissue. Good connection of parts is determined by the presence of cysteine as a component of oligopeptides.
Modern industry produces this type of wood glue in the form of flakes, tiles and powder.
Bone glue
This type of wood glue is prepared from animal bone remains. Its main components are gelatin, collagen and cysteine. They determine the reliability of the fastening of parts and the high viscosity of the composition itself.
It falls into the category of cheap glue.
Isinglass
The main component for making fish glue is the remains of the air bubble, scales and fins. As a result, a solution is prepared that ideally connects parts characterized by different rigidity levels.
In practice, this type of adhesive composition is rarely used, since it is expensive. Therefore, it is used only in special cases, when working with expensive furniture.
In stores it can be found in the form of dry glue and granules.
Casein
One of the most complex types of wood adhesives is casein compounds. For their preparation, components such as kerosene and slaked lime are used along with casein and copper sulfate.
Many experts prefer using this particular glue for fastening wood parts. But when choosing it, it is important to remember that it can change the color of the part and shrinks significantly in volume and is stored for several hours.
PVA
Specialized PVA glue is widely used in carpentry workshops. It is supplied to trade in the form of ready-to-use solutions.
This is a popular variety that provides excellent adhesion with a stable seam. It is transparent and elastic.
If necessary, PVA adhesives with certain characteristics are prepared. Thanks to the introduction of additives into its composition, the composition can become quick-drying or water-resistant.
Synthetic glue
Various synthetic-based compounds manufactured in industrial conditions have found wide application in carpentry practice. Their most popular representatives are:
- Titebond
- Moment Joiner.
- Titanium.
All of them guarantee a reliable connection of wooden surfaces. The moment is additionally characterized by high resistance to water.
Titanium is a universal wood glue that is suitable not only for wood, but also for plastic, glass, paper and more. It dries in the shortest possible time and can be used as part of finishing work.
Composition of synthetic glue
Preparation
The operating algorithm can be derived as follows:
- The glue is prepared according to the above method, with precise control of the cooking temperature.
- All bonding surfaces must be dry and clean. The maximum moisture content for wood is no more than 10 percent (veneer - half that).
- The adhesive mass is applied with a bast or bristle brush to both surfaces, the thickness of the seam is 0.1-0.2 mm.
- You need to wait three minutes. This will allow the adhesives to grip securely and not be squeezed out when connecting the parts.
- After fixing the elements, you will need to grind them together.
- It is advisable to tie the parts to be processed with twine or compress them with a clamp.
- Full use of the product is allowed no earlier than after six hours of exposure.
Making your own wood glue
Several technologies for producing these adhesive compositions are known. In any case, the initial raw materials are initially softened to a jelly-like state, and then they are boiled.
The most popular are homemade adhesive compositions made using two recipes.
First option
Glue making process
Initially, the raw materials must be crushed in an accessible way. Next, small pieces of it are placed in dense material and wrapped, then carefully tapped with a hammer to better get rid of large pieces. This will speed up the cooking process.
When ready, the powder is transferred to a container of suitable volume and filled with clean water. It should completely cover the crushed raw materials. After some time, the mass will become jelly-like. The duration of this stage may vary depending on the size of the particles.
The final stage of manufacturing involves the use of a water bath, on which a container of jelly is placed. It should heat up to about +70 degrees and cook in this state for about 15 minutes with constant stirring.
Second option
Raw materials for wood glue
This method is simpler and allows you to prepare the composition not for immediate use, but for the future.
In this case, the raw materials are crushed and diluted with water in equal proportions. Next, the mass must be boiled for 20 minutes and cooled.
As it cools, the mixture will turn into a paste. When ready, divide it into small pieces.
Immediately before use, the resulting mass must simply be kept in water and heated.
Paste - a traditional flour recipe
Paste is perhaps the best wallpaper glue. It is based on flour. It is absolutely non-toxic and safe for children. It can be used at home.
One liter of it is enough for about 2-3 rolls of wallpaper.
To make it you will need:
- Two containers: for mixing glue and for water.
- Flour - 6 tablespoons per 1 liter of water.
- Water - 1 liter.
Let's start making:
- Take the first container, pour water into it and bring it to a boil.
- At this time, in another, thoroughly mix the flour and cold water until it becomes liquid sour cream, so that there are no lumps.
- Without ceasing to stir the mixture of flour and water, we begin to pour boiling water into it in a thin stream.
- Mix everything well, bring to a boil again, set aside and then let cool.
The consistency of the mass will resemble thick jelly. If there is suddenly no flour in the house, then ordinary starch will do instead, and the quality will not suffer from this. They can easily replace wallpaper glue from the supermarket.
For the sake of experimentation, before applying it to the surface of the wallpaper, take small pieces and adhere them to each other.
It is also great for working with different types of paper, such as cardboard.
Tips for use
Gluing with wood glue
The use of wood glue has its own characteristics depending on the type of surface and other factors in each specific case.
Experts do not advise storing the compositions in finished form for a long time, as they begin to harden and lose their properties.
Before you start preparing the glue, you need to prepare the wooden surfaces. This is explained by the fact that the mass retains its properties best for two hours.
If the need arises, you can supplement the composition of the solution with certain additives that will provide the adhesive mass with certain additional properties.
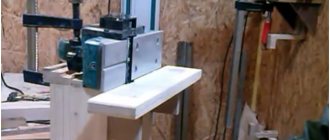
Bonding technology
For strong bonding, it is necessary to create reliable pressure on the parts being glued. Various devices are used for this. Various clamps are commercially available, and some devices can be made independently. In the first case, two rigid plates and four bolts
. But for gluing large parts, four clamping bolts are not enough. In this case, the press can be replaced with a set of separate linear clamps.
As the size of the shield increases, the number of clamps must be increased. They must be placed at a distance of no more than 200-250 mm from each other. Choose bars 25-30 mm thick and 50-60 mm wide. Bolts should have a diameter of 8-10 mm and a length of 200 mm. The pressing edge of the bars must be made flat, then when they are tightened, the curved edge will straighten and create pressure along the entire length. It is better to clamp identical slabs together at the bottom. Then each of them serves as a kind of press for the other and provides uniform pressure
. The nuts on the bolts must be tightened alternately at both ends. It is better to stick the cladding only on one side of each frame, the one that comes into contact with the adjacent one.
The moisture content of the glued wood and wood materials should be 6-10%, maximum 14%, i.e. Only dry wood can be glued. The surfaces to be bonded must be flat and smooth (roughness up to 200 microns is allowed). This surface quality is ensured by processing with a plane
, grinding, planing on machines.
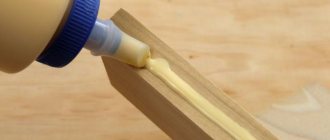
When gluing, it is enough to apply the glue to one of the surfaces to be glued. Apply glue with a brush. Duration of gluing, i.e. exposure of workpieces under pressure depends on the gluing method (hot or cold), the thickness of the workpieces and the temperature of the heater (for hot gluing), and the brand of glue.
When covering panels with sliced veneer, glue sometimes seeps through the thin veneer onto the front surface. The main reasons for this defect are liquid glue, high consumption, and high pressing pressure. Therefore, when performing facing work, it is necessary to strictly comply with the regulatory requirements for these parameters.
Another common defect when lining thin sheets or panels is their warping. It is especially large with one-sided cladding, i.e. when the law of symmetry is violated. Therefore, cladding of shields
always done on both sides. Single-sided cladding is permissible only for thin sheet materials (plywood, fiberboard), but on the condition that parts from them will be fixed in the product, such as, for example, the back walls of cabinet furniture.
After gluing parts, lining them, or assembling a product using glue, a technological holding period is required. Its duration is at least a day. The panel parts are kept on level ground in tight stacks, while the top panel is loaded. The assembled product is kept on the floor
. Technological exposure is necessary so that the glued parts cool, the adhesive joint gains strength and the internal stresses in the adhesive joints decrease. By holding parts in a clamped position, their shape is stabilized, and only in this way can subsequent warping be avoided.
The right approach to mixing
Knowing how to dilute a ready-made mortar for laying tiles also includes the procedure for carrying out operations. The quality of the resulting solution depends on it, as well as how quickly the process will be completed. Let us describe the subtleties briefly.
- No need to add water to the solution. This creates a lot of lumps that are difficult to stir. The actions should be reverse. First, water is poured into the mixing container, then the solution is added little by little. This should be done by immediately stirring the mixture with a mixer. The amount of water is selected in the proportion recommended by the manufacturer.
- The method of diluting the adhesive mixture with the condition of adding dry powder to water, and not vice versa, has another advantage. Stirring not only happens faster, but also creates two layers of solution. The top one is denser, the consistency is assessed by it. The lower one is somewhat thinner, but it reaches its condition in the time it takes to produce a solution from the surface.
- All manufacturers of dry construction mixtures emphasize separately: the solution must be mixed again. This is necessary not only to break up the formed lumps, but also to restore consistency. The freshly mixed composition quickly sets, it is specially left for the time specified by the manufacturer (at least 5 minutes) and then processed again with a mixer. This restores consistency and allows the solution to retain its characteristics for 20-60 minutes.
- How much time and at what speed to stir can be estimated according to the requirements of the manufacturer of the adhesive mixture. Some specifically indicate that only manual breeding is allowed. As for time, it is worth remembering that the longer the mixer lasts, the thinner the solution turns out. Therefore, it is recommended to add the powder to water while kneading - this allows you to obtain a uniform composition, without dry areas or lumps.
Responsible manufacturers indicate the most detailed recipes. For example, on the packaging of compositions from the Ceresit brand, the water consumption per kilogram of dry mixture is indicated with an accuracy of 100 grams, the holding time before re-mixing is normalized, and also the number of minutes during which the position of the laid tiles can be adjusted.
When stirring the glue, do not rush. The consistency of the resulting solution should be accurately assessed. To do this, place a small amount on the trowel, after which the tool is tilted strongly. If the adhesive solution falls off in one piece, you need to increase the amount of water.
A dripping, sliding solution indicates that it is necessary to wait some time for partial setting, and prepare the next portion with less liquid. If the adhesive composition on the trowel holds firmly and has a uniform consistency, you can work with such a mixture with a guarantee of a good result.
As can be seen from the above, there is nothing complicated or magical about mixing high-quality tile adhesive. All you need to do is pay attention to detail and carefully follow the manufacturer's effective techniques and instructions.
When laying tiles, it is very important to dilute the glue correctly, otherwise problems will arise. Firstly, it is much more difficult to work with a liquid or too thick mass, and secondly, the quality of the masonry suffers
In addition, it is important to choose the appropriate composition for specific conditions.
The reliability of fixing the tiles directly depends on the correct preparation of the adhesive solution.
Preparation
The operating algorithm can be derived as follows:
- The glue is prepared according to the above method, with precise control of the cooking temperature.
- All bonding surfaces must be dry and clean. The maximum moisture content for wood is no more than 10 percent (veneer - half that).
- The adhesive mass is applied with a bast or bristle brush to both surfaces, the thickness of the seam is 0.1-0.2 mm.
- You need to wait three minutes. This will allow the adhesives to grip securely and not be squeezed out when connecting the parts.
- After fixing the elements, you will need to grind them together.
- It is advisable to tie the parts to be processed with twine or compress them with a clamp.
- Full use of the product is allowed no earlier than after six hours of exposure.