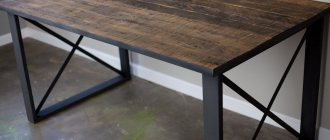
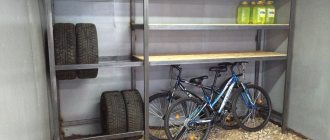
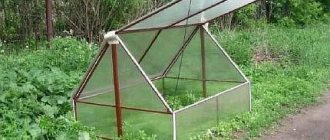
It’s hard to imagine a dacha without a gazebo where the family gathers in the evenings. Until recently, they were built with their own hands from wood. However, watered by rain, scorched by the sun, and tormented by frost in winter, such a structure requires constant maintenance and annual repairs. Metal gazebos are 100% immune to these scourges. They do not rot, do not dry out, do not swell, or crack in the cold. Therefore, a welded gazebo is more durable and does not require maintenance and repair.
Do-it-yourself gazebo made from a profile pipe
Preliminary work
Before starting construction, we determine the location of the future gazebo, then select a suitable drawing, and also stock up on tools and building materials.
To complete the work you will need:
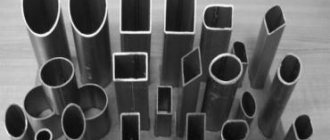
- profile pipes of square (for supports) and rectangular (for sheathing and fencing) sections;
- roofing polycarbonate or other finishing materials;
- concrete and cement or ready-made supports for a columnar foundation;
- accessories;
- paint or primer with anti-corrosion properties.
When choosing a suitable location, generally accepted rules are followed. It should be a secluded, quiet place, preferably with beautiful views. The area must be clearly visible so that the gazebo itself serves as a decoration. If you use it as a kitchen, you should not locate the building far from the house.
Measurements and design
The dimensions of the building are determined taking into account the area of the allocated plot, and then the project is selected. Since pipes can be bent if necessary, there are many suitable options, simple and complex. The scheme provides:
- exact dimensions;
- consumption of building materials;
- foundation type;
- roof shape.
If necessary, you can opt for a collapsible structure. It takes 2–3 hours to assemble; when frost sets in, the structure is assembled and hidden in the house. The floor and foundation are made of cheap materials, fastenings are carried out with bolts.
A stationary building will require a more reliable foundation, and its construction will take more time. Inside, you can build a stove or barbecue out of bricks, install electricity, and create a cozy place for home gatherings. In this case, it is better to make the gazebo hexagonal or octagonal; the chimney is organized through the central part of the pitched roof.
You can build a collapsible gazebo and fold it during frosts
Processing metal parts of the gazebo
Before roofing work begins, it is necessary to take care of protecting the metal - we carry out painting work. First, apply a layer of anti-corrosion solution and let it dry completely (this should not take more than 2 hours). Then you can carry out the finishing work - using paint of any shade that optimally matches the existing landscape design and the exterior of all buildings on the site.
Please note: before starting painting work, it is necessary to process/clean all welding seams - this is done using a grinder. It is also necessary to clean the metal pipes from existing rust - this can be done even before work on assembling/installing the frame of the metal gazebo begins. Do not forget - such work is carried out in protective glasses, gloves and a respirator.
Gazebo pavilion for a summer residence
This, of course, is not the easiest project, but a gazebo pavilion for a summer house is an ideal place for a summer dining room. You can always change the size and design of the pavilion to suit your needs and budget, but it is better to use the instructions and tips provided on the diagrams. A gable roof will improve the appearance of the structure, but it will require large investments and a lot of materials. If you want to build a simple pavilion for an enjoyable meal with family and friends, there are several options you can choose from. On the one hand, you can build a gazebo or a simpler structure, like this wooden pavilion. It is possible to do it yourself, but you must plan every step of construction from the very beginning. It is recommended to buy the best materials you can afford. They should be weather-resistant, such as pressure-treated wood, pine or cedar. Carefully take accurate measurements before adjusting sizes. Pre-drill holes in the pieces before inserting screws to prevent the wood from splitting. All stages of construction are shown in step-by-step diagrams, detailed instructions are on the website.
Types and technological features of metal gazebos
Garden houses can be built from various materials - brick, stone, wood, metal. Each of these materials has its own advantages and disadvantages.
Let's take a closer look at the technological features of metal gazebos. The main advantages of metal structures over products made from other materials:
- high strength (the strong frame of the metal gazebo can withstand mechanical loads and does not deform when the soil subsides);
- durability (metal structures can last several decades);
- fire safety;
- combination with other materials: corrugated sheets, slate, polycarbonate can be used as a roof for a metal frame.
The combination of iron and polycarbonate - metal gazebos, photo
Unlike wood, metal does not burn; it will last much longer, does not fade in the sun and does not crack. It will not be damaged by insects and will not collapse under the influence of weather factors. The only drawback of metal is its higher price compared to wood (by about 15%), as well as certain difficulties in assembly (welding).
Advice: you can extend the service life of a metal product with regular maintenance - timely identification and elimination of traces of corrosion.
Types of metal structures
Garden buildings made of metal can be divided into two groups:
- stationary - capital buildings built on a permanent basis on a strip or columnar foundation;
- temporary - collapsible structures installed directly on the ground so that, if necessary, they can be easily removed or moved to another location.
Photos of metal gazebos - stationary and portable
If you decide to build a metal gazebo for your dacha with your own hands, you need to start by choosing a project and determining the method of manufacturing the structure.
When choosing a technology for constructing a metal structure with your own hands, be guided by your own construction skills, as well as the availability of tools and special equipment.
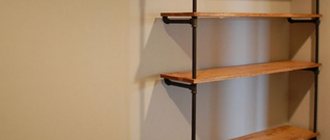
The simplest option is a gazebo made from a profile. It can be constructed from angles, round or profile (rectangular) pipes, channels (metal beams). This structure can be assembled using bolts or welding.
Advice: if you are unable to weld a gazebo from a profile and have no experience working with a welding machine, choose a prefabricated bolted connection.
Welded and bolted connection of elements - photo of gazebos made of metal profiles
Gazebos made from corrugated pipe are mobile, resistant to environmental influences, and reliable. This material is used as a load-bearing element to form the structure frame, since it can withstand heavy loads and cannot be deformed.
Photo of a gazebo made from a profile pipe using forged elements
Profile pipes are often used for the construction of garden houses. And, if the iron pipes are quite heavy, then you can use an aluminum profile pipe, which is lightweight and cheaper.
90f275a7eb5f9092525d1ac86d78afa9.jpe dabaeed38f88ce851238fadfbb82997c.jpe
Gazebo on a metal aluminum frame
If structures made from corrugated pipe look simple, then forged gazebos are more elegant. Ornate patterns, curls, openwork inserts made by artistic forging will give the building originality and a beautiful appearance. But to create a forged structure, you must have blacksmithing skills and special equipment. An alternative would be to purchase a ready-made forged gazebo, which you can assemble yourself.
Please note: since forged steel structures are labor-intensive to construct, they are quite expensive.
Forging products - metal summerhouses, photo
Do-it-yourself metal gazebos are always prestigious. An iron structure can have different configurations. The most common are rectangular and square structures, a little less often – octagonal and hexagonal garden buildings.
Complex design projects can only be brought to life by experienced craftsmen - original iron gazebos, photo
Taking into account the design solution and functional purpose of a garden metal gazebo, it can be equipped with various attributes for relaxation - furniture, a barbecue table, a barbecue. Some metal summerhouses have special brackets on which you can install seats around the perimeter. This significantly increases the comfort of the building.
A summer building with a barbecue is a cozy place to relax in nature
Equipping a recreation area with a barbecue
Equipping a gazebo with a kitchen occurs either in advance, at the planning stage, and then a special stove is integrated into the building, or later, when the assembly is ready. In the second case, we are talking about portable barbecues. There are several types of barbecues.
Classic folding grill
This model is made of metal. The foldable design allows you to cook food both inside and outside the assembly. Such a barbecue has advantages, for example, if it starts to rain, it can be easily moved to a place protected from moisture and continue cooking. This barbecue is mobile; if you do not use the gazebo in winter, you can take the barbecue with you to any other place. But such a barbecue is prohibited from being used in a wooden gazebo, as well as inside any structure with a wooden floor.
Brick stove or fireplace
As a rule, they become the main element around which the gazebo is built, while the chimney becomes the main element of the stove itself. Such a stove will require money, as well as detailed calculations taking into account climatic conditions. If you or your neighbors are bothered by smoke when grilling using a portable grill, you can always move the grill. Such mobility is completely absent in a brick kiln. For such a furnace, it is necessary to create a massive stone foundation, which is why the roaster will not gradually settle into the ground and will last a long time.
Due to design features, it is prohibited to place any flammable objects in front of the stove, and guests should wisely divide the space in order to mitigate the discomfort associated with being near a source of high temperature.
Gas grill
Its advantages are the complete absence of smoke and savings in heating materials such as coal and kerosene. Such a barbecue does not require a special smoke exhaust structure, since to eliminate all residual gas elements, it is enough to attach a pipe to the barbecue and take it outside the assembly. This stove can be placed anywhere in the courtyard of a private house, since there are absolutely no fiery or smoldering elements in it. However, a gas barbecue has one drawback - its price. Since all similar structures are used for industrial purposes or in production, their cost is higher than the most expensive brick kiln.
Homemade vertical beds for cucumbers: types, photos A vertical bed for cucumbers helps save space and create a unique design in the greenhouse. For this option...
The only way to get a gas grill is to build it yourself. Everything must be done in accordance with the drawings and in compliance with safety. Any open flame near a gas leak can lead to uncontrolled ignition and even explosion.
Types of gazebos
Gazebo, altanka, pergola and pavilion - just the names alone of this seemingly unprepossessing structure can recall a good dozen and a half, and each one hides its own small technical feature. Therefore, it is easier to classify “cultural canopies” according to the type of dominant structural material than to later remember all the differences between a belvedere and a gatehouse.
So there are 3 fundamentally different groups of materials:
- Stone. This is brick, shell rock, rubble and even monolithic concrete.
- Tree. In this group: board, log, beam and even willow twig.
- Metal. And finally, we include gazebos made of corrugated pipe, sheet steel or forged parts among metal canopies.
At the same time, structures made of brick and wood are quite massive and require a foundation for their installation, and this, in turn, not only affects the price of the issue, but also imposes some restrictions on the site. It’s easier to bury concrete in the ground than to remove it later and grow a lawn in its place.
At the same time, gazebos made from ordinary metal pipes can not only be built with your own hands, but also do not require any “preferential” conditions for installation. In some cases, it is possible to place awnings even on a garden path, and even, if necessary, hide them in the garage for the winter. Of course, not all models can boast such mobility, but there are plenty to choose from.
And for those who do not believe in the design potential of steel and, despite everything, believe that it cannot compete with natural materials, we invite you to look at the following selection of examples.
Agree, you can feel that these canopies have a soul.
Profile specifics
Specifics of the profile and advantages of gazebos made from it
A structure made using a profile looks quite original. This kind of construction can be done in the shortest possible time. The main condition is to have experience working with welding equipment.
The source material from which the frame of the gazebo is made is pipes, in most cases with a rectangular or square cross-section, made of carbon and low-alloy steel.
The raw materials are characterized by sufficient strength, multifaceted resistance to harmful influences and practicality.
Profile pipe for gazebo
Profile pipes, taken as the basis for the gazebo, give the building a number of positive characteristics. The main ones are:
- low specific weight of the structure (prevents the preparation of a powerful foundation);
- long period of operation;
- reasonable cost of material;
- fire resistance;
- no need for periodic repairs.
Construction of walls and roof equipment
The cladding of the structure involves the use of polymer materials. The sheets are attached using self-tapping screws or bolts to the rafter system. The rafters are made from a similar profile pipe presented above. Relying on supports, the beams converge in the center of the structure at an angle of 10–15°. Next, using a thin metal profile, we carry out the sheathing in increments of 35–40 cm - this will significantly reduce the windage of the polycarbonate and will not allow the sheets to sag excessively, loosening the joints.
Having no experience in making a roof, the emphasis should be on the classic gable structure with a triangular shape. If the length of the rafters exceeds 150 cm, then it would be useful to weld additional spacers and a central beam to them.
Gazebo made of rolled metal photo instructions
Now let’s look at the photos and drawings that will allow us to create a durable and beautiful gazebo from a profile pipe ourselves, and we will also conduct an audit of the necessary tools. Still, steel is not birch. You can't get by with your grandfather's axe.
a2fae5669666b3c1625d129b5b08e248.jpe
7ef815168a8f62745653738933613586.jpe 96d6f241b077febfd93eadcee46f83aa.jpe d55750f8e084abe73b4a989b70ed6310.jpe
Therefore, before going to the metal depot, make sure that your workshop has:
- Welding machine
- Angle grinder
- Electric drill
- Screwdriver
- Saw or jigsaw
- Pencil
- Level
- Square
- Protractor
- Roulette
- Brush or spray
If something is missing, it must be purchased, borrowed or rented.
Now find a suitable concreted area (or pre-make one) and get to work. And in order not to waste extra letters, and also to make the presentation of the material more concise, we will divide the process of making a gazebo into stages and provide each of them with a visual illustration.
- We draw a regular octagon with a radius of 1800 mm right on the ground and make a steel contour around its perimeter from a profile pipe with a cross-section of 60×40 mm, from the corners of which we raise eight racks with a height of the same 1800 mm, but from a 60×30 mm profile. Control the accuracy of the work performed with a level or plumb line.
- To give the racks rigidity, tie them at the end with a belt made of 40x20 mm pipe. To work, you will need to cut 8 fragments, each 1345 mm long.
- The next stage is the floor joists. To construct them, you will again need rolled steel with a cross section of 60×40 mm and our diagram. Work strictly according to the pattern, because this intricate layout is not only the basis of the boardwalk, but also the support for the benches.
And now, actually, a little about the benches themselves. Their installation should begin with jumpers, which must be placed at a height of 400 mm. Then add central supports to them. And finally, focusing on them, screw the side “geobrakes” to the racks. Details on the diagram.
- Stepping back 225 mm above the plane of the bench, weld four rows of 20x20 mm square pipe between the posts, keeping a 50 mm pitch between them. This is a multifunctional element. On one side there is a plane for fastening the back boards, on the other there is a stiffening strap. Same as slanted ones.
- It's time to tackle the roof. For its rafters, take a profile of 40x30 mm and a length of 2071 mm. If you are not sure that you have enough experience to connect all the elements exactly at one point, start installation with one pair of strips, gradually adjusting other frame parts to it.
- The gazebo will not look good without overhangs, and therefore you should take care of the metal fillies. A twenty-centimeter visor will be enough.
- And two more octagonal rings from the thirtieth profile and the twentieth square and with welding work we will assume that you have figured it out.
- Now comes the most time-consuming process. It is necessary to sand down all welds and possible rust, and open the structure first with a primer and then with anti-corrosion paint. And remember, primer paint is not the best solution here.
- Work with wood should also be carried out from the bottom up. First, build a flooring from a fortieth board, having first passed the lumber through a surface planer and opened it with paint and varnish. This way the tree will last much longer.
- Then cover the supports for the benches and their backs, not forgetting to leave small gaps between the boards.
- And finally, roofing work completes the construction of the gazebo. If desired, it is possible to cover the rafter skeleton with ordinary corrugated sheets or sheet metal without fuss. But soft tiles will look much more interesting there. But for its installation you need to prepare a base from OSB boards or plywood.
- And only then lay the modified bitumen. And this is what your pavilion will look like if you followed our instructions exactly.
Do you already have a place to welcome guests? If not, roll up your sleeves and get to work.
What is important to know before starting work
As a starting material, you can use profile pipes, which can have a square or rectangular cross-section. This material is superior in performance to other types of rolled products, such as angles, rods and round pipes. The special cross-sectional shape provides profile pipes with the ability to withstand high loads. The design of these products is durable and weighs little. The gazebo will be beautiful and attractive.
It is convenient to adjust the mounting points from any side, but this cannot be said about round pipes. Profile pipes are universal. They can be used as load-bearing elements, such as roof beams. The racks should be made of pipes of such a diameter that the structure is strong and reliable. The remaining elements can be made from smaller products, which will depend on their functional purpose.
Installation and construction
Making a metal gazebo with your own hands is a task that not everyone can handle, so it won’t hurt to repeat the step-by-step instructions for building such a structure once again.
Selection of materials
In order to build a beautiful gazebo, first of all you need to select the necessary tools.
First of all, you need to choose the material that is used to create the base of the building. As a rule, these are metal pipes. They can be hollow, with a square or rectangular cross-section, or profile. The second option is used more often. It is recommended to select durable profile pipes. Ideally, the wall thickness should be at least two millimeters. By the way, when purchasing pipes, it is worth considering the fact that the cost of the material also depends on their weight. The heavier the profile pipe, the more expensive it will cost.
Next, you will need brackets that are used for installation, metal rods, and material that is used for cladding the roof, and in some cases, walls. To work with metal, you will also need tools such as a grinder, a hammer drill and a building level, with which you can check how smooth the lines and edges are.
Creating a frame from pipes
Summer gazebos made of profiled pipes are a fairly common option. Ideally, they should be installed, if not on a full foundation, then on a strip foundation. The frame of such a building is easy to make with your own hands, but it is not much more difficult to disassemble it when autumn comes and hide it until warmer times.
This frame is covered on top with either a bright fabric cover or a special moisture-resistant fabric that can withstand bad weather conditions. It is not difficult to weld a frame from individual iron pipes. You need to decide on the shape of the gazebo, measure the location of the pipes using an angle or level and weld all the individual parts. Such simple instructions allow you to create homemade metal gazebos even for those who are completely far from the world of construction work.
Selecting a suitable site
In order to build a beautiful gazebo, it is very important to be able to choose the ideal place where it will be installed. This is not difficult to do, the main thing is to focus on your own needs
The gazebo should be located where it will be convenient for the whole family to relax. It is for this reason that very often the welded structure is located either in the center of the site or in a prominent place.
The next important point is the search for ideal building parameters. The gazebo should be neither too big nor too small. The easiest way is to determine the parameters yourself, taking into account your height. The standard option is a building two meters high. The width depends on how many people should be comfortably seated inside the gazebo. And, of course, this parameter is often limited by possibilities, since it is impossible to place a huge metal tent in a small area.
When everything is clear with the size of the gazebo, you can move on to preparing the area. To do this, you just need to clear the entire area of debris and vegetation. After this, ideally you need to fill the area with sand and fill it with water, compact it well. This simple preparation process ensures that the gazebo will stand level and not sag.
Roofing work
We’ve already talked about working with a metal base, so it’s time to talk about the roof. It must be durable and of high quality
This is important because rainy weather is not uncommon in our country.
The roof can be made of corrugated sheet or polycarbonate. Covering with this material is not difficult. The simplest option is to simply lay the sheets on the frame and secure them with self-tapping screws. If you want to add originality to the building, you can bend or twist the edges of the sheets, giving them an unusual shape.
Construction of a gazebo from a profile pipe step by step
The first step towards erecting a metal structure is choosing its type. It can be open, semi-closed or completely closed, with or without lighting. For this purpose, a construction project is drawn up.
Design
The sketch can be sketched by hand, or you can entrust its development to a professional designer. At this stage, you should decide on the dimensions of the structure. The height of the structure should be slightly higher than the average height of a person (180-200 cm), the width of the entrance opening should be no less than the width of the front door (about 1 m).
a drawing indicating the actual dimensions of the building is needed in order to calculate the number of pipes for installing the frame, as well as other necessary building materials.
Detailed drawing of a metal gazebo
To install an iron structure you will need:
- profile pipes with a cross section of 50x50mm and a wall thickness of 2-4 mm for the frame;
- iron rods or pipes with a cross section of 20x40 mm for the transverse elements of the sheathing;
- roofing;
- electrodes, welding;
- grinder, metal drills;
- screwdriver, self-tapping screws.
Preparatory work
Next, they begin to prepare the place for installing a metal gazebo. This could be a site near a pond, in the shade of trees, or near a house - the main thing is that it is picturesque and comfortable for relaxation. In the selected area, remove the top layer of soil (15-20 cm) and level the base. Since the metal gazebo is light in weight, a columnar foundation will be sufficient for it.
Preparing the site for the gazebo
Next, they begin to install the columnar foundation - the base of the gazebo. To do this, holes 50-70 cm deep are dug in the corners of the site, into which a layer of crushed stone (20 cm) is poured and support profile pipes are poured with concrete.
Preparing the site for the gazebo
Attention: the evenness of the installation of the pillars must be checked with a level.
Formation of a metal frame
After installing the vertical metal posts, begin attaching the horizontal crossbars. To do this, you can use iron rods or pipes of a smaller cross-section. Metal elements can be connected to each other by welding, or using bolts and screws. Transverse pipes for fencing the structure are installed at a height of 1-1.2 m. And the top of the support pillars is fastened with the help of an upper strapping.
Please note: the piping pipes should be welded to each vertical post - this will ensure the reliability of the structure.
Methods of fastening metal gazebo elements, photo drawings
Next, they begin to install the frame under the roof. To prevent precipitation from remaining on it, the transverse logs are attached at an angle (30-45 degrees). For a gable roof, several support triangles are made, which are connected by a common profile at the top point, and their bases are connected to the main frame of the gazebo.
Construction of the frame of a metal gazebo for a summer residence, photo
Advice: before installing the roofing, you should prime and paint the metal frame, since this will be problematic after covering.
Roof
One of the simplest and most economical roofing options for a gazebo is polycarbonate. For the roof of the gazebo, 8 mm thick cellular polycarbonate is suitable. It is secured with special bolts with thermal washers. To do this, polycarbonate sheets are cut to the required sizes, and holes for fastenings are drilled in the pipes. The ends of polycarbonate sheets can be covered with special strips - this will provide them with additional protection and give them a neater appearance. As a result, we get a rather cozy and inexpensive gazebo, which only needs to be equipped with benches or other furniture for proper relaxation.
e530c3cdb2eaf85b26c3e7b1dc276bd8.jpe c96b7090affac7b65a7be44bf4449b26.jpe
Attention: when laying the roof covering, install it with a slight overhang. This will protect all structural elements from atmospheric influences. . Do-it-yourself ready-made gazebo made of metal profiles
Do-it-yourself ready-made gazebo made of metal profiles
Metal gazebos at the dacha are a sign of the good taste of the owners of the site. They will become a harmonious addition to landscape design, a reliable and cozy place to relax in nature. These structures can come in different shapes and sizes. Metal combines well with other building materials, which allows you to realize even the most daring design ideas.
Installation and fastening of canopy supports
This stage of work is carried out according to the following plan:
- First you need to clean the area and mark the location for installing the canopy.
- Next, you need to dig holes (50*50 cm, 70 cm deep) for the columnar foundation.
- Now you can prepare concrete by mixing cement, sand and crushed stone (fractions 5–20) in a ratio of 1:2:2.
- Pour it into the holes, compact it, insert the mortgages. The foundation should be left for 4–5 days, covered with plastic film on top. In this case, you will have to water it every day.
- Now you can begin installing the supports. They need to be cut with a margin of 5–10 cm, since slight unevenness of the site is possible.
- They must be placed one by one, checking the vertical position using a level. Now the supports can be welded to the mortgages.
- Now, using a laser level or hydraulic level, you need to find the lowest point on the supports and place a mark at the desired height. It must be “transferred” to the remaining supports. This way you will ensure that all marks are in the same horizontal plane.
- At the end of the support, you need to cut it using a grinder according to the marks.
The diagram will help you get the job done efficiently
Drawings with dimensions
Before assembly, detailed sketches of the structures should be made: a diagram (drawings, dimensions, detailing) will help to correctly calculate the amount of material. As a sample, you can use gazebos that are available for sale at construction companies. Most often, these are variants of non-traditional shapes: arches and semi-arches, pentagons, trapezoids, etc. The design of a simple 4-6-corner garden building of the classical type can also be taken as a basis.
When drawing up a drawing, it is important to determine the height inside the structure so that a person can stand upright. Benches in non-standard gazebos are often located near short walls or arch slopes
There must be at least 1 m above the seats to metal structures to prevent injuries.
Schemes and drawings
The diagram makes it easier to make a gazebo. We suggest you choose the appropriate design option:
Gazebo made from a profile pipe Typical gazebo made from a profile pipe Design diagram - top view
Diagram of a gazebo made from a profile pipe. Plan of a gazebo. Drawing of a roof. Drawing of a gazebo made from a pipe. Diagram of a gazebo. Drawing of a canopy.
Large do-it-yourself wooden gazebo
This large gazebo can be called more of a pavilion. Not a bad option if you have a large yard or enough space on your property. It’s not a bad project in the sense that in the future, under such a canopy you can install a grill or barbecue, or even organize a stationary summer kitchen. To build such a gazebo you need a columnar foundation, but perhaps the most difficult part is the roof. To do this, the upper contour of the gazebo needs to be installed with horizontal ties. Then secure them with self-tapping screws to the supports.
For reliability, the screeds must be secured with metal strips. Then secure all other parts. Finally, saw off the central support flush and lay the sheathing.
Please note that the sheathing is made in different ways, depending on the roofing material; if it is slate, it can be either single-layer or two-layer. But that's a separate topic
The entire process of building a gazebo is shown in step-by-step photos; if you have any questions, instructions are on the source website, the link is under the gallery.
Photo source wjday.ru/kak-postroit-besedku-svoimi-rukami-na-dache.html
Equipping a recreation area with a barbecue
A gazebo equipped with a barbecue for friendly gatherings becomes a truly cozy place to relax. If space allows, it would be great to also include a countertop for cooking, a sink and other additions (for example, shelves, a refrigerator).
Any barbecue also requires the presence of a hood for the gazebo: the iron elements of the manufactured hood will fit into the metal gazebo most organically. The exhaust pipe can be either metal or brick. If desired, you can also order the hood lining with wild stone.
A grill or barbecue oven will decorate any gazeboSource agp-co.ru
Preparation for construction
Before starting construction, you need to transfer the dimensions of the gazebo to the site chosen for the construction of the structure. If you need an option with a foundation, dig a pit of the desired shape and type:
- for columnar (pile) excavations are drilled for piles: in the corners of the structure and throughout the entire floor area in increments of 50-70 cm;
- for a perimeter strip building: depth - at least 70 cm, width - 30-40 cm;
- for slab soil, select soil covering the entire floor of the gazebo and 15-20 cm beyond its perimeter.
Concrete is poured into the pit to the soil level and the main supports (corner and along the length of the walls) are strengthened in it. After this, formwork is placed to raise the base above the ground by 15-50 cm. After hardening, the surface is leveled, measuring with a long building level the height differences between adjacent columns or along the upper plane of other types.
While the foundation is gaining strength, you need to prepare the necessary tools:
- grinder;
- drill (for bolting);
- welding machine (if the parts are welded);
- building level, square, tape measure.
Site selection and site equipment
We begin to determine the best location in the local area. If there is a reservoir, it makes sense to place the gazebo on the upper edge of the bank. The building should be located in a clearly visible area, since it is a decoration of the entire landscape design.
Having finished choosing a location, we begin preparing the site. To do this, in accordance with the drawn up plan, you will need to remove the turf from the soil along its perimeter and apply marking lines. Next, we dig holes according to the number of support pillars, 50–60 cm deep.
A profile with a length that takes into account the gap of the pipe in the prepared pit is very often used as racks. The optimal cross-sectional values for the future support element vary from 80×80 mm with a wall thickness of 2.5–3 mm. To give greater stability, it would be useful to weld the heels to the supports.
Design features
When planning a gazebo from a profile, you must definitely decide on its design, which can be of two types:
- collapsible (that is, created using fasteners);
- capital (welded).
The first type is a frame assembled from profile pipes with a canopy roof made of plastic or water-repellent fabrics. The advantages of this option include simplicity and high speed of installation, which does not require any special skills or specialized tools. The process of erecting a gazebo rarely takes more than 2-3 hours, and when cold weather sets in, it is removed just as quickly. Other features of such structures include the lack of a foundation and the need to fasten the main components with bolts and pins.
Non-removable options are built on a foundation. And their main advantages are durability and the ability to withstand heavy loads. In this case, the frame is made of metal profiles, and other elements are made of brick, plastic or wood. A stationary gazebo can be open, semi-closed or closed - and the latter type makes it possible to place furniture and even household appliances inside. Electricity is supplied to such gazebos, thanks to which they practically play the role of summer kitchens.
Profile designs - the choice for modern style
If you take a closer look at the offer of open garden gazebos, you will see that the leaders are mobile structures, that is, simple canopies based on a stand made of aluminum pipes that can be folded at any time. Due to their low weight, they are quite unstable, but their advantage is easy and quick assembly and disassembly, but the disadvantage is excessive susceptibility to weather conditions. An acceptable price does not mean that profile pipes for gazebos are low quality products, as they are often considered best in their class. More expensive are gazebos based on steel profiles, that is, heavy, durable and often decorative structures, which, relative to the structure itself, are practically no different from aluminum models.
Gazebos with decorative elements, such as openwork inserts, on which plants can be fixed, are also available. Side walls allow you to quickly and easily transform an open gazebo into a partially or completely closed one, equipping it with lighting, with the ability to install heat sources and much more. Expansion of the model range of gazebos from profiles allows you to adapt them to the needs and expectations of clients with different budgets. While some manufacturers offer their designs as exclusive products with all the amenities, others provide a choice of a simple budget summer gazebo for independent relaxation or with class=”aligncenter” width=”1066″ height=”600″|fcw3qayjh5a| src=»https://odstroy.ru/wp-content/uploads/f/d/b/fdb1e54eb7026704eedb58917da0aee6.jpg» class=»aligncenter» width=»1200″ height=»783″[/img]
DIY outdoor gazebo
Here we show you how to build an outdoor gazebo with your own hands from wood. The design, as you can see, is solid. The main building material will be wooden beams, the volume and quantity will depend on the size of the structure, the author does not provide numbers, so you will have to select it yourself. The second necessary material is metal rods of two types: T-shaped and L-shaped. You will also need screws, very large screws, twice the thickness of the beams. Don't forget about a ladder, preferably a strong one, it is the main tool in this project. Concrete is another essential material for building your gazebo and will be used as the base and anchor for the entire structure.
After you make the drawing, you will be able to see what dimensions are needed for all the wooden parts. If you have the tools, you can cut all the components yourself. This is the cheapest option. If you don't have the skills or tools, you need to find someone who will do it...
The first step is to build the foundation.
- Prepare the area and pour the required size slab. If you want more strength, add metal reinforcement to the concrete.
- Next, install the wood beams and metal supports into the concrete at a 90-degree angle.
- If there are gaps between the metal and wood portions of the supports, use tar and silicone to fill them and create a watertight seal.
- Repeat this step for all supports. Typically four posts are installed, but if you choose a different design, more posts may be required.
- Next step, install the wooden slats onto the supports, remember to measure all sides and make sure they are equal. Then secure them in place with screws.
- The next step is to attach the side rails to the ones you installed on the posts.
- Then you need to make a triangular structure that will support the roof. The triangular shape of this part of the design is designed to distribute weight down towards the supports, which will be especially useful if you live in an area with high levels of precipitation, especially snow.
- Use metal rods to securely hold the diagonal pieces in place. Run a metal rod through the two pieces of wood to make sure they are held firmly in place.
- Now install the top crossbar where the roof will be attached. This may require the use of rope or additional help to hold the pieces together.
- Now it's time to install the roof supports to help support the weight. Place supports approximately every 55 cm. Secure the supports with screws.
- Cover the roof with sheets of plywood, this layer must withstand a lot of weight, it must be secured very securely.
- After this, attach the waterproof layer. There are different types of roofs, you can choose which one you prefer, but laminated tiles are a popular and effective choice.
Photo source www.instructables.com/id/Build-a-gazebo-from-sketchup-to-reality
How to choose a place for a metal gazebo
The recreation area must be placed on a completely flat place - specifically in the case of installing a metal gazebo, the ground must be carefully leveled. And it’s not enough to just level it – you need to compact it thoroughly with a special wooden device.
Soil compaction is the simplest option for preparing a site for the installation of a metal gazebo.
Experts recommend first laying out the site with paving slabs - this way two goals will be achieved:
- a metal gazebo will stand more rigidly, there is no fear of it skewing during the rainy season; if you need to move the metal gazebo to another place, then a flat, clean area will remain in its place.
The second goal is appropriate if the metal gazebo will be made in a collapsible version. By the way, such designs are practical - everything is removed for the winter, which automatically extends the life of the gazebo, but there are also disadvantages of a prefabricated structure - fastenings between metal fragments are carried out using bolts and nuts, and constant unscrewing/screwing accelerates corrosion of the metal.
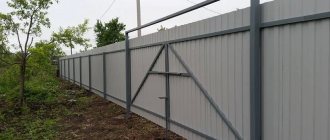
If you plan to build an open metal gazebo, then take care of protecting it from the winds - this could be a fence, a hedge of ornamental shrubs, or dense plantings of climbing plants.
In the case of building a closed metal gazebo, you can choose any place for its location, but provide an approach to the resting place - this can be a garden path made of stone or wooden blocks.
Photos of metal gazebos
In general, the options for gazebos made of metal structures are very numerous: welding, forging, different materials with which the frames are finished. Profile pipe, round, made of steel and aluminum, there are even stainless steel options. All this is complemented by any shape: from square and rectangle, to any complex shape. Metal is so flexible that there are many, many variations. Some of them are collected in the photo gallery.
The roof has an unusual shape and the awning, with decorative elements visible, is stretched from the inside
Metal frame covered with an awning instead of a roof: there is shade, it’s not hot and it’s inexpensive
An unusual openwork made of thin pipes, painted white, adds lightness to the design
Very nice decor. This is not a metal gazebo, but a song in metal
Another option for a multifaceted gazebo
Artistic forging in the design of racks - elegant and exclusive
Round gazebo for a summer house under blue polycarbonate - romantic
A simple solution for a summer house: a square gazebo covered with beige polycarbonate
The rafter system can be beautiful
Unusual structure - a very interesting solution
It’s not often you see a metal gazebo made of round pipes. The welder is a master of his craft
An openwork gazebo made of metal is a summer option for a summer house or in the yard near the house
Drawing of a hexagonal gazebo - top view
Drawing of a hexagonal gazebo - front part
Hexagonal outdoor gazebo made of iron
Sketch of a metal gazebo with polycarbonate finishing. The lower part has a shaped finish made of pipes, which are covered with dark translucent polycarbonate.
Photo of a hexagonal gazebo made of metal profiles with partial wood trim
Metal gazebo with barbecue
Drawing of an octagonal metal gazebo with dimensions
Sketch of an octagonal metal gazebo with dimensions
Octagonal gazebo made of metal
Round gazebo with metal frame and polycarbonate cladding
Metal frame combined with tinted polycarbonate cladding
This is probably the simplest gazebo: two bent pipes that are attached to the backs of garden benches. Polycarbonate is attached to the pipes. Summer garden gazebo is ready
0751f2a9c760c9e5c7006b741371c608.jpe
65857ffe9c95f068902dce63ded64806.jpe d92155ab77a2168a3a07b76e80f5d50b.jpe
How to weld a gazebo for a summer house, watch the video.
Metal selection
A metal gazebo requires a significant variety of building materials used, because there is no specific standard solution in this situation.
The basis of any design is almost always a frame assembled from pipes. These parts can be either profiled (that is, relatively flat and with pronounced angles) or round. The latter are cheaper, but the welded structure made from them almost always looks a little sloppy at the connection points, unless a highly qualified specialist worked on it. The minimum permissible pipe wall thickness should be 2 mm. At the same time, you should not choose pipes that are too thick either - they will be more difficult to cut and weld. Such thoroughness for a lightweight design will be unnecessary.
The roof of a metal gazebo is usually made from corrugated sheet metal or any other type of sheet metal. If the design involves the presence of walls, then they are made of the same material.
It should be noted that a metal gazebo can be built from different metals, but structures made of iron are most widespread, since this material is the most accessible. An iron gazebo will be relatively inexpensive and will be quite strong in terms of strength, but you should not expect lightness from it in case of possible transportation. If you want to make the house collapsible, it is better to spend extra money and buy aluminum - while not inferior in reliability, it will allow you to move the building from place to place without any problems.
DIY garden gazebo
This project is, of course, larger-scale. To build a garden gazebo with your own hands, you don’t have to be a high-level carpenter or a jack of all trades, although it wouldn’t hurt. All stages of construction are shown here.
- Work begins with markings. To ensure proper drainage and prevent grass and weed growth, remove the turf and about 4 inches of soil.
- Then fill the prepared area with gravel.
- Then install the spot foundation forms and fill them halfway with concrete.
- Use a level to make sure the tops of each shape are at the same height.
- In this case, the relief is slightly inclined, so the height of the molds for each hole is different.
- In the second photo you see a device, a laser level, which was used for marking.
I won’t describe all the details further, everything is shown quite well in the photographs, and detailed instructions can be read on the website, link under the gallery.
Photo source www.scout.com/home/build/story/1386859-build-a-hip-roof-gazebo
How to secure the rafters from above?
We cut out four pairs of wooden rafters, the length is two and a half meters. They need to be combined with each other as in the picture above. The height from zero to the top point will be a meter.
Don't connect everything at once, start with two, then add one at a time. The wood needs to be impregnated with an antiseptic and cut off at the bottom corner, that is, on the ground. After all, working with the rafters at the top will be inconvenient.
We place an auxiliary board in the center, and nail a block onto it, again in the center. The length of the latter is no less than 85 centimeters. Now the entire structure needs to be raised to the top of the gazebo.
The top rests on a block - this is the rule. We center the entire structure, using a plumb line we check the verticality and distances from the center to the stop of each leg of the frame. We attach the rafters to each plug, remove the board and trim, and install the sheathing.
And remember that we just gave a standard example of a do-it-yourself metal gazebo. You can choose each material, dimensions and much more yourself.
We recommend that you refer to this article, this will help you do the job correctly. But you shouldn’t make it your drawing. Consider your own desires, the characteristics of the site, the climate of your area, soil strength and financial capabilities.
Construction of a gazebo
The first step in building a gazebo from a profile with your own hands is the construction of a foundation - usually a pile or columnar one. To do this, they first dig holes for the support posts, install the structures themselves, fill the recesses with stones or crushed bricks and fill them with cement-sand mortar.
The next stage is the construction of a metal frame, which is attached to the supports and placed in such a way as not to interfere with the passage into the gazebo - that is, above the level of human height in the area of the door. This point should be taken into account at the stage of drawing up the drawing.
When creating the cladding of a structure, polymer materials are most often used. And the roof is installed on a metal profile sheathing. The simplest design for making a gazebo yourself is the classic gable roof, which can be easily installed on any frame.
The work is completed by arranging the gazebo. After this, the stylish and durable design will become an excellent decoration for your garden or country landscape. And it will provide an additional place where you can relax, chat and even cook food, if the design provides for combination with a barbecue area or installation of a stove directly inside the gazebo.
Gazebo painting and floor work
Painting of the metal parts of the gazebo must be carried out before covering the roof. It takes place in several stages:
- Cleaning weld seams, removing rust.
Cleaning of welding seams before painting work is carried out using a grinder
- Coating of metal parts of the building with anti-corrosion material.
- After it dries (usually this takes no more than two hours), the gazebo is painted.
If the gazebo is planned to have a floor covering made of boards, then the design should include a bottom trim made from a corner around the perimeter of the structure. In addition, transverse corners are welded in the direction from the front to the rear edge of the gazebo at intervals of 50 cm. The floor covering is laid on this structure.
A wooden floor in a gazebo can be built without additional strapping with corners - the boards are attached to the floor with nails, and to the metal part of the structure with self-tapping screws