Perhaps one of the most useful and ancient tools is a knife. It is difficult to find an area of activity where one could do without it. Knives are needed by both hunters to fight animals and librarians to cut paper. There are a huge number of these weapons, which differ in size, shape, sharpening and other characteristics. Handmade knives have always been valued. You can easily make them yourself.
Advantages of handmade knives
Homemade knives, subject to all technological recommendations, are not inferior to factory models in terms of quality and have a number of their own advantages, such as:
- the ability to independently determine the type of product;
- individual choice of knife shape;
- non-standard design of the handle, relying only on the individual preferences of the master and the general design of the knives;
- the ability to use materials available at hand;
- satisfying the creative impulse of the master.
The key point in making unusual handmade knives is determining the category of purpose and design of the masterpiece being created. The classification of knives is very arbitrary, but the following main types of products can be distinguished:
- products for household needs;
- combat (including hunting and fishing knives);
- sports knives;
- decorative knives;
- survival knives.
The design of the knives involves the division into knives with a retractable blade and a fixed blade.
Crafting tools
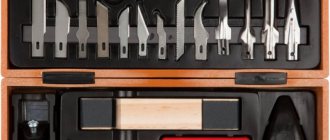
Having decided on the type and design of the product and having prepared its sketches, immediately before work the craftsman needs to prepare the following tools and equipment for making knives:
- Vise with soft lips (for clamping and holding the knife in a given position).
- Grinding equipment (grinder or stationary machine).
- Drilling equipment (machine or hand drill) with drills of various diameters.
- Tools for sawing and processing metal (file, metal scissors, jigsaw, hacksaw).
- Hammer.
- Rasp.
- Equipment for heat treatment of the knife blade (electric oven, gas burner and fire brick, etc.).
- Personal protective equipment (respirator, goggles or mask).
Handmade knife drawing
Drawing of a hunting knife
Machete drawing
To protect the knife from scratches and to prevent damage to things by the blade during transportation, you can make a homemade knife sheath. For this you will need:
- a piece of thick cotton fabric;
- a piece of hard natural well-dressed leather;
- durable sewing needle with high-quality nylon thread;
- a thin awl or drill with a thin drill bit;
- pliers;
- durable steel wire;
- calipers;
- working knife with a durable, sharp blade;
- abrasive sandpaper for processing leather cuts.
Collectible models
A distinctive feature of such products is the unique work of the master. The knives are made of high-quality steel, and they also differ in artistic design. The cost of such knives is, of course, high. There are different types of collectibles:
- Gift. The blade is suitable as a gift for interior decoration. The cost of products depends on the material and design of the blade.
- National. They differ in the way they are worn, material and decoration. The shape of the blade reflects the culture of the people.
- Custom. The shape of the blade can be any. Products are limited to one-piece pieces. The cost of such blades can be exorbitant.
Selecting materials for making knives yourself
The product manufacturing process dictates the preparation of the following basic materials:
- Durable steel blank for the blade.
- The material from which the handle will be made (wood, polymer, plastic, horn or bone blank, etc.)
- Sandpaper of varying roughness.
- Steel rivets or any wire from which you can make homemade rivets to secure the knife handle.
- Varnish for finishing the finished handle.
Step-by-step instructions for making a handmade knife
After all the tools and materials have been prepared, you can begin the actual work of making a handmade knife. The work process involves dynamics, therefore, to produce a knife with high quality characteristics, the master should adhere to the following work plan:
- Annealing of a steel billet.
The high initial hardness of the steel workpiece may not allow the future knife blade to be processed quickly and without loss. To reduce the hardness of a steel billet, they resort to a heat treatment operation such as annealing. The essence of annealing is to heat the workpiece to a temperature of 600-700 ºС, hold it at this temperature for several hours and then slowly cool it in a furnace.
- Preliminary mechanical processing of steel blanks.
After the hardness of the workpiece has been reduced, you can begin its primary machining. To do this, using a cardboard sample cut out based on the prepared sketches, the necessary boundaries are marked on a steel blank with a scriber and then the knife is given the required shape with a grinder. The descents should be carried out slowly, gradually, with obligatory cooling in the water after each pass. Then the workpiece must be thoroughly cleaned from nicks and irregularities, which can play a negative role in the hardening process.
- Hardening of a steel billet.
Hardening a workpiece is a responsible job, because both the quality of the product and its service life will depend on it in the future. By hardening the steel base of the knife increases its hardness and improves its mechanical properties, which are responsible for the durability and service quality of the product. The hardening process can take place either in a factory electric furnace or be carried out using a gas burner, blowtorch, forge and other auxiliary devices that allow the product to be heated to temperatures of about 900 ºC. The heating temperature and holding time are individual for each type of metal, the values of which can be found in special thematic reference books on the heat treatment of metals. The heating temperature can be determined by the color of the metal.
Heated metal colors
After the metal has been heated to the appropriate temperature and maintained for the required time, it must be cooled in water or machine oil. To carry out cooling, the workpiece must be grabbed with long tongs and dipped into a bath of prepared liquid.
Please be aware that oil on the surface may ignite!
If water is chosen as the cooling medium, then in order to avoid the appearance of hardening cracks, several tablespoons of table salt must first be dissolved in a container with water.
Various options for homemade knives
Uneven heating of the product or its cooling can lead to steel defects such as warping. To prevent it, the steel workpiece should be cooled by lowering its blade with the cutting side strictly vertically down.
- Release of the workpiece.
To impart final mechanical properties to the workpiece, after hardening the workpiece should be subjected to a tempering procedure. To do this, the workpiece is again heated to a temperature range of 200-300 ºС, kept for a certain time and cooled in air to room temperature. An important point in the process of designing a pen is its future design. If you plan to apply a design to the surface of the handle, then it is imperative to carry out the etching procedure. After this procedure, you can begin assembling the knife.
- Making a knife handle.
Preparing the handle of a knife is no less important, because the shape of the handle will completely depend on the accuracy of the actions performed. The types of handles are very diverse, and you should choose the type of handle based on the type of purpose of the finished product. On the material chosen for the handle (for example, wood), you need to trace the borders of the handle using a simple pencil according to a cardboard sketch. Then give the handle the appropriate shape using a sharpening machine, a file and sandpaper.
- Preparing holes for rivets.
Rivets are the elements that will secure the handle to the steel base of the knife. It is necessary to drill 3 holes in the steel blank and in the handle of the knife with a drill at the same distance from each other along the diameter of the future rivets.
- Final assembly of the finished knife.
Assembling a homemade knife involves pulling together all the parts of the knife into a single product. To facilitate the assembly process, you can first glue all the parts together and leave them in a vice for the glue to set for a while. Then insert rivets into the holes; a good solution would be to insert not a rivet, but a thin hollow tube identical in diameter into the outer hole on the knife handle. Subsequently, you can insert a cord into this hole, and use it to secure the knife to your belt or backpack. The final processing of the knife handle consists of polishing it with polishing paper and processing it with felt.
Example of a knife with a hole in the handle
Financial calculations
Start-up capital
| Type of expenses | Amount, rubles |
| Paperwork | 1 000 |
| Rent | 30 000 |
| Equipment | 82 000 |
| Materials for production (blanks, handles) | 150 000 |
| 30 000 | |
| Total | 293 000 |
Monthly expenses
| Type of expenses | Amount, rubles |
| Rent | 30 000 |
| Workers' salaries | 60 000 |
| Taxes | 5 000 |
| Communal payments | 5 000 |
| Total | 100 000 |
How much can you earn?
In a month, the company can produce up to 100 pieces of products. The average cost of one knife ranges from 1,500 to 2,500 rubles. At the same time, its cost will not exceed 800-900 rubles. Consequently, from one unit of goods you can earn up to 600 - 1,500 rubles (net profit about 80,000 rubles).
Payback period
The profitability of such production will actually be high (about 45%), and the return on the initial investment will not exceed 4-5 months.
The process of creating a handmade sheath
A handmade sheath is a decorative element, the creation process of which is simple, and the result is surprisingly practical. The knife blade must be wrapped in a piece of cotton fabric and covered with paraffin. A piece of leather, previously well soaked in water, must be placed so that the two opposite ends of the piece of leather close on the sharpened side of the blade. Use clamps (any kind will do, even stationery ones) to fix the position of the leather case clearly along the contour of the blade. The product must dry well.
Homemade leather scabbard
After the leather blank has completely dried, you need to remove the clips and, following the contour that appears, stitch the future sheath. To do this, using an awl or a drill with a small drill diameter, it is necessary to make many holes at the same distance from each other, through which a needle with a strong thread is sequentially passed. Having completed the sewing part of creating a handmade sheath, you need to trim off the excess leather using a sharp knife. Treat the edges of the sheath with abrasive sandpaper. If necessary, determine the location of the hanger for the sheath, cut it out of leather and secure it to the sheath with glue. To add a decorative shine, the sheath can be treated with shoe polish to match the tone of the leather from which it is made.
Powder steel
Powder metal component technology is applied by Zwilling J. A. Henckels. Using SCT technology, different metal parts of the knife are made from steel, which has optimal characteristics for a given element. The necessary components of the workpiece are stamped from rolled steel. The knife neck is created using powder metallurgy - metal powder is pressed under high pressure and sintered in a vacuum at a temperature of 1300 degrees Celsius. The shank is attached to the neck using plasma welding, and the blade is fixed to the neck using arc welding. With this technology, not only the quality of the steel, but also the shape of individual parts is maintained more accurately. Stress and corrosion resistance has been tested at the Stanford Research Institute of California and SCT has been shown to be superior to traditional methods.
Powdered steels have the maximum number of good properties other than price. Powder metallurgy is a very expensive process for kitchen knives. .
Features of sharpening the finished product
Sharpening the blade will be correct only if the angle of the blade to the block is chosen correctly. The main principle for choosing a sharpening angle is that the smaller the sharpening angle, the sharper the blade, and the larger the sharpening angle, the longer its sharpness. The universal angle for sharpening is an angle of 20º, but if particularly desired, the master can rely on the following generally accepted values:
- an angle of 30-35º is selected for hunting and folding knives;
- angle 40-45º - for knives that require edge sharpness and increased resistance to dullness;
- 25-30º - angle for household knives;
- 25-40º - selected for sharpening tactical knives.
Sharpening a handmade knife
Sharpening a knife should be accompanied by smooth movements. When sharpening the curve of the blade, you need to slightly lift the handle of the knife, which will create the same sharpening angle around the perimeter of the cutting edge. The direction of the blade should be such that the direction of movement is always strictly perpendicular to the cutting edge.
Ceramics
Perhaps over time, steel for cutting tools will be gradually replaced by special ceramic alloys based on zirconium dioxide. Such ceramics have a hardness close to diamond. It comes in a striking black or white color. This ceramic can be painted in blue, pink, green... Knives made from this inert material do not lose their appearance even with complete lack of care. Already today, in the mass production of knives, composite metal-ceramic compounds are used, which avoid some of the disadvantages of metal, but increase its advantages.
Today, the problem with zirconium ceramics remains that it is not possible to rid it of excessive fragility. Such knives should absolutely not be dropped.
Making a hunting knife at home
The process of making a handmade hunting knife is no different from the step-by-step instructions given above and the main idea is to accurately adhere to the dimensions according to the prepared sketches.
Hunting knife
A distinctive feature of a hunting knife is its configuration: the center of gravity of the blade is shifted to the handle and the blade is narrower in comparison with it. The handle at the base has a protective limiter, which allows you to protect the hunter’s hand during a strike. The material of the handle should be chosen in such a way as to prevent the hand from slipping from it. The average length of the blade is usually 12-15 cm with a width of 25-30 mm.
Any craftsman, inspired by a photo he liked on the Internet, or an unusual product spotted from a friend or store, can easily bring all his ideas to life, all you need to do is have a minimum set of necessary tools and the desire and result will not be long in coming!