Batteries are used in many household appliances and tools. Sometimes, it is necessary to replace one or more elements. They are connected into a block of a certain voltage, and the poles are welded together with a metal strip using spot welding.
The soldering method is not suitable here, since this connection method causes strong heating of the internal part of the battery, which leads to its failure. Therefore, if you need to repair lithium-ion batteries yourself, you need to purchase a spot welding machine (spotter) or make it yourself.
The simplest way
The easiest way is to weld the batteries with the battery itself. To do this you will need:
any car battery, suitable for a drill or screwdriver;- two soldering iron tips or a piece of thick single-core copper wire;
- relay 500-1000 A;
- capacitor;
- variable resistor;
- stranded copper wire with a cross section of 30-40 mm2;
- switch.
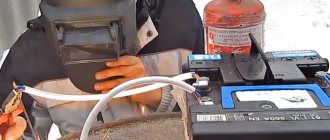
In the field, to weld a nickel plate to a battery, all you need is a battery, charging wires, a piece of solid wire and electrical tape.
Two electrodes are made from the wire. Their ends are cleaned, leveled and secured with electrical tape. There should be a distance of 2-3 mm between the ends of the wires, the ends are in the same plane.
The other ends of the monolithic wire are hooked using charging cable clamps. The pre-charging cable is connected to the terminals of the working battery. Polarity doesn't matter.
Spot welding is ready. The nickel strip is installed on the lithium battery. The ends of the electrodes, which are energized, are pressed to the tape.
A short circuit will occur and the metal at the point of contact will melt. The electrodes must be removed quickly to avoid burning the nickel plate.
Nickel tapes for welding batteries
February 18, 2019
Buy
Nickel welding tape is intended for the assembly of high-power batteries or individual cells by resistance welding. The choice of tape depends on the operating conditions of the battery assembly. If it will be used outdoors, in conditions of high humidity, then it is better to choose a pure nickel tape. Nickel is a unique material that combines contract properties such as ductility, strength and toughness. Moreover, the material is high-temperature and retains its properties when heated to 960 degrees.
Nickel has the following characteristics: - resistance to oxidation - resistance to alkalis and acids - high ductility with simultaneous high strength, excellent malleability
Tapes NS-25.5/1 and NS-8/1 are 99.96% nickel, have the same thickness of 0.15mm and differ in width. The purity of nickel is important to avoid the so-called. "water sickness" If during the production of nickel there remains a high oxygen content (more than 0.005%), then when the surface is welded, oxygen binds with hydrogen and water is formed. In this case, unwanted swelling of the welded joint occurs.
The 8mm wide nickel tape is designed for welding small 18650 lithium-ion batteries, while the 25.5mm wide NS-25.5/1 tape has intermediate holes and is designed for larger batteries that are more commonly used in electric vehicles. Using this tape, it is convenient to weld four batteries at once, using only one piece of tape.
In addition, the wide tape fits the battery holders, so it can be used to weld batteries already installed in these holders.
The only negative factor in using nickel tape may be its softness, which reduces the strength of the structure. To eliminate this drawback, nickel tape is often replaced with nickel steel tape (the steel content in it is up to 15%), however, in addition to the risk of corrosion, the use of this tape also reduces current conductivity.
It is necessary to correctly select the width and thickness of the nickel tape depending on the operating current of the battery assembly, because There is an exact relationship between the thickness, width of the tape and current strength.
| Width (mm) | Thickness (mm) | Current (Ampere) |
| 5 | 0,127 | 6 |
| 5 | 0,15 | 8 |
| 5 | 0,15 | 7 |
| 6 | 0,2 | 11 |
| 8 | 0,2 | 15 |
| 10 | 0,2 | 18 |
Return to news list
At home
For convenience and to improve the quality of welding at home, additional elements are used.
The stranded power wire is connected to a working battery using clamps, and the other ends are connected to a normally open relay contact and to a soldering iron tip.
The second contact of the relay is connected to the second tip. The result is such a circuit that when the relay contacts are closed, the voltage of the working battery will be present at the ends of the tips (electrodes).
A large capacitor, a resistor and a switch are used to control the relay. The capacitor and resistor are connected in series. One terminal of the capacitor is connected to the battery. The common terminal of the switch is connected to a resistor.
In the initial state, the switch should be in the position where it is shorted to the working battery. The capacitor will charge. The relay control winding is connected with one contact to the terminal of the container connected to the battery, and the second is connected to the free terminal of the switch.
When switching, the voltage from the capacitor is supplied to the control winding. While the capacitance is discharging, the relay is closed, and current can flow through it in the event of a short circuit.
To weld, it is enough to place a nickel connecting tape on the lithium battery cell, two tips on it, press it and press the switch . The relay contacts will close and voltage will appear on the electrodes.
Since they are shorted through the plate, a short circuit current will flow through it, which will cause the metal to melt between the points of contact of the electrodes. The welding has been completed.
Using a resistor, you can adjust the duration of the control pulse. Adjustment can be done experimentally. It is necessary when the voltage of the working battery and the thickness of the material being welded change.
Nickel tapes or what connects batteries in assemblies
Not long ago I saw a mention that there are not enough reviews of unusual products and today I have just such a review. Although I would not call the product itself unusual, I have not come across such reviews, which is why I decided to write. I have repeatedly received questions about how battery assemblies are cooked. It is clear that this is done with a special tape, but today I will try to tell you what they are, how they differ and which one is better to use. First, a quick disclaimer regarding the price listed in the title. Tape is most often sold either by weight or by meter. In this case, lots weighing 1 kg were purchased, the price of such a lot is about 52-53 dollars, regardless of the width and thickness, with the exception of wide tape, its cost per 1 kg is higher and I will also talk about it today.
As far as I know, there are two material options for bands, Nickel and nickel-plated steel. The second option, for obvious reasons, is somewhat cheaper, but has its drawbacks: 1. The resistance is slightly higher. 2. Susceptibility to corrosion.
If there is not much difference regarding resistance, then the material may be critical. When preparing battery assemblies for electric scooters, bicycles and other similar equipment (where a lot of tape goes), you should take into account the operating features. The fact is that nickel itself is chemically inactive and therefore not susceptible to corrosion. The steel strip is also coated with nickel for the same purposes, but the ends of the strip and especially the welding points remain. And if in a laptop battery (for example) this is not important, then in some Segway the battery is used in conditions of high humidity and sooner or later the contact point may simply rust. But in addition, do not forget that if nickel usually comes in its pure form, then steel is an alloy and no one knows what was mixed there, I think many have heard about the secret recipes for an alloy like “foil with cardboard”
Delivery and packaging. Five points here, not only did the seller pack everything quite well, but he also sent it using DHL. It was ordered in two batches, 2 kg in each parcel. The only thing I can complain about a little is that he didn’t send it very quickly, but in any case it arrived after a very short time. I think that the seller simply collects orders for tape of different widths, then gives a large order for cutting and sends it to customers.
The tape was tightly wrapped in polyethylene, then wrapped several times in bubble wrap and tightly inserted into a cardboard box.
The tape is available in several thicknesses/widths: 0.1x5mm
0.1x6mm 0.1x8mm 0.1x10mm 0.15x5mm
0.15x6mm
0.15x8mm 0.15x10mm 0.2x5mm 0.2x6mm
0.2x8mm
0.2x10mm
0.15x7x27mm
Above, I highlighted the options shown in today's review.
The material is declared as Nickel 99.96%, I will try to check this a little later, but for now a little general information about the product. As I already wrote, there were two orders, the first was for me, the second for a friend. I personally didn’t need the tape itself and the order was divided into two parts, partly because of the price and because upon receipt I checked the quality of the goods and only then ordered a second batch.
I'll start with tape 0.2x8mm and 0.15x7x27mm
Each coil is wound on a plastic insert, the diameter of the coils is 165mm for narrow and 137mm for wide.
It is wound very tightly, in addition to the general packaging, each one is also individually wrapped.
The weight in my opinion is fair, each reel weighs a little more than a kilogram, i.e. It is not the total weight of the coil that is taken into account, but the weight of the material.
Tape 0.2x8. The width/thickness corresponds to the declared one, taking into account the error of the caliper.
But the second tape is much more interesting; in appearance it resembles photographic film.
This tape is intended for more convenient connection of large assemblies, especially relevant in electric vehicles. For example, four batteries can be welded in one piece, and this will be easier and more reliable. Unfortunately, this is compensated for by almost one and a half times the cost of the tape itself.
Measured dimensions of the tape.
Thickness measurements were taken with the narrow part of the jaws of a caliper.
Drawing from the seller. I got slightly different dimensions, especially the width of the inner cross section. According to calculations there should be 6mm (20.2-14.2=6), for some reason it turned out to be 7.22.
Let's move on to the tests. First I tried soldering. The result is simply excellent. I soldered using only the flux of the solder itself, the soldering turned out beautifully, and it was very easy to solder, I just took the solder, touched it with a soldering iron and got the result as in the photo.
But you can’t really check anything by soldering; nickel-plated steel will most likely be soldered in exactly the same way.
Unfortunately, I am not a chemist (I had a C in chemistry, very similar to a D), who, when using chemicals, would give an exact answer in a minute or two about what it is, so I will have to check in several other ways.
Method number 1. First, cut off a piece of approximately 110-120 cm from each tape.
Then, with a marker, we mark a meter of length on each piece so that approximately the same “tails” remain at the ends.
We connect an adjustable power supply to the ends of the tape. In general, you can simply connect the load through the tape, you will just need to know what current flows in the circuit and you will most likely also need an ammeter; with an adjustable power supply it is simply more convenient. We connect the tester probes to the previously marked points and apply current.
First I checked at a current of 1 Ampere, then at a current of 5 Amperes. As a result, I got a certain voltage drop on the tape, in this case it is 54.95 mV at a current of 1 Ampere. At a current of 5 Amps, the tape begins to heat up and the voltage begins to rise. In general, the lower the current, the better, but then you need a voltmeter with the ability to measure very small voltages, or you need a longer tape. It turns out that the resistance of a meter piece of tape is almost 55 mOhm. If you use a different current value, simply divide the measured voltage by the current. For example, we got 123mV at a current of 0.45 Ampere, 0.123/0.45=0.273 Ohm or 273 mOhm.
I also accurately measured the resistance of the second piece, albeit for slightly different purposes. I got 40.9 mOhm respectively.
Rather, to double-check, I connect the meter that I talked about not long ago and we get almost the same values, taking into account the error of both the first test and the meter itself - 53.7 and 40.4 mOhm.
Now let’s reduce the measured resistance to a cross section of 1 mm2. The narrow tape had a thickness of 0.2 mm and a width of 8 mm, which gives 1.6 mm square (0.2x8 = 1.6). We multiply the resistance of 54-55 mOhm by 1.6, we get 86.4-88 mOhm. We look at the plate and see that nickel has a resistance of 87 mOhm per 1 m with a cross section of 1 mm sq., which agrees with the measurements shown above. By the way, about the steel I talked about above. The table shows that a resistance range is indicated for it, since it is an alloy and, accordingly, the resistance depends on what is mixed there.
Above, I simultaneously measured the resistance of a wide tape, but I did it for a slightly different purpose, just to find out its cross-section, since calculating it mathematically is not very convenient... The resistance of nickel is 87 mOhm, respectively, the tape with a measured 40.4 mOhm has a cross-section of about 2.17 mm2.
Method number 2. You can also check the material by its density. To do this, I cut pieces exactly 1 meter long from the previous “experimental subjects”, fortunately there were already marks on it that I put before measuring the resistance. Then I simply weighed it on my scales. The scales are certainly not ideal, but they are quite accurate for this kind of measurement.
Next, we recalculate the volume of the weighed strip. first we bring the tape to a width of 10mm, for this we multiply 100cm by a width of 0.79cm, we get 79cm with a tape width of 10mm. The thickness of the tape is 0.2mm, multiply by 79, we get 1.58cm or 15.8mm. This would be the thickness if we cut our 10mm wide tape into strips 10mm long and folded them together. This means that now the weight of 1 m of tape must be divided by 1.58 and we get the density reduced to 1 cubic cm. 13.93\1.58=8.816
According to the information found on the Internet, the density of nickel is 8.907, I got 8.816, which is slightly lower, but measurement errors play a big role here, especially in the thickness of the tape. In any case, this is clearly higher than the density of steel, which ranges from 7.7 to 7.9 g/cm³.
There is a third option for a relatively simple check, but I have not carried it out. The fact is that nickel is magnetic, but its Curie point is 358 degrees, and for steel it is more than 800. Accordingly, if you heat a strip of nickel to a temperature higher than 358 degrees, it will lose its magnetic properties.
I decided to end the experiments here, but my friend went even further. He was interested in how much pure metal he actually got. I didn’t try to stick out the plastic clip, but he still risked doing it out of sporting interest. In the end, it turned out that it weighs about 65 grams. The total weight of the reel was 1053 grams, the net weight is 988 grams. Less than stated, but in my opinion not critical.
Now the second pair of coils I ordered has arrived. Delivery was also via DHL express, which with a weight of 2 kg is not very cheap, as far as I understand. 0.1x5mm and 0.15x6mm tape were ordered, the tape spools weighed 1070 and 1005 grams respectively. According to the first there is a slight overweight, according to the second there is underweight, on average about 1 kg per reel. In order not to drag it all home and not have to do it all over again, I simply asked them to cut me a couple of 120cm pieces.
Next is the same test sequence with resistance measurement. I can note that at a current of 5 Amps, the resistance of the 0.1x5mm tape begins to increase significantly. Of course, with a current of 5 Amps, about 4 Watts are dissipated on it, and although the tape does not heat up to the touch, its resistance increases.
The calculated cross-section of the first tape is 0.5 mm, the second is 0.9 mm, while the measured resistance for the first is 153x0.5 = 77 mOhm, for the second 76.3x0.9 = 68.7 with a norm of 87, something strange.
We weigh it. Even a simple estimate shows that what we see is a little different from what we should. The fact is that the cross-section of the tapes is 0.5 and 0.9 mm, and for some reason the weight differs by a factor of two.
We measure and find that the first tape has normal dimensions, and the second, instead of a width of 6 mm, is as much as 7. The seller does not have such a tape in its assortment, after 6 comes immediately 8. In general, I was waiting all the time, what’s the catch, since everything doesn’t happen so good that the price suits me, the DHL delivery and the material are as stated. In the end, it turned out that one of the tapes had a wrong size. The problem is not very big, but if you calculate it by the length of the tape, it turns out that there is about 15% less of it.
What about the calculations? The density is approximately the same, but for some reason my resistance was even lower than stated and amounted to 76 mOhm for the first (0.1x5) and 73 for the second (0.15x7). In this case, I am at fault with the accuracy of the measurements, since the thickness is small and natural errors are possible; even a measurement error of 0.01 mm when measuring a thickness of 0.1 mm already gives a 10% error, which is quite a lot.
But I can say with confidence that this is not nickel-plated steel, since the density is greater than that of steel, the resistance is lower, and it does not spring.
The second part of the experiments was carried out at a friend’s place, where we decided to try welding these strips to batteries. For the experiment, five strips were taken, four from the review and plus a very small one, 0.1x4mm.
Also, a number of batteries took part in the experiment, some new, some used. Accordingly, strips 0.1 mm thick were welded for small batteries, and 0.15 and 0.2 mm thick for 18650.
Even at the preparation stage, a friend showed me a little “trick” that I didn’t even think about. The fact is that the wide tape is not only designed for welding several batteries at once, but its dimensions are also designed so that they fit the battery holders that I have already talked about and as a result the tape fits neatly into the intended grooves.
A short video of pull-out tests.
Welding was carried out using a machine with a controller from Yurok, which I helped assemble. Each tape had its own settings, which depended both on the thickness of the tape and on the type of batteries and the material of their contacts. As a result, the tape, 0.1 mm thick and 4 mm wide, was welded so that it could barely be torn off.
A similar picture was with the 0.1x5mm tape, which was purchased on Ali.
With larger batteries and thicker tapes the result was a little worse; the entire tape ended up being torn off. but the friend explained why this happened. The fact is that for normal welding you need not only to have some ease of use of the device, but also a good clamping force, and since the device was just standing on the table and I was shooting a video along the way, it turned out a little worse than planned. Although in general the result has been achieved, for example in the photo there is a 6P1S assembly.
At first I thought that it was necessary to cook as shown on the left, but my friend said no, the result is better if you place the contacts so that the current flows along the line shown on the right.
Along the way, I decided to take a group photo of the devices used in the work. Each block is oriented to specific assemblies of batteries, power tools, radios and even electric shavers. Shown above is just a clamp for working with long assemblies. Moreover, outwardly identical pads also differ in internal diameter, because the batteries must be inserted with a slight interference, and sometimes also have a certain position relative to each other.
That's probably all. On my own behalf, I can say that in general terms the product fully corresponds to what was declared, delivery is fast, packaging is normal, the price is clearly lower than buying by the meter. The only thing that slightly worsened the overall impression was an error with the width of one of the tapes; instead of 6mm it was 7
The seller has another 0.5 kg tape and by meter, but the price is of course different.
As usual, I’ll be glad to ask any questions I can, I’ll tell you what I don’t know, I’ll ask a friend.
From a transformer
Spot welding for batteries can be done with your own hands from a transformer. It can be used to weld not only batteries, but also any thin metal products.
To weld batteries, a high-power transformer is not required; 300-500 W is sufficient. The main thing is to be able to rewind the secondary winding.
The primary winding should be 220V 50 Hz. As a winding wire for the secondary winding, you need to use an insulated copper wire of large diameter. It takes three to four turns.
The body of the spot welding machine can be made of plexiglass or plywood. Plexiglas is of course preferable. The base of the housing must be of such a size that it can accommodate a transformer with connecting wires, a button and a lever with electrodes .
The lever is mounted on an axis between aluminum corner posts, which in turn are secured to the base of the device with self-tapping screws. The length of the lever is made in such a way that the electrodes attached to it reach the working platform of the base of the device. The diameter of the electrodes should be 3-5 mm. Their ends are sharpened and the ends are leveled.
The secondary winding of the transformer is connected to the electrodes using a stranded copper wire with a cross-section not less than the cross-section of the electrodes. The length of the wires from the secondary winding to the working part should be minimal. It is better to weld the connections to reduce the circuit resistance or connect them through screw terminal blocks.
The operating button is installed on one of the terminals of the secondary winding. Springs are installed on the lever and button. They are needed for their rapid return to their original state.
To set a specific welding pulse duration, instead of a button, you can use a thyristor or a power relay controlled by an RC circuit. The resistor must be variable, and the capacitor must be large enough to allow the pulse duration to be varied in the range from tens to hundreds of milliseconds.
There are a large number of circuit implementations of spot welding for batteries. Much depends on the materials available. Circuits may change to increase the functionality of the device and improve its consumer properties, but the essence remains the same.
