Steel 45
Total information
| Substitute |
| Steel 40Х, Steel 50, Steel 50G2 |
| Type of delivery |
| Long products, including shaped steel: GOST 1050-74, GOST 2590-71, GOST 2591-71, GOST 2879-69, GOST 8509-86, GOST 8510-86, GOST 8239-72, GOST 8240-72, GOST 10702 -78. Calibrated rod GOST 1050-74, GOST 7414-75, GOST 8559-75, GOST 8560-78, GOST 10702-78. Thick sheet GOST 1577-81, GOST 19903-74. Thin sheet GOST 16523-70. Tape GOST 2284-79. Strip GOST 1577-81, GOST 103-76, GOST 82-70. Wire GOST 17305-71, GOST 5663-79. Forgings and forged blanks GOST 8479-70, GOST 1131-71. Pipes GOST 8732-78, GOST 8733-87, GOST 8734-75, GOST 8731-87, GOST 21729-78. |
| Purpose |
| Pinion shafts, crankshafts, camshafts, gears, spindles, bands, cylinders, cams and other normalized, surface-improved and heat-treated parts that require increased strength. |
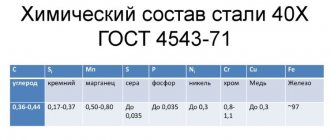
Chemical composition (according to GOST 1050-2013)
| Chemical element | % |
| Carbon (C) | 0.42-0.50 |
| Silicon (Si) | 0.17-0.37 |
| Copper (Cu), no more | 0.25 |
| Arsenic (As), no more | 0.08 |
| Manganese (Mn) | 0.50-0.80 |
| Nickel (Ni), no more | 0.25 |
| Phosphorus (P), no more | 0.035 |
| Chromium (Cr), no more | 0.25 |
| Sulfur (S), no more | 0.04 |
Mechanical properties
Mechanical properties at elevated temperatures
| test t, °C | σ0.2, MPa | σB, MPa | δ5, % | δ, % | ψ, % | KCU, J/m2 |
| Normalization | ||||||
| 200 | 340 | 690 | 10 | 36 | 64 | |
| 300 | 255 | 710 | 22 | 44 | 66 | |
| 400 | 225 | 560 | 21 | 65 | 55 | |
| 500 | 175 | 370 | 23 | 67 | 39 | |
| 600 | 78 | 215 | 33 | 90 | 59 | |
| Specimen with a diameter of 6 mm and a length of 30 mm, forged and normalized. Deformation speed 16 mm/min. Strain rate 0.009 1/s. | ||||||
| 700 | 140 | 170 | 43 | 96 | ||
| 800 | 64 | 110 | 58 | 98 | ||
| 900 | 54 | 76 | 62 | 100 | ||
| 1000 | 34 | 50 | 72 | 100 | ||
| 1100 | 22 | 34 | 81 | 100 | ||
| 1200 | 15 | 27 | 90 | 100 | ||
Mechanical properties of rolled products
| Heat treatment, delivery condition | Section, mm | σB, MPa | δ5, % | δ4, % | ψ, % |
| Hot-rolled, forged, calibrated and silver steel of the 2nd category after normalization | 25 | 600 | 16 | 40 | |
| Calibrated steel of the 5th category after hardening | 640 | 6 | 30 | ||
| Steel, calibrated and calibrated with a special finish after tempering or annealing | <590 | 40 | |||
| Normalized and hot rolled sheets | 80 | 590 | 18 | ||
| Normalized or hot rolled strips | 6-25 | 600 | 16 | 40 | |
| Hot rolled sheet | <2 | 550-690 | 14 | ||
| Hot rolled sheet | 2-3,9 | 550-690 | 15 | ||
| Cold rolled sheet | <2 | 550-690 | 15 | ||
| Cold rolled sheet | 2-3,9 | 550-690 | 16 |
Mechanical properties of forgings
| Section, mm | σ0.2, MPa | σB, MPa | δ5, % | ψ, % | HB |
| Normalization | |||||
| 100-300 | 245 | 470 | 19 | 42 | 143-179 |
| 300-500 | 245 | 470 | 17 | 35 | 143-179 |
| 500-800 | 245 | 470 | 15 | 30 | 143-179 |
| <100 | 275 | 530 | 20 | 44 | 156-197 |
| 100-300 | 275 | 530 | 17 | 34 | 156-197 |
| Hardening. Vacation | |||||
| 300-500 | 275 | 530 | 15 | 29 | 156-197 |
| Normalization. Hardening. Vacation. | |||||
| <100 | 315 | 570 | 17 | 39 | 167-207 |
| 100-300 | 315 | 570 | 14 | 34 | 167-207 |
| 300-500 | 315 | 570 | 12 | 29 | 167-207 |
| <100 | 345 | 590 | 18 | 59 | 174-217 |
| 100-300 | 345 | 590 | 17 | 54 | 174-217 |
| <100 | 395 | 620 | 17 | 59 | 187-229 |
Mechanical properties depending on tempering temperature
| holiday t, °С | σ0.2, MPa | σB, MPa | δ5, % | ψ, % | KCU, J/m2 | HB |
| Quenching 850 °C, water. Samples with a diameter of 15 mm | ||||||
| 450 | 830 | 980 | 10 | 40 | 59 | |
| 500 | 730 | 830 | 12 | 45 | 78 | |
| 550 | 640 | 780 | 16 | 50 | 98 | |
| 600 | 590 | 730 | 25 | 55 | 118 | |
| Quenching 840 °C, water. Workpiece diameter 60 mm | ||||||
| 400 | 520-590 | 730-840 | 12-14 | 46-50 | 50-70 | 202-234 |
| 500 | 470-520 | 680-770 | 14-16 | 52-58 | 60-90 | 185-210 |
| 600 | 410-440 | 610-680 | 18-20 | 61-64 | 90-120 | 168-190 |
Mechanical properties depending on the section
| Section, mm | σ0.2, MPa | σB, MPa | δ5, % | ψ, % | KCU, J/m2 |
| Quenching 850 °C, tempering 550 °C. Samples were cut from the center of the blanks. | |||||
| 15 | 640 | 780 | 16 | 50 | 98 |
| 30 | 540 | 730 | 15 | 45 | 78 |
| 75 | 440 | 690 | 14 | 40 | 59 |
| 100 | 440 | 690 | 13 | 40 | 49 |
Technological properties
| Forging temperature |
| Start 1250, end 700. Sections up to 400 mm are cooled in air. |
| Weldability |
| Difficult to weld. Welding methods: RDS and KTS. Heating and subsequent heat treatment are required. |
| Machinability |
| In the hot-rolled state at HB 170-179 and sB = 640 MPa Ku tv.all. = 1, Ku b.st. = 1. |
| Tendency to release ability |
| Not inclined. |
| Flock sensitivity |
| Insensitive. |
Critical point temperature
| Critical point | °C |
| Ac1 | 730 |
| Ac3 | 755 |
| Ar3 | 690 |
| Ar1 | 780 |
| Mn | 350 |
Impact strength
Impact strength, KCU, J/cm2
| Delivery condition, heat treatment | +20 | -20 | -40 | -60 |
| Rod with a diameter of 25 mm. Hot rolled condition. | 14-15 | 10-14 | 5-14 | 3-8 |
| Rod with a diameter of 25 mm. Annealing | 42-47 | 27-34 | 27-31 | 13 |
| Rod with a diameter of 25 mm. Normalization | 49-52 | 37-42 | 33-37 | 29 |
| Rod with a diameter of 25 mm. Hardening. Vacation | 110-123 | 72-88 | 36-95 | 31-63 |
| Rod with a diameter of 120 mm. Hot rolled condition | 42-47 | 24-26 | 15-33 | 12 |
| Rod with a diameter of 120 mm. Annealing | 47-52 | 32 | 17-33 | 9 |
| Rod with a diameter of 120 mm. Normalization | 76-80 | 45-55 | 49-56 | 47 |
| Rod with a diameter of 120 mm. Hardening. Vacation | 112-164 | 81 | 80 | 70 |
Endurance limit
| σ-1, MPa | τ-1, MPa | σB, MPa | σ0.2, MPa |
| 245 | 157 | 590 | 310 |
| 421 | 880 | 680 | |
| 231 | 520 | 270 | |
| 331 | 660 | 480 |
Hardenability
Hardness for hardenability strips HRCе (HRB).
| Distance from the end, mm / HRC e | |||||||||
| 1.5 | 3 | 4.5 | 6 | 7.5 | 9 | 12 | 16.5 | 24 | 30 |
| 50.5-59 | 41.5-57 | 29-54 | 25-42.5 | 23-36.5 | 22-33 | 20-31 | (92)-29 | (88)-26 | (86)-24 |
| Heat treatment | Quantity of martensite, % | Crit.dia. in water, mm | Crit.dia. in oil, mm |
| Hardening | 50 | 15-35 | 6-12 |
Physical properties
| Test temperature, °C | 20 | 100 | 200 | 300 | 400 | 500 | 600 | 700 | 800 | 900 |
| Modulus of normal elasticity, E, GPa | 200 | 201 | 193 | 190 | 172 | |||||
| Modulus of elasticity under torsional shear G, GPa | 78 | 69 | 59 | |||||||
| Density, ρn, kg/cm3 | 7826 | 7799 | 7769 | 7735 | 7698 | 7662 | 7625 | 7587 | 7595 | |
| Thermal conductivity coefficient W/(m °C) | 48 | 47 | 44 | 41 | 39 | 36 | 31 | 27 | 26 | |
| Test temperature, °C | 20- 100 | 20- 200 | 20- 300 | 20- 400 | 20- 500 | 20- 600 | 20- 700 | 20- 800 | 20- 900 | 20- 1000 |
| Linear expansion coefficient (α, 10-6 1/°С) | 11.9 | 12.7 | 13.4 | 14.1 | 14.6 | 14.9 | 15.2 | |||
| Specific heat capacity (s, J/(kg °C)) | 473 | 498 | 515 | 536 | 583 | 578 | 611 | 720 | 708 |
Foreign analogues of Steel 45
| USA | Germany | Japan | France | England | European Union | Italy | Belgium | Spain | China |
| — | DIN,WNr | JIS | AFNOR | B.S. | EN | UNI | NBN | UNE | G.B. |
| 1044 | 1,0503 | S45C | 1C45 | 060A47 | 1,0503 | 1C45 | C45-1 | C45 | 45 |
| 1045 | 1,1191 | S48C | 2C45 | 080M | 1,1191 | C43 | C45-2 | C45E | 45H |
| 1045H | 1,1193 | SWRCH45K | AF65 | 080M46 | 1,1192 | C45 | C46 | C45k | ML45 |
| G10420 | C45 | SWRCH48K | C40E | 1449-50CS | 2C45 | C45E | C48k | SM45 | |
| G10430 | C45E | C45 | 1449-50HS | C45 | C45R | F.114 | ZG310-570 | ||
| G10440 | C45R | C45E | 50HS | C45E | C46 | F.1140 | ZGD345-570 | ||
| G10450 | CF45 | C45RR | C45 | C45EC | F.1142 | ||||
| M1044 | Ck45 | CC45 | C45E | C46 | |||||
| Cm45 | XC42H1 | ||||||||
| Cq45 | XC42H1TS | ||||||||
| XC45 | |||||||||
| XC45H1 | |||||||||
| XC48 | |||||||||
| XC48H1 | |||||||||
| Sweden | Bulgaria | Hungary | Poland | Romania | Czech | Austria | Australia | Switzerland | South Korea |
| SS | BDS | MSZ | PN | STAS | CSN | ONORM | AS | SNV | KS |
| 1650 | 45 | A3 | 45 | OLC45 | 12050 | C45SW | 1045 | C45 | SM45C |
| 1672 | C45 | C45E | OLC45q | 12056 | HK1042 | Ck45 | SM48C | ||
| C45E | OLC45X | K1042 |
Legend
| Mechanical properties | |
| σB | temporary tensile strength (tensile strength), MPa |
| σ0.2 | conditional yield strength, MPa |
| σcom | compressive strength, MPa |
| σco0.2 | compressive yield strength, MPa |
| σ0.05 | elastic limit, MPa |
| σben | bending strength, MPa |
| σ-1 | endurance limit during bending test with a symmetrical loading cycle, MPa |
| δ5, δ4, δ10 | relative elongation after rupture, % |
| ψ | relative narrowing, % |
| ν | relative shift, % |
| ε | relative settlement at the appearance of the first crack, % |
| τK | ultimate torsional strength, maximum shear stress, MPa |
| τ-1 | endurance limit during torsion testing with a symmetrical loading cycle, MPa |
| KCU and KCV | impact strength, determined on a sample with concentrators of the U and V types, J/cm2 |
| HRСе and HRB | Rockwell hardness (scale C and B respectively) |
| HB | Brinell hardness |
| H.V. | Vickers hardness |
| HSD | Shore hardness |
| Physical properties | |
| E | normal modulus of elasticity, GPa |
| G | modulus of elasticity in torsional shear, GPa |
| ρn | density, kg/m3 |
| λ | thermal conductivity coefficient, W/(m∙°C) |
| ρ | electrical resistivity, Ohm∙m |
| α | linear thermal expansion coefficient, 10-61/°С |
| With | specific heat capacity, J/(kg∙°С) |
Share:
979
ACCEPTANCE RULES
3.1. Rolled products are accepted in batches consisting of steel of one heat, one size and one heat treatment mode (when manufactured in a heat-treated state).
By agreement between the manufacturer and the consumer, batches are formed from steel of the same grade of several heats of the same size.
Each batch is accompanied by a quality document in accordance with GOST 7566.
When deoxidizing agents other than silicon are used for semi-quenched steel, a corresponding indication is made in the quality document.
For rentals accepted with characteristics established by the consumer in accordance with paragraphs. 2.2 and 2.3, the quality document indicates the test results for the ordered indicators.
3.2. The rolled products are subjected to acceptance tests.
3.3. To check the quality, the following are selected from a batch of rolled products:
- for chemical analysis - samples in accordance with GOST 7565. The manufacturer periodically controls residual copper, nickel, chromium, arsenic and nitrogen, at least once a quarter. When producing steel, taking into account the manganese equivalent, control of residual copper, nickel and chromium is carried out at each heat;
- to control surface quality and dimensions - all rods, strips and coils;
- to control the macrostructure by fracture or etching, to test for impact bending, to determine the depth of the decarbonized layer - two rods, strips or coils;
- to test hardness - 2% of rods, strips or coils, but not less than 3 pieces;
- for tensile testing - one rod, strip or coil for control in a normalized state, two rods, two strips or two coils for control in a cold-worked, annealed, high-tempered or tempered condition;
- to determine hardenability - one rod, strip or coil from a ladle melt of steel of all grades that do not contain boron, and two rods, two strips or two coils from a ladle melt of steel grades containing boron;
- to determine the grain size - one rod, strip or coil from a melting ladle;
- for slump testing - three rods, strips or coils;
- To determine hardness after hardening, use two longitudinal samples from the melt.
(Changed edition, Amendment No. 1).
3.4. If unsatisfactory test results are obtained for at least one of the indicators, repeated tests are carried out in accordance with GOST 7566.
The results of repeated tests are applied to the entire batch.
RENTAL CHARACTERISTICS INSTALLED BY AGREEMENT OF THE CONSUMER WITH THE MANUFACTURER IN THE NTD
1. Rolled products with a normalized mass fraction of nitrogen in electric steel.
2. Rolled products with a lower hourly fraction of manganese, reduced against the norms of the table. 1 per manganese equivalent equal to:
BM = 0.3 (Cr%) + 0.5 (Ni%) + 0.7 (Ci%),
where Cr, Ni, Cu is the residual actual mass fraction of chromium, nickel, copper in steel, not exceeding the standards specified in Table 1.
3. Rolled products calibrated from steel grades 08, 55 and 60 in a cold-worked or heat-treated state with control of mechanical properties.
4. Rolled products with normalized impact strength on type I samples at a temperature of minus 40°C.
5. Rolled products with normalized impact strength on type II samples at a temperature of plus 20°C and sub-zero temperatures.
6. Rolled without control of relative contraction.
7. Rolled products calibrated and with a special surface finish with normalized hardness in a normalized and tempered state and hardened with a tempering state.
8. Long-rolled products with standardized hardness in a normalized state.
9. Rolled products with standardized hardness within specified limits.
10. Rolled products without hardness control.
11. Rolled products with a standardized austenite grain size.
12. Rolled products with standardized purity for non-metallic inclusions.
13. Rolled products with standardized purity based on hair fibers identified on the surface of finished parts by the magnetic method or etching.
14. Rental of small-tonnage lots.
APPENDIX 6
Recommended
Heat treatment modes for workpieces to control the mechanical properties given in Tables 3 and 4
Table 10
Recommended minimum shutter speeds:
- when normalizing or hardening - 30 minutes; when tempering 200°C - 2 hours;
- when tempering 600°C - 1 hour.
- The cooling medium during quenching is water.
APPENDIX 7
Recommended
Heat treatment modes for workpieces to control the mechanical properties given in Table 8
Table 11
APPENDIX 8
Mandatory
SAMPLE SELECTION SCHEME FOR DETERMINING HARDNESS AFTER HARDENING
h3 style=”text-align: right;”>APPENDIX 9
Recommended
Modes of thermal treatment of samples to determine hardness after hardening, given in table. 8a
Table 12
Notes:
- Holding time during hardening (after reaching the hardening temperature) 20 min.
- Oil temperature (65±10)°C.
APPENDICES 8, 9 (Introduced additionally, Amendment No. 1).
TRANSPORTATION AND STORAGE
5.1. Transportation and storage - in accordance with GOST 7566 with the following addition.
5.1.1. Products are transported by all types of transport in accordance with the rules for the transportation of goods in force for this type of transport. By rail, transportation is carried out depending on the weight and overall dimensions in covered or open cars. The weight of the cargo package should not exceed 10,000 kg for mechanized loading in open vehicles, and 1,250 kg in covered vehicles. Packaging, means and methods for forming packages - in accordance with GOST 7566.
When sending two or more packages, the dimensions of which make it possible to arrange a transport package with overall dimensions in accordance with GOST 24597, the packages must be formed into transport packages. Fastening means - according to GOST 21650.
(Changed edition, Amendment No. 1).
